Paper Bag Cast Iron Skillet Cleaner

We stopped buying paper towels years ago. Never really needed them.

And since we were eating mostly vegetarian meals, we rarely had the dilemma of what to do with a greasy cast iron skillet. Now that we eat bacon occasionally, because we’ve reintroduced a little locally-produced organic meat now and then, we have to contend with the leftover grease. We’ve used a few rags on the grease and just wash the rags, but that isn’t the best use for the rag.

And then, one day a week or so ago, I posted a dozen lunch-bag size bags to give away in my local Buy Nothing group. (I save these little bags whenever they somehow make their way into our house, and the kids use them when they go on school field trips.) A member immediately posted a comment explaining that he uses those thin lunch bags to sop up his bacon grease. It was an “aha” moment for me.

IMG_3974

Here’s what he wrote:

“If you have a new, or not-so-well-seasoned pan, a thicker bag will leave little micro fragments of paper. So generally, the smoother the pan and the finer quality of the bag, the better it works. Newspaper is completely unworkable because it’s such lo’grade.”

I decided to keep the bags, and now I have a small stash of little brown bags I can use to clean out my cast iron skillet when it gets a little too greasy. The thin bag is pretty darn absorbent.

IMG_3984

I throw in a little Celtic sea salt to scrub the bottom of the pan with the crumpled up bag, and the salt acts as a perfect scrubbing agent.

IMG_3986

No need to run soap and water over the well-seasoned skillet. And the pan is ready for its next job.

IMG_4001

The greasy bag goes into our next fire as fire-starter or we just toss it in our compost.

IMG_3996

Save those little bags for jobs like this!

20 Wine Cork Uses

25 Reuses For Natural Wine Corks. Photo © Liesl Clark

Wine corks have a natural mystique. There’s something attractive about those stoppers of cork once they’re released from a bottle of fine wine. And when you’ve accumulated a few, cork projects come to mind. One of the first DIY projects I made for my first home was a cork board out of a frame of recycled old painted wood found at the dump in Aspen, Colorado. It was such a thing of beauty, I made several of them, collecting corks from local restaurants, and I sold them to a shabby chic antique barn.

Before I start in with this list, I feel compelled to bring attention to the fact that cork is a renewable recyclable material. Recycling your cork through Recork or Cork Forest will keep your cork out of the landfill and result in cork flooring and other cool products made of cork like shoes. Each organization can point you to your nearest recycler or you can take corks to a bin at Whole Foods Markets since they have a partnership with Cork ReHarvest.

The cork forests of Portugal are one of the oldest forms of sustainable agroforestry in the world. They’ve been in production since the 13th century and harvesting of the cork does not require cutting down the tree. Buying wines that use natural instead of plastic corks helps sustain these forests and their biodiverse habitats that need continued protection. But how do you know which wines have natural corks? There’s now a web app for that!  Put out by Recork, I love this app called CorkWatch. I did a search for my favorite local winery, Eleven Winery, and found that all of their wines are corked with natural cork. Kendall-Jackson by contrast has a Reserve chardonnay in natural cork and their less expensive everyday chardonnay in plastic.

Although there’s risk of getting a wine with cork taint if you sample a natural cork wine, I still prefer purchasing a plastic-free wine. We know plastics leach BPA into liquids and there is good evidence showing that the plastic corks are not allowing wines to mature properly. Recork’s CorkWatch is helping me reduce my plastic footprint. Furthermore, Cork Forest Conservation Alliance has a method of identification on the bottles themselves which some wineries are using: If you see an acorn on the bottle it means the cork is natural.

If you have accumulated some plastic corks, apparently the industry says you can recycle them. Of course our recycler won’t take them. I couldn’t find any information whether Seattle takes them and Earth911 had zero results for a recycler in our region. Hmmm. I think I’ll stick with traditional cork.

Ok, so you want to do something cool with your saved natural corks rather than recycle them? Here are a few ideas.

1) Wine Cork Cork Board: It’s as simple as gluing the corks against particle board with a frame around it. I use wood glue.

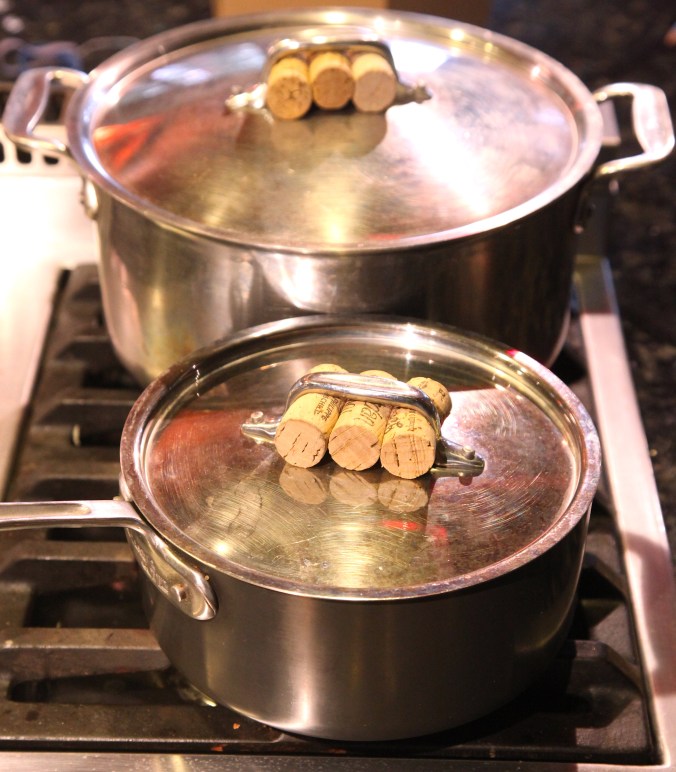
2) Wine Cork Pot Grippers: I squeeze them inside the handles of my cookware so I can pick up the pot tops when they’re hot without the need of a pot holder. Corks don’t conduct heat so these cork handles have become a staple in our kitchen.

cork potgrippers

3) Cork Stamps: If you’re good with an exacto knife, try carving some stamps.

4) Bulletin Bar: Line up your corks and glue them to a yardstick. This makes a yard-long bar for pinning things like your children’s art.

5) Cork Placemat: With 50 corks, a utility knife, and a hot glue gun you’ll have a cork placemat in no time (Okay, it’ll take some time.)

6) Cork Plant Labels: Cork looks natural in the garden labelled with the names of your veggies and herbs you’ve planted.

7) Furniture Leg & Floor Protector: Little cork disks make great furniture leg pads to protect your wood floors from scratches.

8) Wine Cork Key Chains: They might keep your keys afloat!

9) Cork Centerpiece: If you have a large glass bowl and a tea light you can make a pretty cork centerpiece.

10) Cork Trivet: Cork is a great material for making a trivet.

11) Cork Backsplash: If you have a wet bar, a cork backsplash would look great.

12) Cork Ornaments: Corks and beads make pretty Christmas ornaments.

13) Wine Cork Wine Coasters: They might be a bit wobbly for your wine glass but the do look cool.

14) Cork Wreath: Even wreaths can be made from wine corks. Next thing you know, you’ll be able to make a planter out of wine corks.

15) Wine Cork Bird House: This video shows you how to do it. Doesn’t look tough.

16) Wine Cork Place Card Holder: These aren’t difficult to make and they leave a great impression.

17) Wine Cork Curtain: Alas, I can’t find a decent tutorial, but imagine stringing corks and beads together to create a 60’s-ish curtain of cork-strings in your doorway.

18) Wine Cork Base Board: This Old House shows you how to make a base board runner made of wine corks.

19) Wine Cork Dog Leash: Really! And it’s not hard to make.

20) Plant Pot Moisture Absorbers: This one is 2 ideas in 1. You can place corks in the bottom of your large pots to reduce the amount of potting soil you need to put in while providing drainage. But you can also grind up some corks in your vitamix and put the bits in your soil to help hold moisture on hot days.

Easy DIY Snack Boxes

By Finn Clark

Aunt Kelly's Cool Carton Snack Boxes. Photo © Finn Clark

My Aunt Kelly gave me the idea to make snack box containers because she made us one as a gift for Christmas. Since we get local organic milk delivered in cartons, I started saving some so I could try to make my own, using Kelly’s as a template.

Aunt Kelly's Cool Snack Box, Opened Up. Photo © Finn Clark

Here’s how it’s done:

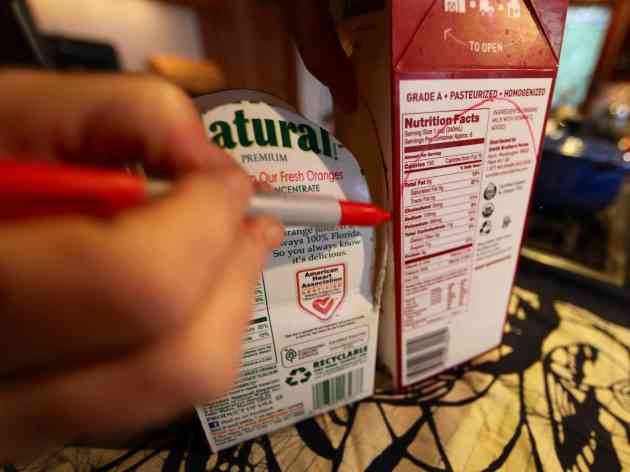
1) You’ll want your box to be square. Each carton is about 3.5 inches wide. Measure 3.5 inches up from the bottom of each corner and put a dot there with a Sharpie. This will be the point where you will cut down to from the top.

2) Then measure another 3.5 inches above that and put another dot there. This is the high point of your arch.

Drawing the high point of your arch. Photo © Finn Clark

3) We used Kelly’s as a template so just traced the arches, but I’ve given you the measurements above, so you can now draw your arch like we did.

Put a dot 3.5 inches up from the bottom. This is the point where you cut down to from the top. Photo © Finn Clark

4) Now that you have an arch drawn for each side of your carton, start cutting them out with scissors. Be sure to cut on the corners all the way down to your 3.5 inch mark (up from the bottom.)

Cutting down the corners from the top of the carton all the way down to the 3.5 inch mark. Photo © Finn Clark

5) Now cut out your arches.

Cutting the arches. Photo © Finn Clark

6) Fold your sides down at the 3.5 inch marks.

Folding the sides down.

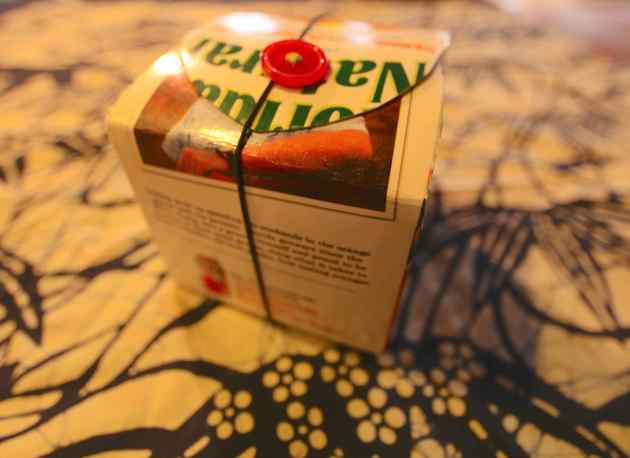
7) Sew on a nice large button. Just sew it on like you would normally sew a button. We chose our favorite side to sew the button onto, centered it, and measured about 1.5 inches down from the top.

Sew on a button. Photo © Finn Clark

8) Wrap a rubber band around the button once tightly and use it to cinch down your little snack box.

The right size rubber band adds the finishing touch. Photo © Finn Clark

You’re done! Enjoy your snack box. I use mine to hold apple slices, or home made crackers, nuts, whatever I can find in our pantry for a school snack. And it’s really easy to wash out!

Me and my DIY snack box.

Oh, and you can save the left-over cut carton and use it as a crown.

50 Things To Never Buy

50 Things You Never Have to Buy

A few months ago, I posted 10 items we no longer buy and have had a resounding response. Well, they were actually 20 items, since the original list of 10 came from Suburban Pioneers. I’ve decided to up the ante and compile a list of 50 items you could cross off your shopping list. I’ll start at 50 and work my way down to the first 10 listed by Suburban Pioneers.

Here goes:

50) Bottled Water: Let’s just not ever buy bottled water unless we absolutely have to. Ok? With a little forethought, there’s no need to buy water packaged in plastic.

Bottled Water for Sale

49) Air:  Who buys air? Apparently the air is so bad in Beijing, the Chinese do.

48) Note paper: Notes can be written down on any scrap paper. We write notes on the backside of letters with only one side printed, that come in the mail: envelopes, anything with room for a few paragraphs, a list, or some doodles.

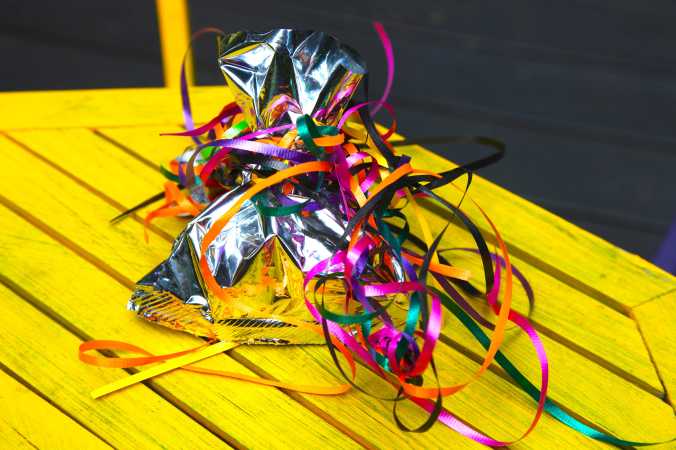
47) Wrapping Paper: There are so many wonderful alternatives to wrapping paper, including cloth, paper bags, your children’s artwork, and chip bags. We have a stash of reusable cloth bags that I make each year to use as gift bags. We save wrapping paper, too, and reuse it and reuse it and…
Chip Bag Gift Bag

Chip bag turned gift bag.

46) Fly Paper: We’ve started making our own sweet fly paper and it works most of the time..

Hanging out to dry. Photo © Liesl Clark

45) Pot Scrubbers: Crumpled up aluminum foil works. Really. Don’t laugh. It totally works.

44) Planters: Almost anything can be converted into a planter — you just have to use your imagination. If it can hold anything, it can be a planter. I’ve seen bras and toilets as planters, bike helmets, and baby shoes. Here are 5 planters that I photographed while in Nepal.

43) Trellises: As above, trellises are a garden feature that can include whimsical reuse. Here are 25 beautiful trellises you can make from your trash.

42) Chicken Bedding: We use cut grass, dried leaves, roadside grass and — our favorite — shredded paper.

Shredded Paper Bedding Photo © Liesl Clark

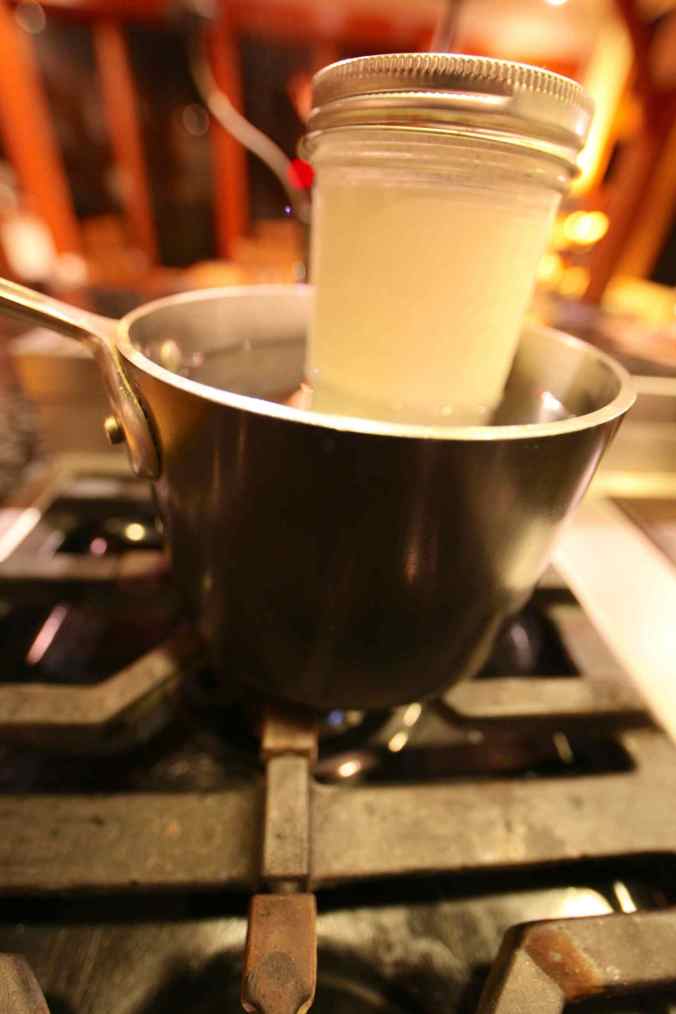
41) Yogurt Maker: Skip the yogurt maker and make your own in glass jars. It’s easy.
img_1601-photo-c2a9-liesl-clark

Off-The-Grid Yogurt Over The Pilot Light ©Liesl Clark

40) Window Washing Liquid: Vinegar and water works perfectly, along with newspaper instead of microfiber rags or paper towels.

No-Smudge Newspaper Method. Photo © Liesl Clark

39) Laundry Detergent: Try this DIY recipe and save some money.

38) Dish soap: Here’s a DIY Dish Soap recipe that’ll surprise you.

37) Salad Dressings: Remember simple balsamic and olive oil dressings? Just make your own delicious dressings in a jar. They get better with age and will give you no excuse for not eating your greens. Try our favorite recipe and you won’t be disappointed.

Adding Vinegar to Taste is Best. Photo © Liesl Clark

36) Fire Starters: These are so easy to make and they make excellent gifts.

35) Balloons: If you visit Balloons Blow on the Web, you’ll understand why you never want to buy them again. And as an alternative, try a pretty no-sew bunting.

34) Saran Wrap: We never use plastic food wrap any more, now that there’s the ultimate reusable alternative.

33) Gift Tags: We’ve been known, come Christmas, to repurpose last year’s cards as gift tags. You can do the same with all the pretty cards you receive throughout the year — turn them into tags to add to your gifts.

32) Padded Envelopes: We receive so many of these throughout the year, and reuse them of course, that we even give away in our local Buy Nothing group a box or 2 to other local businesses that can reuse them.

Don't Buy New! Reuse Your Padded Envelopes.

31) Christmas Ornaments: Ornaments are one of the sweetest items to make, as they’re treasured year after year. It’s a family tradition.

Click Through For Trash Backwards Trash to Treasure Ornament Roundup in our app!

30) All-Purpose Cleaner: Orange peels and vinegar will style you with an all-purpose cleaner you’ll love.

DIY All-Purpose Household Cleaner

29) Fruit Vinegar: Fruit scrap vinegar is one of the DIY recipes that’s really changed my buying habits. I make a better apple cider vinegar, red wine vinegar, and blackberry vinegar than I can buy in the store.

Vinegars Photo © Liesl Clark

28) Potatoes, Arugula: If you’re a gardener, you’ll understand this. When you inadvertently leave a potato or two in your garden, you end up with more next year. Same goes for arugula which always goes to seed in our garden. We never have to replant it. So we simply don’t buy it.

27) Garlic Crusher: In a pinch, use a wide knife to whack at your garlic cloves. Or, go caveman-style as I do and find a great stone for crushing.

Garlic Crushing Pestle.jpg Photo © Liesl Clark

26) Furniture/Floor protectors: So many items can be used to protect your floors from the scratching legs of your furniture. Flip flops are one among many.

25) Silica Gel: We get a lot of silica gel through products that are sent to my husband for his work and then give it away. Silica gel has so many uses! If you need it, just ask on your Buy Nothing group and you’ll likely find plenty.

Silica Gel, Photo by Liesl Clark

24) Beach Toys: So many beach toys are washed up on our beaches, obviously left behind by others, I’d love to see people simply stop buying them. There are great alternatives to buying these redundant plastic items.

Metal beach toys from the thrift shop, photo by Rebecca Rockefeller

23) String: We rarely buy string anymore, because we aren’t ashamed to say we salvage it from all sorts of items, like our chicken feed sacks.

22) Doorstops: Get creative with your doorstops and you’ll find joy in refraining to buy one.

Boot Doorstop © Rebecca Rockefeller

21) Easter Egg Dye: We discovered a great reuse for an Easter egg dye that we’ll definitely use again — magic markers! Whether they’re used up or not, soaking them in water for a while doesn’t hurt them one bit.

Use your dried up Non-Toxic Markers for Easter Egg Dye

20) Paper towels: Um, use cloth ones.

A few good rags in a basket = alternative to paper towels. Photo © Liesl Clark

19) Hair ties: Look in every parking lot and on any sidewalk and you’re bound to find a hair tie or 2. I mean it, they’re everywhere. I find them on trails in the woods, too.

Hair Ties and Hair Clips Recovered From the Parking Lots and Sidewalks of the World. Just wash them. Photo © LIesl Clark

18) Pens: As above, look in every parking lot and on the side walks. Pens are everywhere.

Pens Recovered on Puget Sound Beaches

17) Ribbons: Simply look on every shoreline and ribbon can be found there.

Ribbon Found on Our Beaches (including the spool), Photo © Liesl Clark

Ribbon Found on Our Beaches (including the spool), Photo © Liesl Clark

16) Styrofoam Packing Peanuts or bubble wrap:  (Just ask for it on your Buy Nothing group.)

15) Ziploc bags: Wash them.

Gaiam Bag Dryer, Photo © Liesl Clark

Gaiam Bag Dryer, Photo © Liesl Clark

14) Plastic children’s toys: Just ask any parent for them, they’ll gladly give you a box or 3.

13) Books: Of course, I do support buying books from your favorite author, but for many of the books you’ll need throughout the year, use your library!

12) Plastic straws: Plastic straws are a scourge upon the land and water. Use your lips, or find a glass, bamboo, or metal alternative.

plastic straws recovered from Point No Point and Schel-Chelb Estuary, WA, photo by Liesl Clark

11) Cigarette Lighters: Plastic cigarette lighters replace matches way too often. We still collect cool looking matchbooks from bars and restaurants.

Lighters Recovered from Puget Sound Beaches

Lighters Recovered from Puget Sound Beaches

(For these last 10, be sure to visit Suburban Pioneers for their full post)

10) Post-Its

9) Plastic Funnels

8) Microwavable Neck Pillow

7) Pet Fur Remover (Brush or Stone)

6) Travel Toiletry Containers

5) Rubber Bands

4) Reusable Grocery Bags

3) Pet Poo Bags

2) Cleaning Rags

1) Plastic Leftovers Containers

What can you add to our list?  Enjoy your frugal living!

DIY Matches, With Pasta

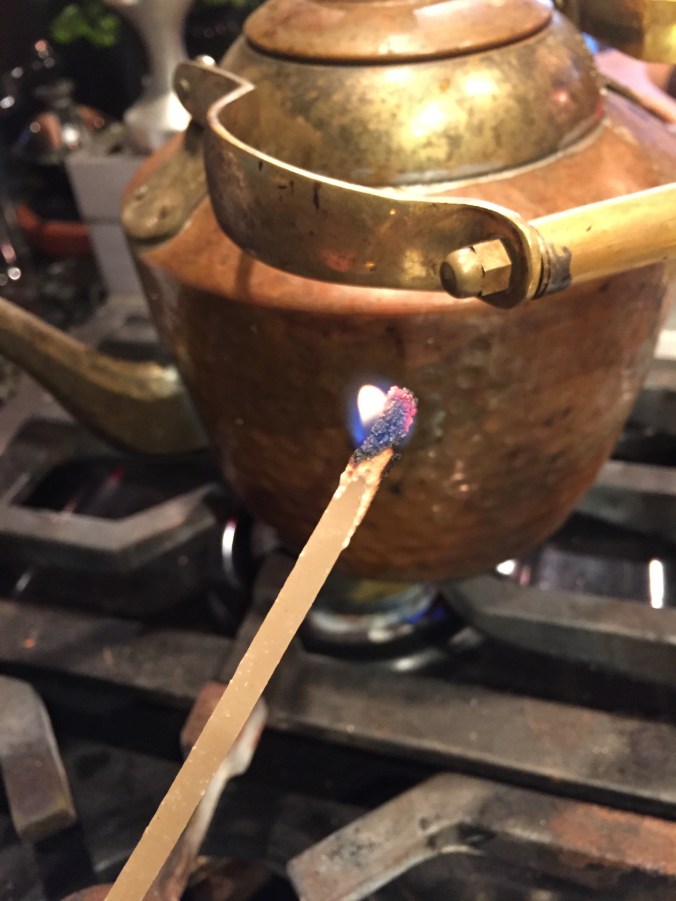
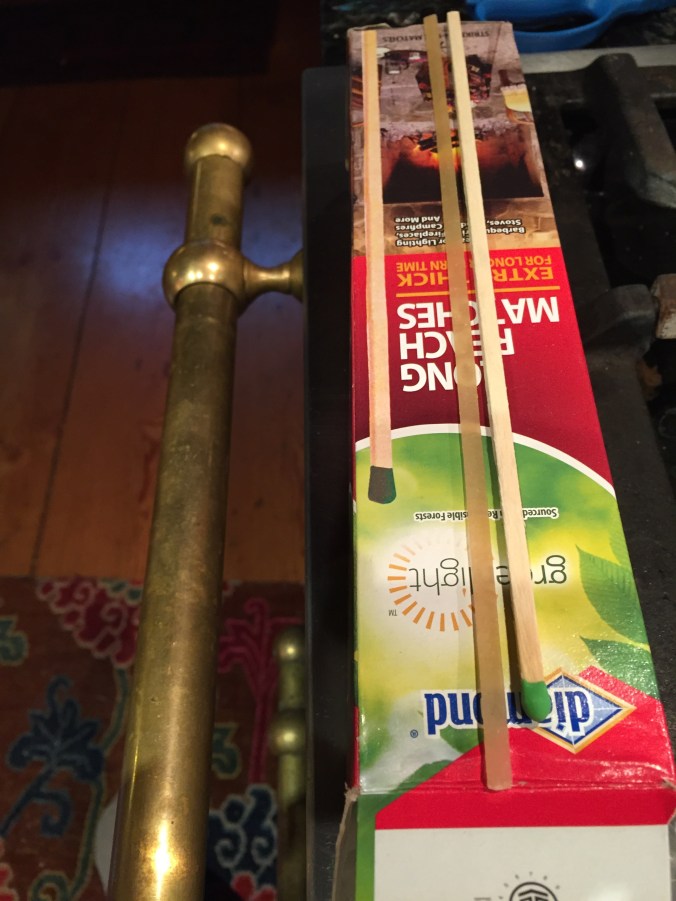
Here’s a simple hack I learned recently when we ran out of long matches which we often need for lighting our homemade candles, our pilot lights on our stove, or for the fire. The longer matches enable me to get deep inside some of our long candles that glow from the inside out. If you’re in a pinch and need one, but don’t have one on hand, just use a long piece of dried fettuccini pasta! I light my piece of pasta with our pilot light on the stove and we’re off to the races.

IMG_0564

You can also use a piece of spaghetti. They’re both long enough to help you get to those out-of-reach spaces that need to be lit!

IMG_0566

Easy peasy.

Stone Garlic “Press”

If you’re a lover of kitchen gizmos like garlic presses but just haven’t enjoyed the clean-up factor, get yourself a big stone to use in your kitchen. Skip that gizmo that’s a pain to clean up, is going to eventually break, doesn’t give you all the garlic from that clove since it gets stuck in weird places, and simply use a pestle-shaped stone instead.  I’ve used one in my kitchen for 10 years now and I couldn’t live without it. In Nepal, my friends use stones in their kitchens: One flat one and one cylindrical one for crushing, mashing, and grinding either garlic, chili peppers, whole grains or whole spices. I brought a stone home with me and would recommend you look for one, too. Maybe there’s a pestle-shaped on out in the woods, in your garden, or on the bank of the nearest river or stream. Think cave man, not Pottery Barn. One hit on the garlic and it’s peeled. Another smash and it’s crushed. Easy.

Olive Oil Tin Turned Celery Container

I love olive oil tins. They’re reminiscent of the Old World where reuse of large tins is commonplace. When I think of how I’ve seen olive oil tins reused, I imagine geraniums on a sunny step in colorful olive oil planters in Italy or hammered out oil tins used as roofing or wall siding in Nepal.

2 Lovely Olive Oil Tins, What To Do? Photo © Liesl Clark

I saved a couple of tins this year and other than using them as a flower vase, I couldn’t think if anything special to do with them. And then my son started having a celery craving. I hate storing celery (or anything) in plastic bags in the refrigerator, so we started storing it in large mason jars with a a couple inches of water for the stalks to stay fresh. And then the idea hit me: Turn an olive oil tin into a refrigerator celery container. It holds 2 large celery bunches perfectly!

First Use an Old-Style Can Opener. Photo © Liesl Clark

You’ll need a Swiss Army-style jack knife with a can opener to remove the oil tin lid. And if that doesn’t work, get out the tin snips. Make sure you bend and file down all rough and sharp edges.

Our new celery tin. Photo © Liesl Clark

Be sure to put a few inches of water in your tin to keep the celery crisp and fresh. Then, throw it in the fridge! Our celery lasts weeks in this custom-made tin crisper.

A Tin of Celery Works Beautifully in our Plastic-Free Fridge. Photo © Liesl Clark

Gone are the days of limp celery in the vegetable drawer.

Celery in a Tin in a Plastic-Free Fridge. Photo © Liesl Clark

DIY Dishwasher Rinse Aid

What the heck is rinse aid and why do we need it? If you have hard water, you might want to get rid of the those residue spots left over by the drops of water on your glassware. A rinse aid has a surfactant in it that prevents your water from leaving droplets on your dishes. But you should know that many rinse aids have toxic ingredients that I doubt you’d want to have on any surface that holds your food and drink. I’ll quote Treehugger here to outline the ingredients in question:


  • Sodium tripolyphosphate: High concern for general ecotoxicity.
  • Methylchloroisothiazolinone: High concern. The US EPA reports the LC50 value is very toxic to aquatic life.
  • Antiredeposition agent: Moderate concern for cancer, respiratory effects, kidney and urinary effects, general systemic/organ effects; and some concern for chronic aquatic toxicity, skin irritation/allergies/damage.
  • Troclosene sodium, dihydrate: Moderate concern for chronic aquatic toxicity, acute aquatic toxicity, respiratory effects; some concern for general systemic/organ effects, developmental/endocrine/reproductive effects, cancer, kidney and urinary effects, nervous system effects, digestive system effects, skin irritation/allergies/damage, damage to vision.
  • Oxybenzone: Moderate concern for developmental/endocrine/reproductive effects.


It turns out, you might not even need rinse aid. If your water isn’t hard, the little droplets left over on your dishes won’t leave a residue on them. Test your water, or better yet, go without rinse aid for some time and see what happens. But first, if you have residue on your dishes and glassware, cut the amount of detergent you use by half. Chances are you’re using too much.

If you have hard water, I sympathize. Ours is, too. Want to save some money, still have spot-free dishes, and do the right thing for the environment at the same time? Try this secret ingredient in that little rinse aid spot near where the detergent goes:

White vinegar.

Distilled white vinegar as a rinse agent in your dishwasher will render your glassware shiny and streak-free. Photo © Liesl Clark

That’s all you need. Replace your rinse agent with vinegar and you’ll get the same if not better results. But a word of caution: if you have rubber parts in the slot where the rinse aid goes, don’t put the vinegar in there. Apparently, vinegar can corrode rubber. I know of some people who skip putting the vinegar in that special slot for the rinse aid and just put it in a small cup in the upper shelf so it can splash out over time. Either way, you’ll save a bundle, reduce your plastic footprint and keep chemicals off your plates and out of your gray water.

Distilled white vinegar to the rescue! Use this instead of expensive rinse agents. Photo © Liesl Clark

The interior of our dishwasher is metal and we’ve used vinegar now for over 3 years with no problems to the parts. I’m not sure how a plastic-interior dishwasher will take to vinegar in the reservoir and would love to hear from others who have used it.

We buy our white vinegar in bulk and then put the vinegar for our rinse aid in a plastic bottle that squirts.

Find a good squirt bottle to convert into your rinse aid dispenser. Photo © Liesl Clark

It’s stored under the sink right next to the dishwasher. You’ll likely find a good bottle in your own trash to reuse as your vinegar rinse aid dispenser, or simply reuse your rinse aid bottle.

Crystal clear dishes again. Photo © Liesl Clark