Can I Recycle Broken Glass, Wine Glasses, Drinking Glasses, Window Panes?

We’ve broken a couple of wine glasses lately and although I knew our recycling facility in our home town won’t take glass from wine or drinking glasses, I thought I’d look up the reasons why. According to Washington State’s Department of Ecology: “The combination of ingredients used to make glassware is different from what goes into container glass for bottles and jars. If these two types of glass are recycled together, the resulting glass will not be suitable for container glass. In fact, glassware, ceramics, window panes, or mirrors can pose a threat to equipment in a glass recycling plant.”

So that’s our answer for wine glasses, and likely the answer for all glass recycling facilities. We don’t want to contaminate the glass used for containing food. But if you break your mason or mayo jar, you can still put it in your glass recycling. It’s the material that counts, not whether it’s broken. I simply put the glass shards inside another jar that I’m recycling, as tightly as I can, so it all just melts down together.

So, for the non-recyclable glass, here are a few reuses I came up with that also might help:

1. Will anyone else take your broken drinking glasses? If they’re made of pretty colors, you might try a local potter or ceramics artist since glass mixed in with other glazes can make pretty colors in a firing.

2. Have windows that you want to recycle? Try your nearest Habitat for Humanity Store or save them and turn to our Trash Backwards app for window reuse inspirations:

3. If you have a tumbler hanging around, save your broken glass to make your own tumbled sea glass.


4. Recycle This in the UK has some interesting reuse ideas, like using your broken glass under your wood shed to deter rats!

5. Take the stem of your broken wine glass and glue it to the bottom of a teacup for a pretty teacup wine glass.

6. If your wine glass only has a chip or crack in it, or if it’s etched from your dishwasher, you can transform it into an adorable tea candle lamp. And if your kitty breaks enough of your wine glasses, then you can make a whole set of ’em.

7. Put your glass shards in the bottom of a plant pot to help with drainage?

What do you do with your broken glass? Send us your comments below or if you have a great solution you’d like to include in our app, please submit it through our contributor’s page.

Patio Umbrella Pea Trellis

Trellises can be made from just about anything with a little height and some expansiveness. When a patio umbrella broke in half recently due to high winds, I saw a nice pea trellis-in-the-making.

A Broken Patio Umbrella Turned Trellis. Photo © Liesl Clark

I couldn’t wait to get these images out because I’m excited about this garden hack, so you have to use your imagination. OK, don’t laugh, the peas are just sprouting but there are signs of promise to come.

Just Sproutin'. Peas are reaching toward their patio umbrella trellis.

The next time you have a patio umbrella that breaks in half, save the inner wooden part for a pea trellis in your garden. Take the canvas off and you’ll see that what remains is the perfect shape, octopod-like, that will serve you for many years. If you want to see how it’ll look with a little more vegetative matter around it, aristonorganic has a great pic to give you some perspective. I think I’ll paint mine a bright red with some leftover paint for some added garden color.

A broken patio umbrella soon to be a pea trellis.

Oh, and if you’re wondering what to do with the fabric of your umbrella, sun-drenched as it is, take it to your nearest The North Face store for recycling through their Clothes the Loop program. They’ll take all of your textiles and shoes for reuse and recycling. Don’t hesitate, because there’s a store discount waiting for you in exchange for your used clothing or textiles.

But I have to show you something pretty incredible. My friend, Michelle, is an extremely talented seamstress. She took one of my worn out patio umbrellas and turned the fabric into a post apocalyptic recycled outfit for her daughter. Seriously! It’s so cool, you have to check this reuse out! 

Fixing Tools With Broken Handles

By Mr. Everest

I’ve noticed a trend lately that’s surprising: tools with broken handles are discarded when only the wooden handle is broken. I grew up with acres of woods around me and tools like axes and rakes came in handy every day. I still use them quite regularly and when a wooden handle snaps in half, replacing it costs a fraction of the replacement cost for the entire tool. It just takes a little custom fitting, but anyone can do it.

If your axe handles break, you can always replace them. Photo © Liesl Clark

I replaced the handle for an old axe head of mine this week and I’ve broken the process down into 5 simple steps: I suggest you buy a good quality hardwood handle like hickory or ash from a hardware store or, if you have a good hardwood source nearby, just carve your own.

1) Cut out a piece at the end of your wooden handle to match the slot of your iron that will fit inside your tool head’s insertion hole. You’re making the end insertable into the tool head, so cut your piece making sure it’s not too small. I use a draw cut saw.

IMG_3221 Photo © Liesl Clark

2) You can see the gist of it below. You’re just trying to create a wooden neck that will fit inside the eye of the tool.

IMG_3225 Photo © Liesl Clark

3) Now you need to slide the wooden handle-neck into the eye of the tool head.

IMG_3228 Photo © Liesl Clark

4) I force it by bouncing the bottom of the handle onto a hard surface like stone or concrete and usually the head will pop on. If you have any gaps between the iron head and the wooden neck you can fill that with wooden shims.

IMG_3231 Photo © Liesl Clark

5) Drop it in a bucket filled with water and soak overnight. If it’s good kiln-dried wood, a 24-hour soaking is probably fine. If it’s a piece of wood you cut from your woods, it’ll need to soak a little longer so that the wood swells nicely inside the tool head.

IMG_3235 Photo © Liesl Clark

If your head is still loose after the soaking, you can always drive a metal shim into the top to tighten your fit.

IMG_3782 Photo © Liesl Clark

Repairing our tool handles runs in the family. By observation, our 9-year-old was able to carve his own handle for a broken rake.

Replacing a tool handle is a great carving project for a whittler. Photo © Liesl Clark

It took him 15 minutes to carve a spare baluster we had to the right size, fit the handle into the rake’s slot, and then take it up to the pond for an overnight soak.

Replacing the broken handle on an old rake took 15 minutes. Photo © Liesl Clark

Reusing Pickle Juice

We love our Claussen pickles (they’re one of the few commercial brands of food we buy) and for years I’ve regretfully poured the pickle juice out, until my passion for reuse got the better of me and we did an experiment.

Claussen Kosher Dill Pickle Juice, Sans Pickles. Photo © Liesl Clark

We sliced some beautiful spanish onion very thinly and threw it in the pickle juice sans pickles. A few hours later, the pickled onions were perfect! We’ve been enjoying them ever since. They go nicely on a salad, in guacamole, in tuna salad sandwiches and would likely be perfect for hamburgers and hot dogs. My children eat them straight out of the jar.

Thinly sliced Spanish onion is perfect for pickling. Photo © Liesl Clark

I did a little research across several discussion boards, to make sure reusing the juice is okay, and here’s what I learned: You can definitely reuse the juice to pickle fresh or blanched veggies in your refrigerator. Some people expressed concern about the health risks in reusing pickle juice for a new stash of pickled somethings. But almost all sites concluded that you should simply use your best judgement. Many admitted even drinking the stuff. Perusing the web showed me that there are pickle  juice-reusers out there who have been doing it for years. With good instincts and taste buds, and as long as you only reuse the pickle juice for short-term pickling in the refrigerator (no more than a couple of weeks), I think your re-pickles will be worth the risk.

Pickled onion. Yum. Photo © Liesl Clark

Some people add a teaspoon of kosher salt and another of distilled white vinegar to the jar to ensure a strong brine.

We’ve even started pickling our fresh-laid (hard boiled) eggs in there for a delicious lunch snack for the kids when cucumbers aren’t in season. Vegetables to definitely try are: Green tomatoes, green beans, cucumbers, cauliflower, and mushrooms (very short term pickling). I’d like to also try a kimchi experiment with cabbage and carrots and use the pickle juice when I’m brining my favorite kimchi.

Of course, the one down-side to Claussen pickles is that they’re not entirely plastic-free. There’s that little plastic neck thing that corporate food tends to have around it to prove that no one has tampered with the glass jar. Local organic pickles don’t have those annoying plastic sealers and most of us are used to hearing that “pop” when a jar of safely-canned food is opened. You can always make your own pickles. We do, when they’re in season, and we have a great refrigerator pickle recipe for you here.

Organic Homemade Refrigerator Pickles. Photo © Liesl Clark

Other pickle juice reuse ideas that I’ve discovered?

1) I found one reference online that said you can clean your copper pots with pickle juice. Just dip your sponge in the juice and polish away!

2) Make a salad dressing using your pickle juice.

3) Try your hand at Polish pickle rye bread.

4) Pickletinis: Mix pickle juice with a dash of vodka or gin. I dare you to try one. Or, just do a pickleback shot: One shot of Irish whiskey and one shot of pickle juice.

5) Some extreme athletes have claimed that pickle juice helps them fight dehydration and cramping.

6) Fight colds with your pickle juice! Here are some words from a reader: “When my throat starts getting scratchy and I can tell I’m coming down with a sore throat, I take a big swig of pickle juice, and another in a few hours if need be. Not sure why, but it never fails to wipe out that nasty sore throat before it takes hold.”

Do you have any pickle juice reuses to share? Please do in the comments below!

Fix Broken Scissors

You choose, which pair of scissors are going to last longer?

Although the ones with the plastic handles cut a little better, they’re broken and I suspect they’ll break again. The metal pair have been around for decades and are still going strong. In the event they break apart, I might be able to entice our blacksmith friend to help repair them. If you don’t have the tools you need at home, you can take scissors for sharpening at a nearby sewing shop.

Meanwhile, I’m just questioning why the need for plastic handles? The obvious solution is to fix them, so this is simply a reminder to those of you who have plastic-handled scissors that break: Get out the Super Glue and fix ’em! (This is my second pair that’s needed repair this month, oddly.)

Do you have a good fix it solution for an everyday household item? Please share it with us!

Dust to Dust: Closing The Loop With Ceramics

Antique Ceramic Collected at the Beginning of My Ceramics Phase. Photo © Liesl Clark

I have a thing about earthen hand-made ceramics. They’re beguiling. Especially the ones made before the (pottery) wheel, with their human thumb-prints inside a perfect sphere. I’ve been collecting them, along with wheel-thrown pots from exotic locales, for years.

This one's from Kitale, Kenya, on the border with Uganda. I acquired it when I made a film about the mountain elephants there. Photo © Liesl Clark

But more recently, we’ve had some losses with this highly impermanent material. I fully understand why ancient people found ceramics of such use. They were sustainable, made from a renewable resource — the clays of our Earth. So, when one broke or became worn, it wasn’t a big deal. You could always get another.

IMG_2431 Photo © Liesl Clark

But the really old pots, today, are either well-loved or have value. Here’s our story:

It was a dark and stormy night. The wind moaned through the windows, but then a bang happend inside the house that caused us to shudder in our beds. It wasn’t from the tree-branch-driven tumult outside, but from some lurking creature on the inside.

Within seconds the gig was up when we heard a “meow” and I knew our furball had done some terrible deed.

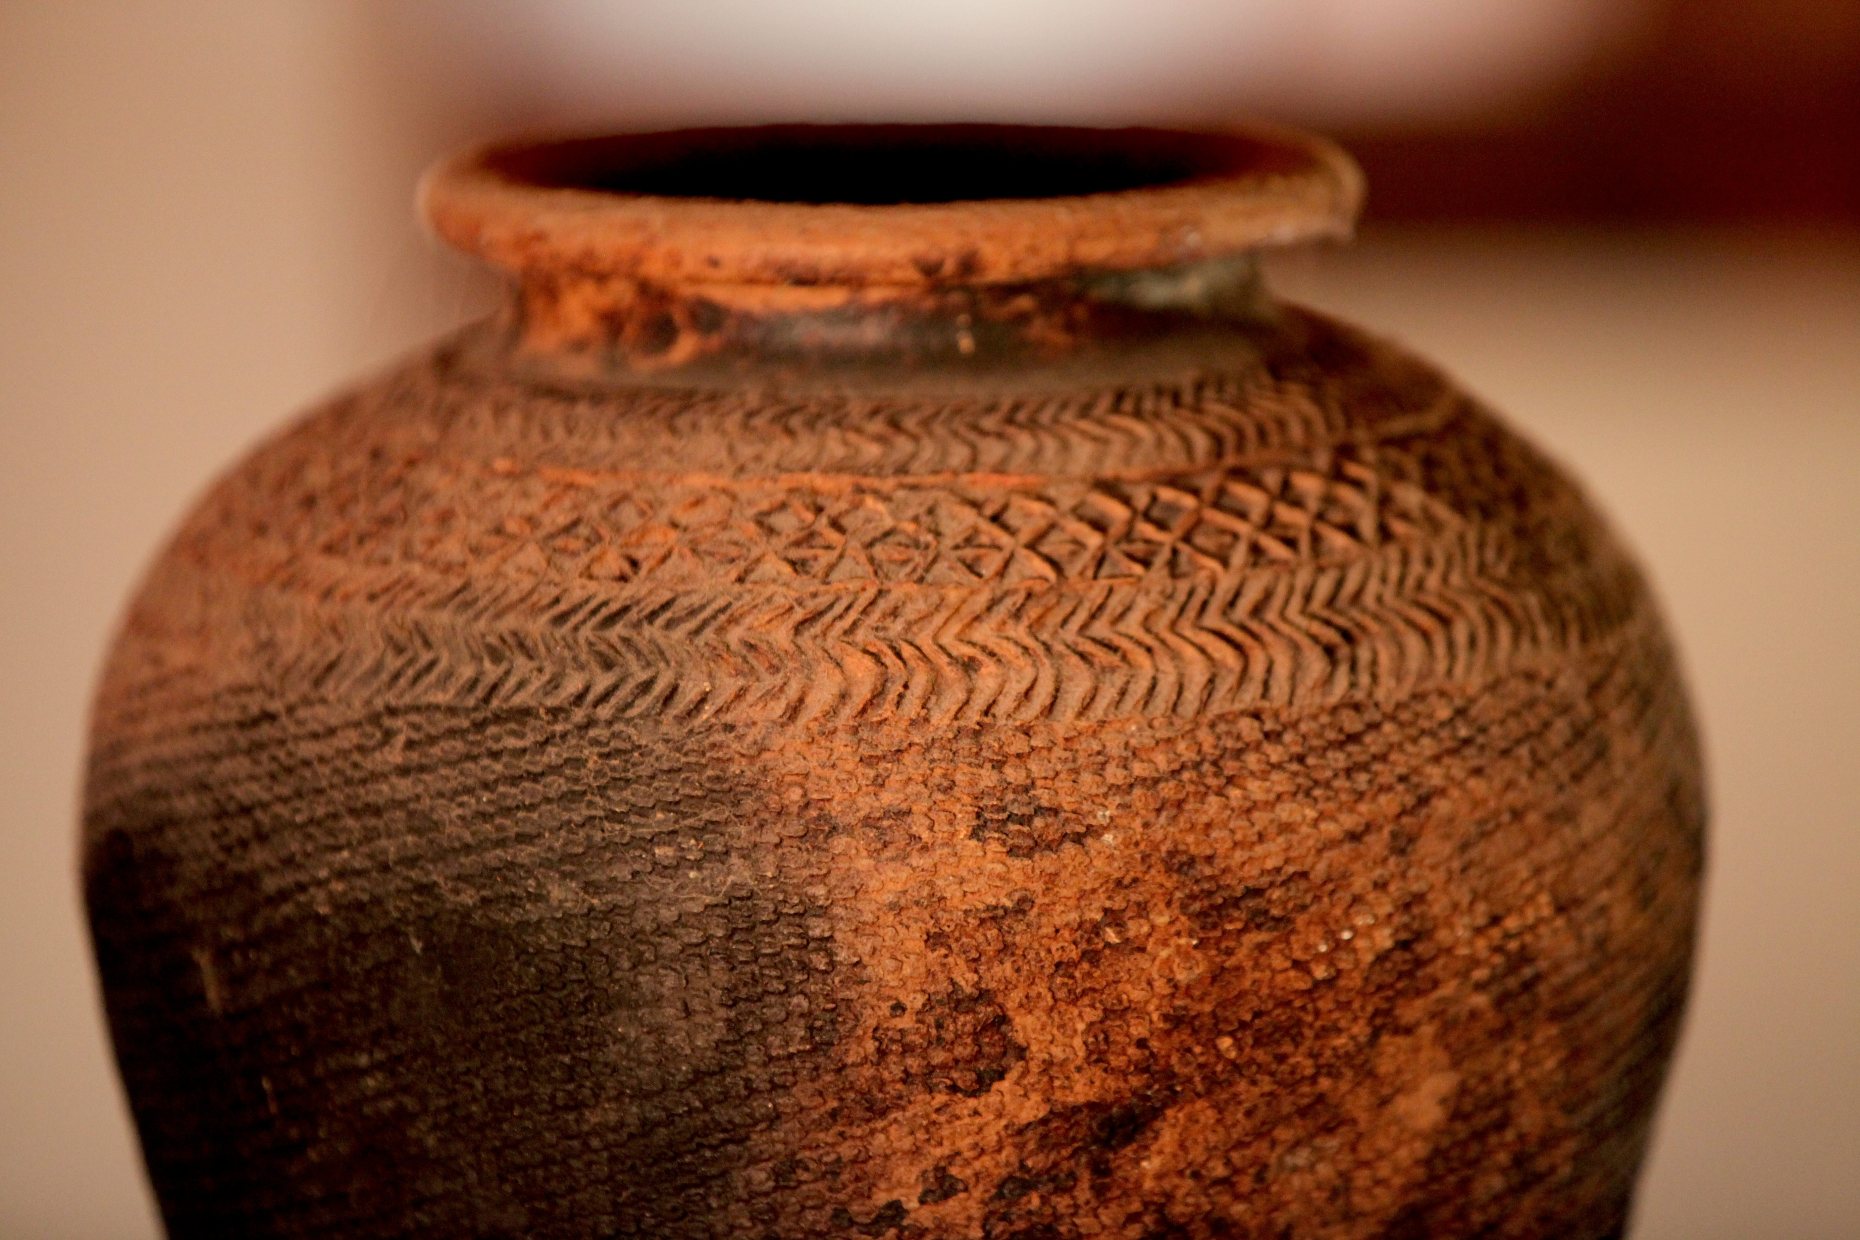
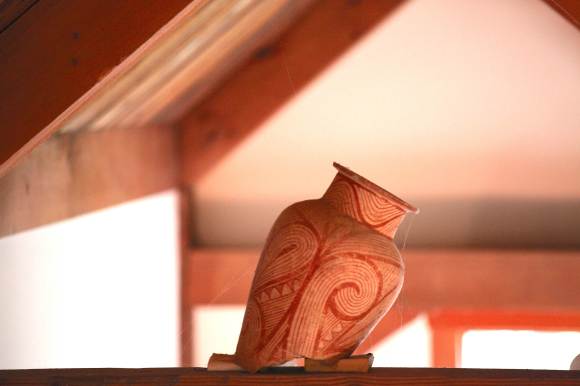
True to her mischievous ways, Willa had knocked a very old pot from one of our ceiling beams. It was a pot that I had brought back from Thailand when I was in my twenties. It was made in Burma and the patterns on it were stunning. Its twin still sits up on a beam, surely tempting our vixen.

Ancient Pots on Wooden Beams. Only Safe Place in the House. Until Willa. Photo © Liesl Clark

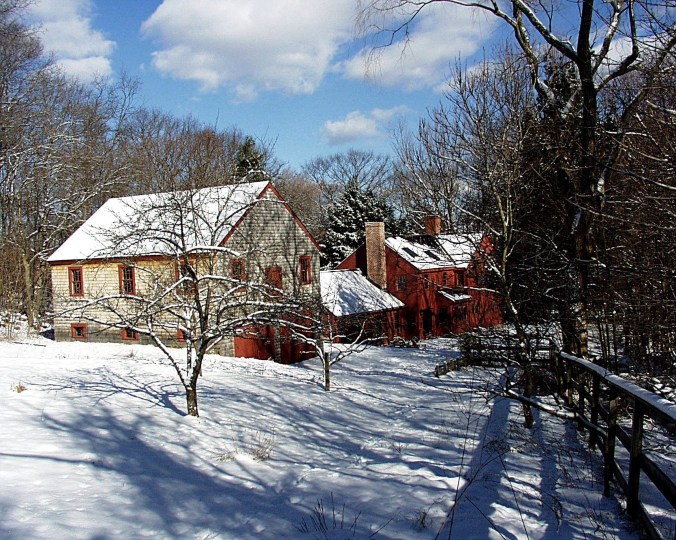
Why do I have old clay pots on our beams? Their earthy colors and feminine curves feel like a good combination with the hand-hewn beams from first-growth douglas fir recycled from Seattle’s oldest piers. With children and pets in this house, the 35-foot-high beams were the only place I could think to store the fragile pots out of the way of balls, feet, tails, claws, spills. Who knew that the cat could get up so high and push a pot from its perch?

The Burmese Pot Turned Potshards. Photo © Liesl Clark

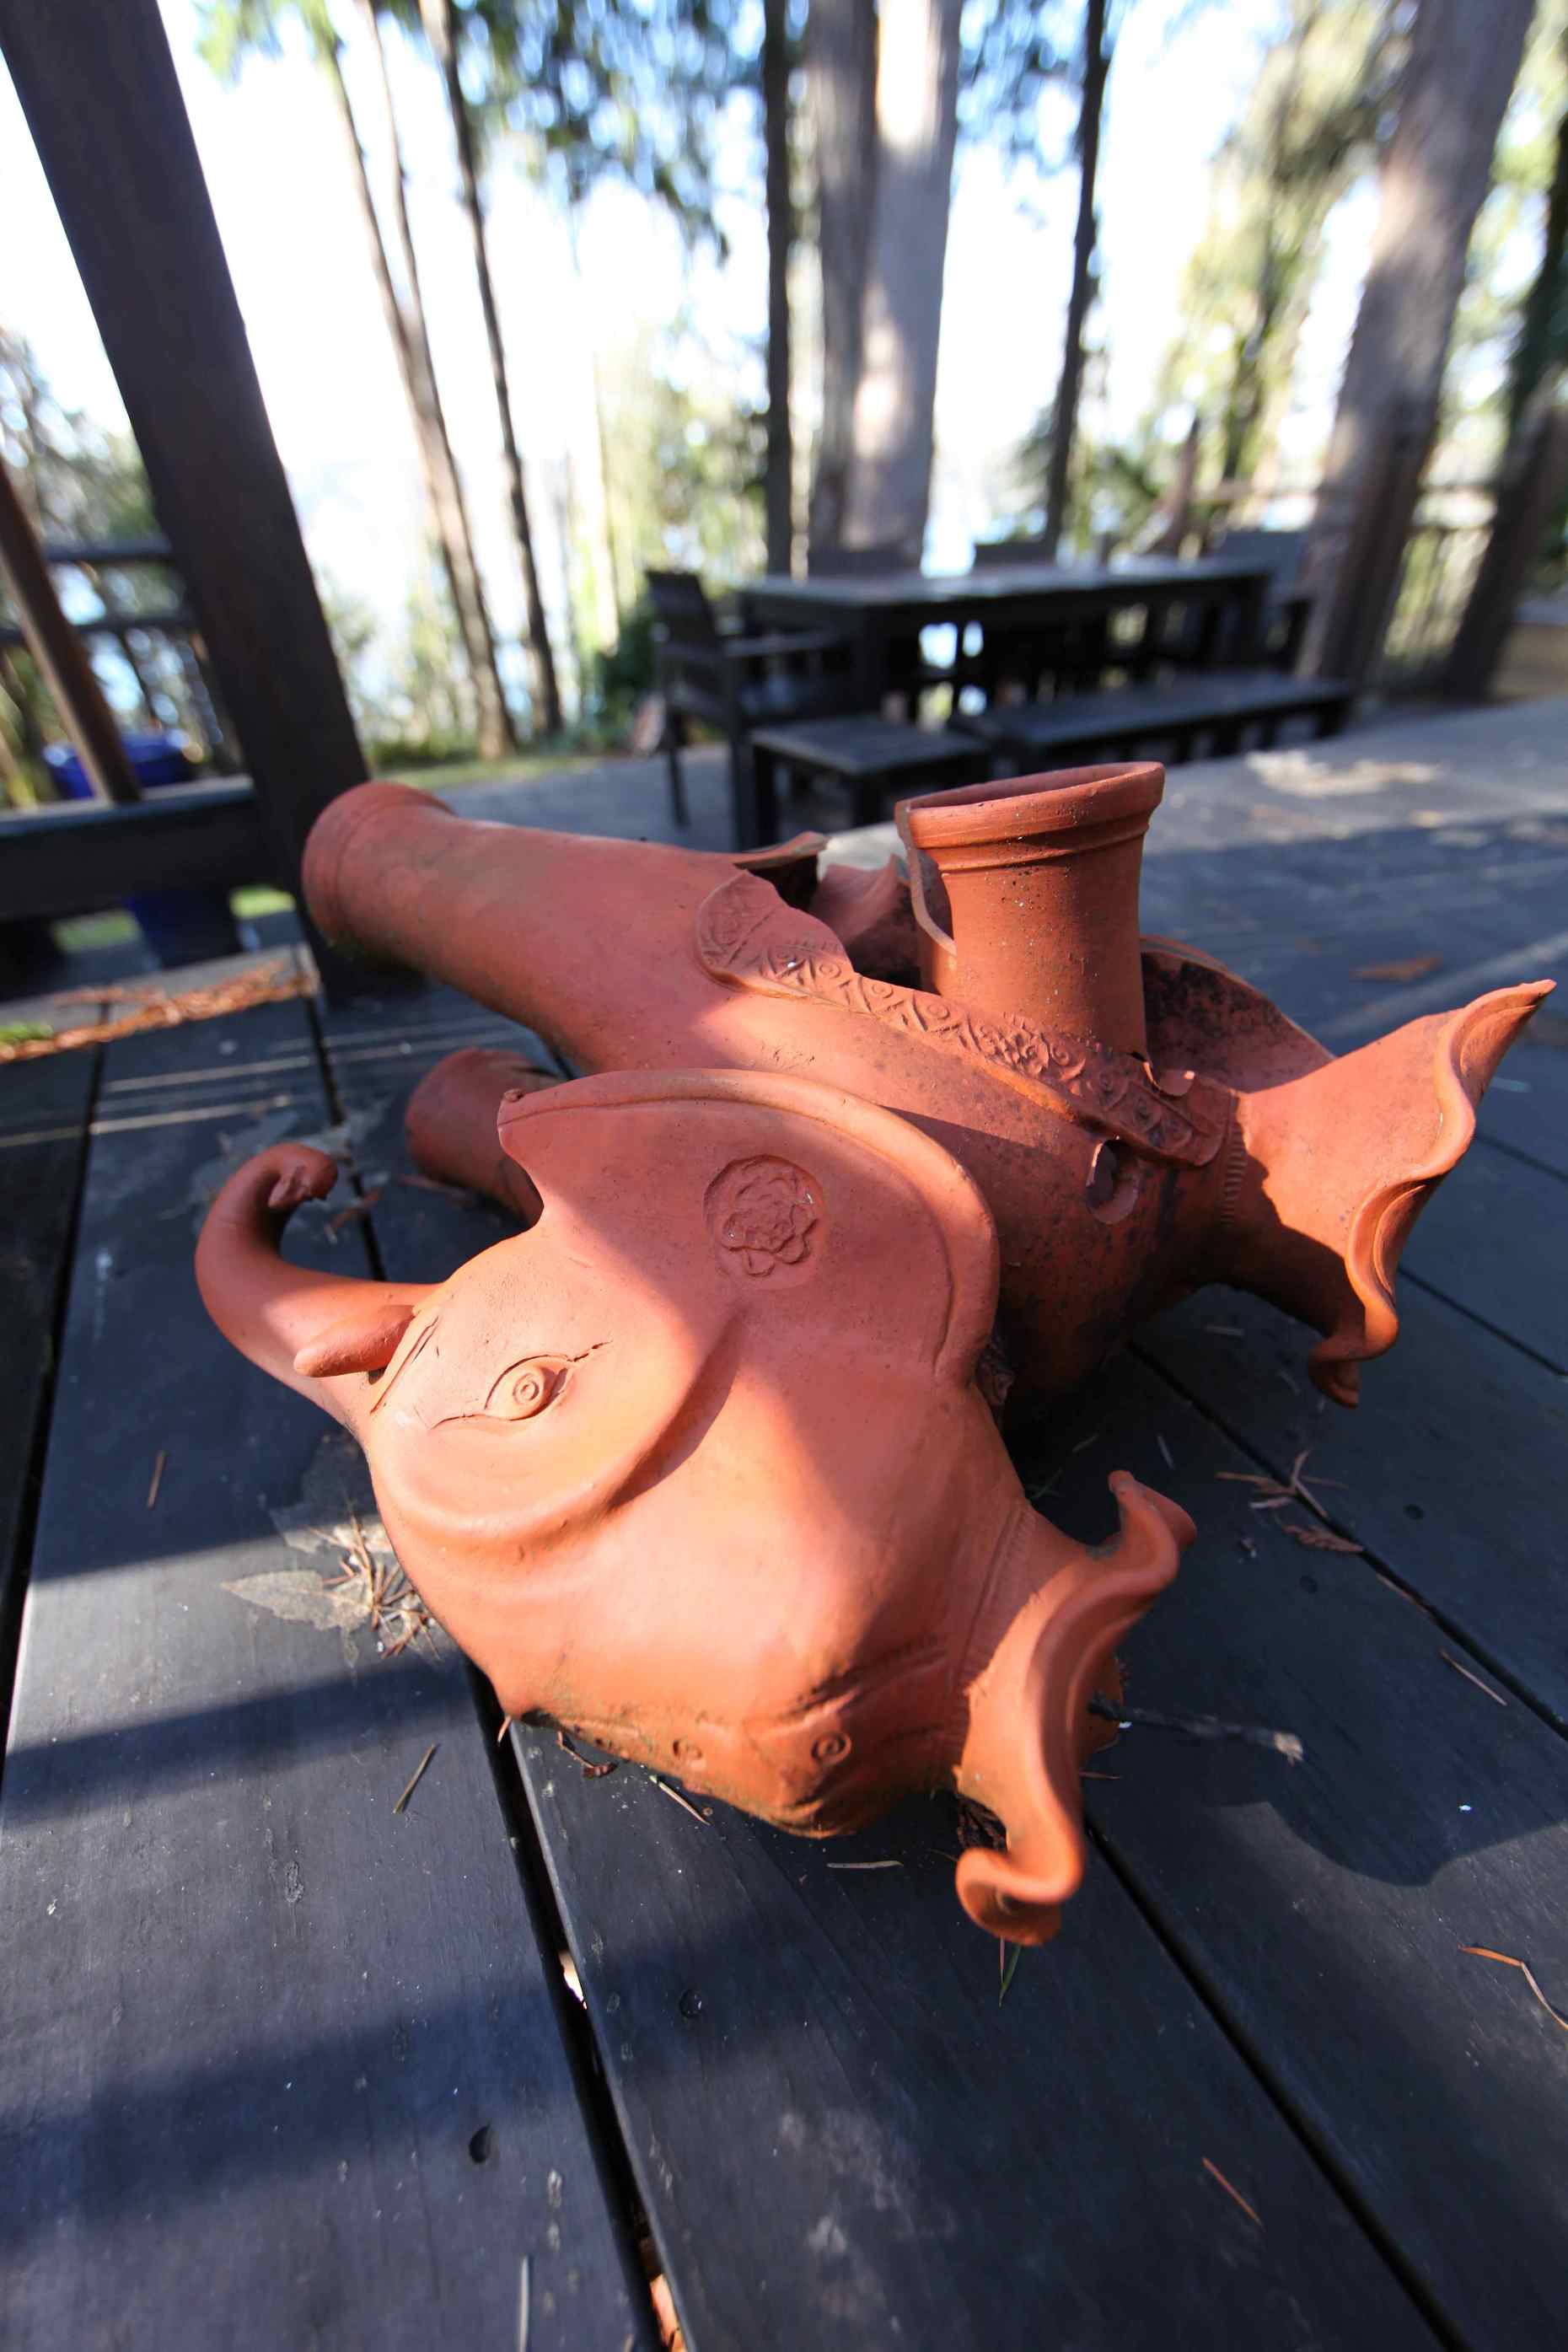
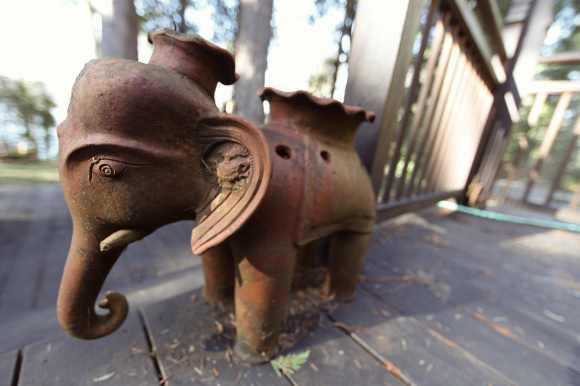
Then, a week later, Willa the cat jumped onto a terra cotta elephant we had brought back from Nepal. This lovely strawberry planter was outside on our deck and somehow she managed to smash it to pieces.

Broken Terra Cotta Elephant. Photo © Liesl Clark

Here is it's twin. Photo © Liesl Clark

I’m losing patience with our whiskered she-devil.

She's Not Very Buddha-like. See The Beams Way Up High? Photo @ Liesl Clark

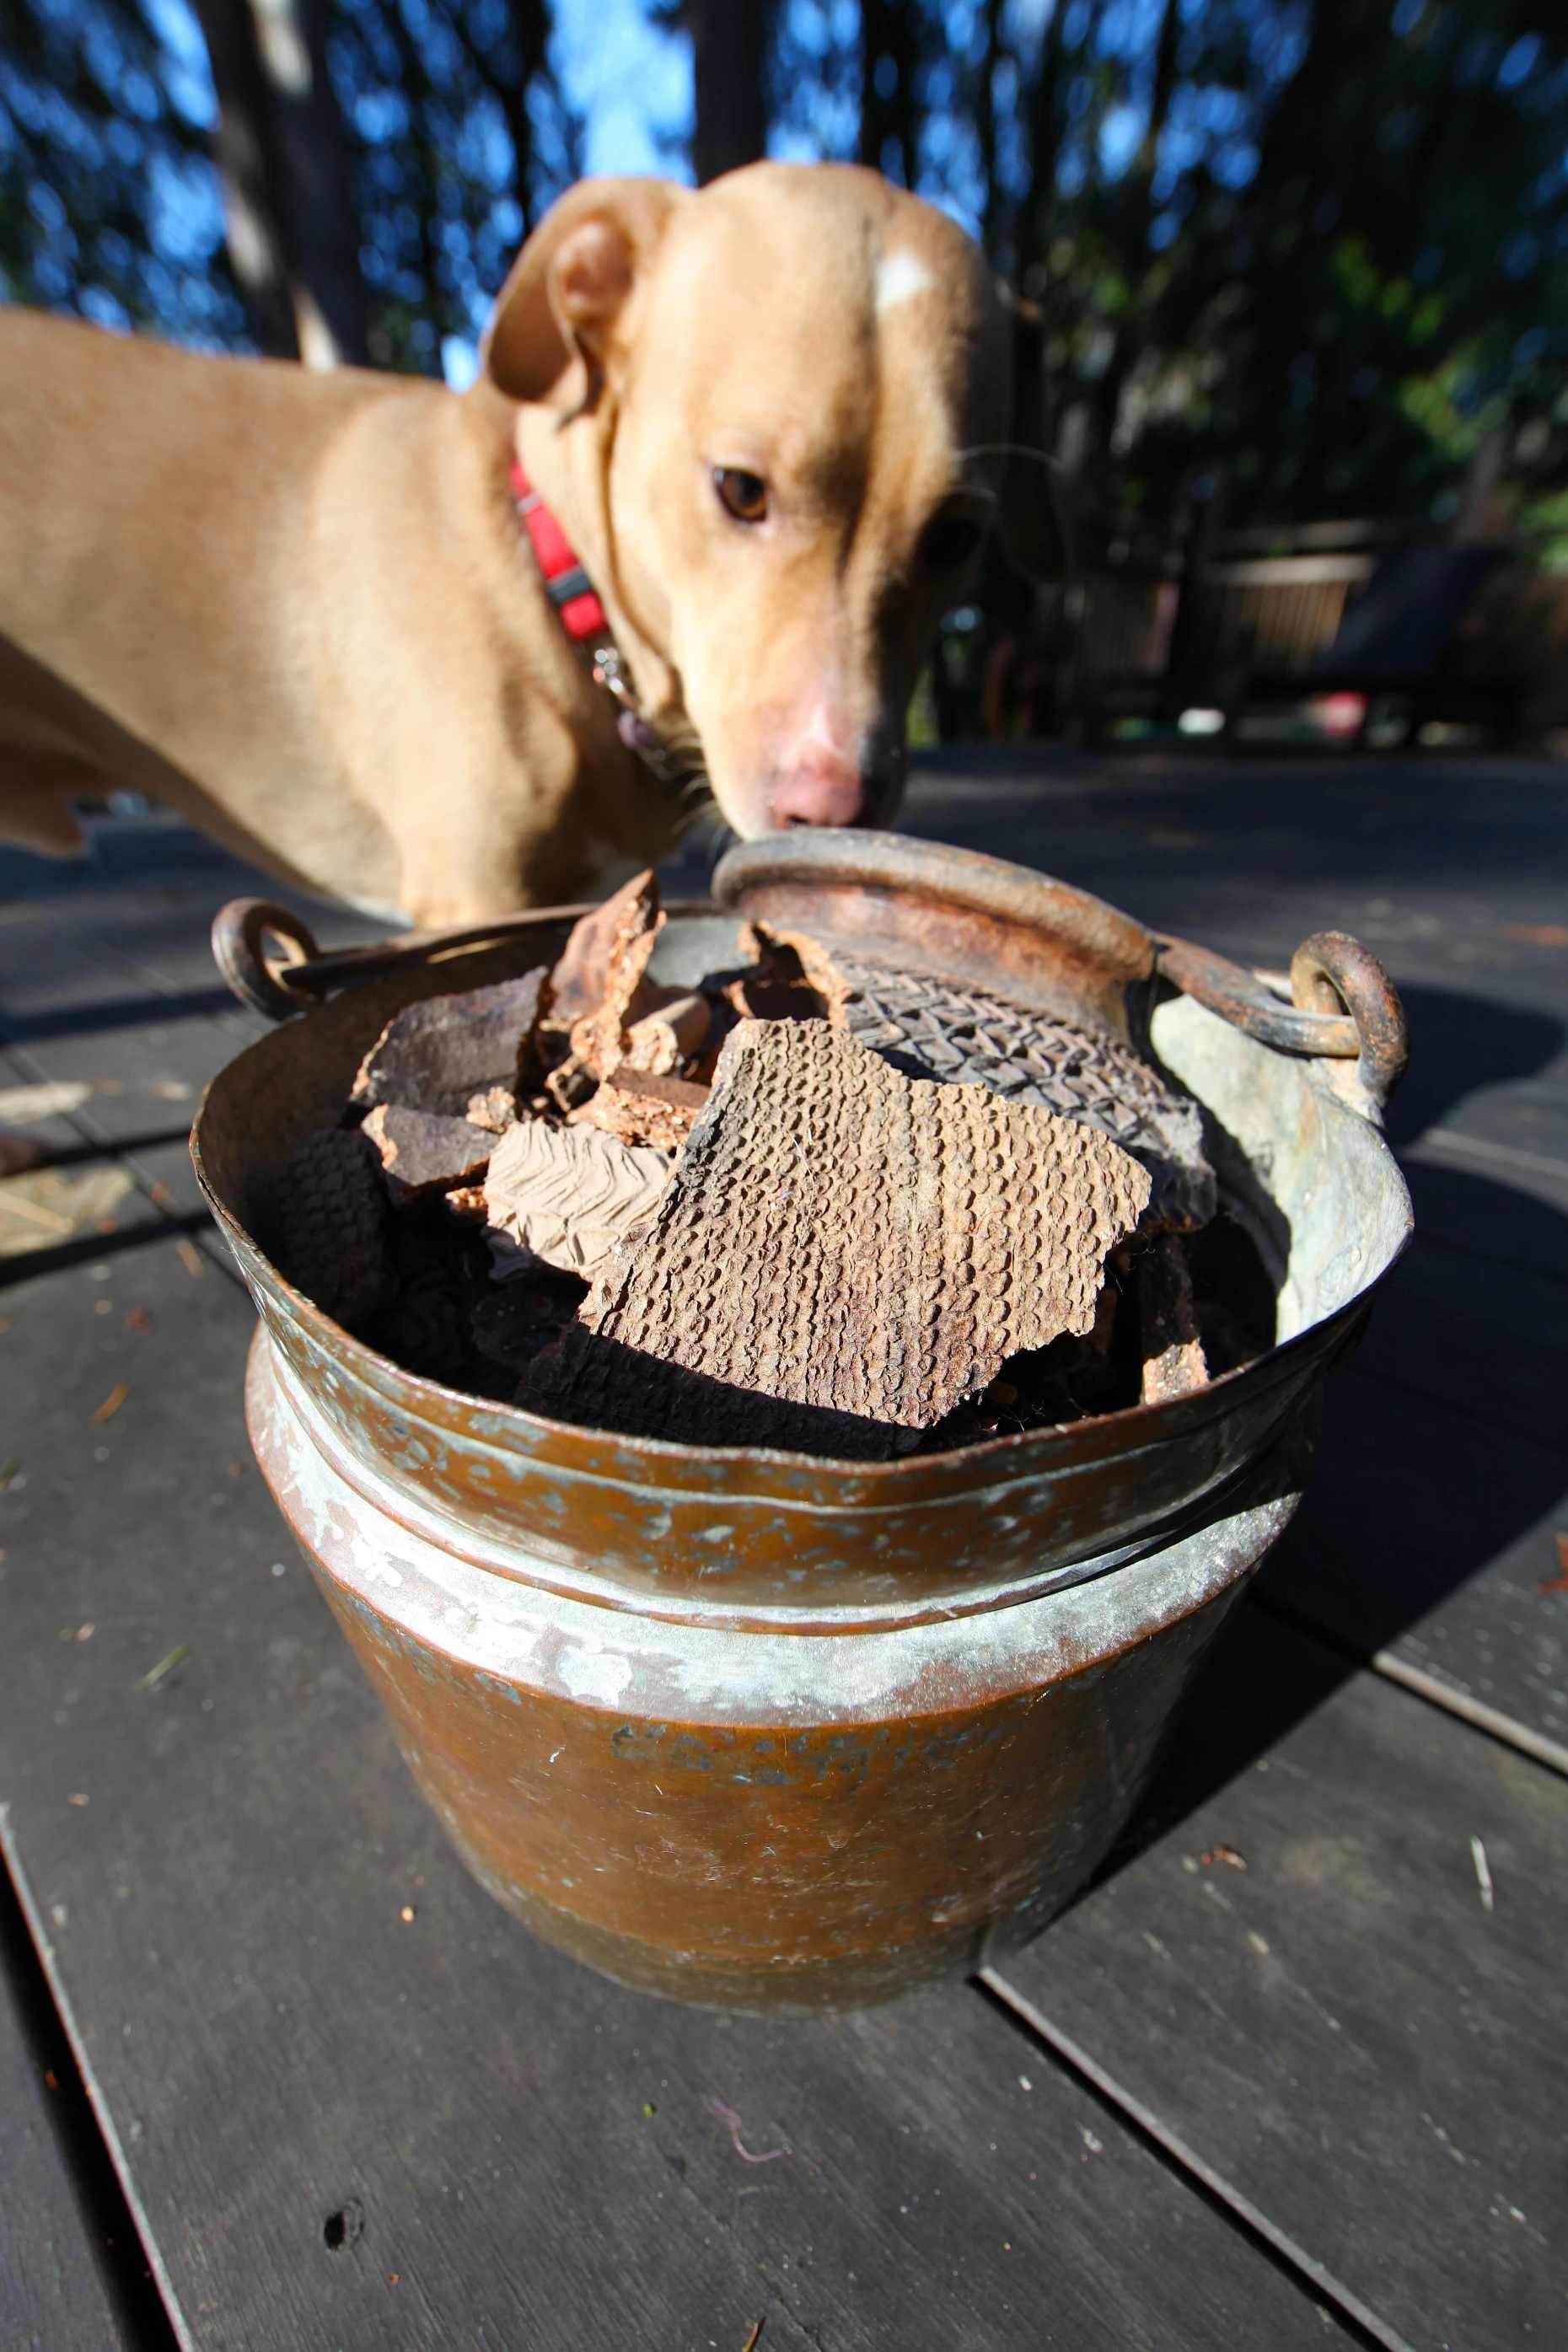
And now I have a new waste stream to deal with: Broken terra cotta pots.

What to do? A couple days of research yielded some decent options:

Drainage: Break up your pots and use as drainage under eaves of your house to encourage draining the rainwater away from the house. You can also break up the pieces to use as drainage in the bottom of large pots. The terra cotta actually absorbs a good amount of water, aiding in the drainage process wicking water away from the source but also absorbing some for plants above if they’re deep inside a pot.

Garden Bed Edging: Partially buried pieces of terra cotta pots can make a nice garden border or edging, or a feature unto itself in your flower bed.

IMG_2266

This dragon, on the edge of a broken pot likes to eat dirt.

Plug Up Holes in Your Chicken Yard: Our chicken yard needs some repair, especially in the places where the chickens have dug holes along the fence. We use broken terra cotta pieces to repair these holes to ensure digging raccoons, mink, and rats don’t get in. Yes, I said rats. They crawl through holes they make and then snuggle up in the shredded paper bedding underneath their nest boxes.

Broken terra cotta pots plug up holes in our chicken yard to keep the vermin away. Photo © Liesl Clark

Buried Pot Whimsy: Half bury a broken pot and add a plant inside to give off the effect of an overturned pot buried over time with your pretty perennial taking over. It’s a cool effect, especially with succulents. I think I’ll half-bury our elephant so it looks like it’s clawing its way out from the depths of the Earth.

Make a Fairy Garden: Broken pots can be reassembled into a little world for miniatures.

Make Ceramic Mosaic Pieces: Potshards and any broken ceramics, like dishes and mugs, can be the ingredients for lovely mosaics used in garden stepping stones, large pots, or even furniture.

Our local mosaic artist, Gillian Allard, collects her ceramics from yard sales, and large rummage sales like our Rotary Auction. She teaches classes on mosaics, so she’s always looking. In addition to ceramics and tiles, Gillian incorporates broken glass, buttons, jewelry and beads into her mosaics. I plan on giving her a broken mirror (cat did that one, too) that she’ll surely use. So, if you have broken ceramics, do find a local mosaic artist to pass them on to. Or, offer them up on your local Buy Nothing group.

Blue Daisy Stepping Stone:  From a broken serving platter and gems purchased at the Rotary Auction. Photo © Gillian Allard

The Zero Waste Institute has in interesting take on ceramics I tend to agree with: They came from the Earth so why not simply return them to earth? They suggest grinding them down to a powder and then reusing that powder to make more ceramics. Makes good sense. We should have community ceramics-grinding mills so we could fully close the loop and make new ceramics from old ones.

IMG_2275 Photo © Liesl Clark

These little ceramic deities sit under one of our apple trees.

I think I’ll do that with my old Burmese pot, unless anyone can give me a better reuse. Dust to dust, right? Send it back to the Earth. And perhaps the kids and I can have a little ceremony when we do it, celebrate the passing of a beautiful hand-made pot made from the earth half way around the Earth as we distribute its dust throughout the forest whose rich green could certainly absorb the minerals and clays used in the old pot.

Chickens and ceramics go well together on our property. Photo © Liesl Clark

A landscaper friend of ours says we should save some of the ground-up clay for our compost bin and gardens. It’s fine, he says, to add it to our soil, especially the sandy and loamy areas.

If you add a little chicken poop to your clay soil, all's well. That's why I like ceramics around my chicken compound. Photo © Liesl Clark

But more importantly, we’ll save a few select pieces of our Burmese pot for our sacred tree, as mementos. Sacred tree? Yes, everyone should have a sacred tree on their land.

Meet our sacred tree, where ceramic offerings are made.  Photo © Liesl Clark

It’s a tree of your choosing that’s important or sacred to you for any reason. Maybe it’s in a central part of your property, at the heart of your land. Or maybe it’s just a cool-looking tree, with all sorts of nooks and crannies for you and your children to place lovely offerings. Our tree is both central (2 trees, a madrona and a douglas fir, growing from one spot) and cool-looking. Sometimes we light butter lamps at its base at night, but mostly we place ancient salegrams and special broken and found ceramics at the base.

The kids love searching for the ceramics throughout the seasons to see how the tree is enveloping into its mass the special deities we’ve planted there.

Ganesh, now enveloped in a douglas fir. Photo © Liesl Clark

IMG_2288 Photo © Liesl Clark

Not too long ago, ceramics were one of the only forms of waste left behind by a community or indeed an entire civilization. My husband, 2 children and I spend a month each year in Nepal filming, exploring remote cliff caves, and searching for the ceramics of an ancient people that were among the first to settle permanently in the Himalaya. Their broken ceramics, tiny shards we find in open fields that would’ve once been their settlements, are the first clue we search for: their trash, among the only remaining evidence of a people long gone. These are undiscovered cultures that thrived in the Himalaya 3,000 years ago, and all that remains are their ceramics, their metal implements, gold and silver funerary masks, their glass and stone beads, wooden coffins, silk, and their bones. That’s it! And their funerary pots, made of a dark clay, are stunning.

3000 year old funerary pots recovered from caves in Mustang, Nepal. Photo © Pete Athans

3000 year old ceramic pots found in the caves of Mustang. Photo © Liesl Clark


When you gain an appreciation for mini masks made of earth, you put them everywhere. They connect you with the past and maybe even the future when your clay object will be a part of the earth again.

In Kathmandu, you can still buy yogurt in clay pots. It’s beautiful and delicious yogurt, made and sold in disposable ceramic pots. The idea is that the clays are from the valley, so you can simply dispose of the pots outside your door (which many people do) or with your organics in the compost. I think at one time the pots were reused. These beautiful ceramic pots sure beat plastic. We save them and bring many home along with the little terra cotta wax tea lights that cost pennies each. The little pots replace plastic pots in our children’s playhouses.

Now, after dreaming with me in ceramics, imagine our material culture today and what people will find left behind by us earthlings some 3,000 years from now? I’d like to believe that we’ll clean up all the plastics and return one day to a world where we’d simply find sustainably packaged goods, just like we used to do long before plastics ever existed.

Do you have a ceramics reuse? Please share it with us.

Shredded Paper Chicken Bedding

IMG_2261

It’s simple. Just ask your friends and neighbors for their shredded paper. Don’t buy wood shavings! You really don’t need to. Since shredded paper can’t be recycled in most municipalities, and your friends will be happy to give you theirs. Or, hit up your office, or friends who work in an office setting. All I can say is, this stuff is great as chicken bedding in a coop.

Shredded Paper Bedding Photo © Liesl Clark

When it’s time to clean out your chicken coop. Put the paper and chicken droppings in your compost bin. It’ll get that bin cooking, adding much-needed nitrogen to your organic waste. My compost bins are a red-worm mega-composting colonies. It doesn’t take long for the dropping-laden shredded paper to turn into this:

IMG_2259

And when you take that beautiful compost out to the garden and dress your veggie beds with it, you’ll get this:

IMG_2262

Corn Mache in January. It grows in the early winter here in the Northwest. Great for salads.

What do you use for chicken bedding? Please let us know!

IMG_2260

Fabric Scrap Doll Tutu

Easy Fabric Scrap Tutu For a Child to Make, Photo © Liesl Clark

Visiting grandma means we get to dive into her boxes of fabric scraps. For 40 years, no fabrics have been wasted in her house. Just last month, she passed on several boxes to a local quilt-making organization, but luckily we found a few more up in her attic.

Grandma's Fabric Scraps, Photo © Liesl Clark

We looked in the Trash Backwards app for some good fabric scrap reuse ideas for small hands and landed upon a fun tutu tutorial for a little girl. My daughter decided she wanted to make it for her stuffed panda. So, we took our lead from the tutorial at Home Sweet Home and made a mini version for a doll or stuffed animal.

Strips of Fabric Scraps, Photo © Liesl Clark

1) First, cut your fabrics into 1/2 inch to 1 inch wide strips. We made ours approximately 6-8 inches long.

2) Find an elastic waistband, about 8-12 inches-worth and sew 2 ends together so you have it in a loop.

Sew Your Waistband Into a Loop, Photo © Liesl Clark

3) Fold your strips in half length-wise and place them underneath the waistband with the loop sticking out of the top and thread the ends of the fabric scrap through your loop, tying half of a square knot. This is how you tie on your skirt scrap pieces.

Adding Fabric Scraps to The Waistband, Photo © Liesl Clark

4) Tie your scraps on one after the other and gather them together tightly.

Tying One On, Photo © Liesl Clark

5) We wanted to be sure that the waistband was sewn together well, so grandma reinforced it with some hand-sewing.

Reinforce Your Waistband Ends, Photo © Liesl Clark

You’re Done! Spread around your strips so they even-out your skirt and you can add on more strips of color wherever they’re needed.

A Tutu For a Doll or Stuffed Friend, Photo © Liesl Clark

Panda Loves Her Tutu, Photo © Liesl Clark

Dancing With Her Tutu, Photo © Liesl Clark


Fabric Scrap Tutu, Photo © Liesl Clark

Letting Go of Honey Hill Farm

JPEG image-74D81F27B287-11

Our daughter was born here. It’s a 300-year-old beautifully renovated farm that is a testament to the impermeability of time, weather, and wear on a well-loved home. Our babies lived the first years of their lives swinging in their car seats from the 1705 beams, crawling on the wide pine floor boards, and sledding down through the apple orchard out behind the barn. The hill was where we kept bees and in our first year there 100 pounds of clover honey was harvested from three hives perched beyond the white pine. We sold the golden elixir on our porch to neighbors we met over time. It was an idyllic place to live, but alas it’s now time to let it go.

Sideoutback

The truth is, we haven’t lived there for the past 10 years.

JPEG image-74D81F27B287-5

Due to a need to move to the Pacific Northwest for work, we left our beloved New England farm and family 10 years ago, just before the market crashed. When housing prices plummeted, we knew we had to hold on to the home, and rent it out, to wait until the situation stabilized. In 3 months’ time, if all goes as planned, our farm will change hands, and become an experiential preschool for families who want to bring their children in close contact with the Earth.

Essex from street 2

Although we moved our primary “stuff” from the farm years ago, we’ve had to slowly get rid of the last bits and pieces that comprise a final vacating of a property.

JPEG image-74D81F27B287-6

These are the kinds of items most people simply throw away, too hurried to mindfully find new stewards for their still-useful items.

JPEG image-74D81F27B287-16

We travelled back to New England last summer to take 3 days to gift our stuff to members of our former community. I connected with the admin of the local Buy Nothing group and she let me temporarily join the group to post our remaining possessions to neighbors.

Screen Shot 2016-03-04 at 11.00.05 AM

Everything disappeared in a matter of hours. Paint, farm tools, antiques, old hardware, large work benches and potting tables were hauled off the property by people happy to come in their cars and trucks to reuse what we couldn’t fathom carting across the country to our home in the Northwest.

Screen Shot 2016-03-04 at 11.00.58 AM

We’re essentially masterminding a zero waste move.

JPEG image-74D81F27B287-8

Here are our best simple tips for a low impact move for anyone trying to reduce their waste when moving out of one property and into another:

  1. Create recycle/reuse waste streams in boxes for easy-to-recycle/reuse items: i) Regular commingled recycling (plastic bottles, glass and paper); ii) Plastic bags (to recycle at grocery stores); iii) Metal (to recycle in a metal recycling facility); iv) Office supplies (pencils, pens, paper clips, etc to give to a teacher or an office somewhere); v) Batteries (take them to your nearest battery recycling facility.)
  2. Don’t buy new boxes. Ask for them on your Buy Nothing group or get them from your nearest liquor store.
  3. Create collections to give away: It’s easier to commingle all of your hardware, or garden supplies, paint supplies, pet supplies, music, etc together to give to neighbors as collections of like-items rather than randomly giving away each item individually.
  4. Don’t buy paper for wrapping fragile items: Use newspaper (ask for it in your Buy Nothing group) or plastic bags, bubble wrap, and styrofoam that you’re planning on recycling,  or napkins, t-shirts, clothing to wrap around your glasses and fragile items for shipping. It saves money and waste.
  5. Even old paint can be reused: Before taking your remaining household hazardous waste to your hazardous waste facility, do check with neighbors to see if they’ll use it. We had people come to pick up our interior and exterior paint for their own projects.

JPEG image-74D81F27B287-3

What additional broad-strokes tips can you add to this list?

JPEG image-74D81F27B287-13

We’ll dearly miss our Essex home on the marshes. © Liesl Clark

Fastest Caesar Salad Dressing, Plastic-Free

Fresh Salad Dressings Made in Bulk in Glass Jars Will Get You to Eat Your Greens. Photo © Liesl Clark

We’re big on salads, growing greens for 12 months of the year. And often, the only thing hindering us from making a salad for lunch or dinner is…the dressing. If you don’t have one ready to just throw on your greens, chances are you’ll skip the salad on a busy day. Solution? Make a big batch of the most delicious dressing you can cobble together so it lasts several weeks in the fridge.

So, get out your favorite bottles or jars because we’ve got a fabulous dressing that’ll keep you and your loved ones wanting salad at all meals:

Liesl’s Faux Caesar Salad Dressing:

Plenty of Garlic. Photo © Liesl Clark

Crush about 4-6 cloves of garlic. We use a garlic crushing stone.

A Garlic-Crushing Stone is Fast and Easy. Photo © Liesl Clark

Place in your favorite jar and add 1/2 Cup extra virgin olive oil.

Olive Oil is Always at Hand. Photo © Liesl Clark

Add about a tablespoon of fish sauce. Fish sauce? Yes, fish sauce, as found in Thailand, Vietnam, and in the Philippines is a savory seasoning staple in our household. It serves as an easy alternative to anchovies in this recipe. Be sure to buy it in a glass bottle.

No Need For Anchovies! Get Fish Sauce in a Glass Jar. Photo © Liesl Clark

Add about 1/2 cup freshly grated parmesan cheese.

Fresh Salad Dressings Made in Bulk in Glass Jars Will Get You to Eat Your Greens. Photo © Liesl Clark

Add a tablespoon or 2 of red wine vinegar or homemade vinegar from your fruit scraps.

Adding Vinegar to Taste is Best. Photo © Liesl Clark

Done! Every time you use the dressing, you can add a little more parmesan cheese for added flavor. Also, it’s easy to adjust the amount of vinegar and fish sauce to taste. Every fish sauce tastes a little different from the next brand and vinegars, too, can be stronger than others. We use anything from our homemade red wine, cider, and blackberry vinegars to malt vinegar. Our children just love this dressing. Enjoy!