Easy DIY Snack Boxes

By Finn Clark

Aunt Kelly's Cool Carton Snack Boxes. Photo © Finn Clark

My Aunt Kelly gave me the idea to make snack box containers because she made us one as a gift for Christmas. Since we get local organic milk delivered in cartons, I started saving some so I could try to make my own, using Kelly’s as a template.

Aunt Kelly's Cool Snack Box, Opened Up. Photo © Finn Clark

Here’s how it’s done:

1) You’ll want your box to be square. Each carton is about 3.5 inches wide. Measure 3.5 inches up from the bottom of each corner and put a dot there with a Sharpie. This will be the point where you will cut down to from the top.

2) Then measure another 3.5 inches above that and put another dot there. This is the high point of your arch.

Drawing the high point of your arch. Photo © Finn Clark

3) We used Kelly’s as a template so just traced the arches, but I’ve given you the measurements above, so you can now draw your arch like we did.

Put a dot 3.5 inches up from the bottom. This is the point where you cut down to from the top. Photo © Finn Clark

4) Now that you have an arch drawn for each side of your carton, start cutting them out with scissors. Be sure to cut on the corners all the way down to your 3.5 inch mark (up from the bottom.)

Cutting down the corners from the top of the carton all the way down to the 3.5 inch mark. Photo © Finn Clark

5) Now cut out your arches.

Cutting the arches. Photo © Finn Clark

6) Fold your sides down at the 3.5 inch marks.

Folding the sides down.

7) Sew on a nice large button. Just sew it on like you would normally sew a button. We chose our favorite side to sew the button onto, centered it, and measured about 1.5 inches down from the top.

Sew on a button. Photo © Finn Clark

8) Wrap a rubber band around the button once tightly and use it to cinch down your little snack box.

The right size rubber band adds the finishing touch. Photo © Finn Clark

You’re done! Enjoy your snack box. I use mine to hold apple slices, or home made crackers, nuts, whatever I can find in our pantry for a school snack. And it’s really easy to wash out!

Me and my DIY snack box.

Oh, and you can save the left-over cut carton and use it as a crown.

50 Things To Never Buy

50 Things You Never Have to Buy

A few months ago, I posted 10 items we no longer buy and have had a resounding response. Well, they were actually 20 items, since the original list of 10 came from Suburban Pioneers. I’ve decided to up the ante and compile a list of 50 items you could cross off your shopping list. I’ll start at 50 and work my way down to the first 10 listed by Suburban Pioneers.

Here goes:

50) Bottled Water: Let’s just not ever buy bottled water unless we absolutely have to. Ok? With a little forethought, there’s no need to buy water packaged in plastic.

Bottled Water for Sale

49) Air:  Who buys air? Apparently the air is so bad in Beijing, the Chinese do.

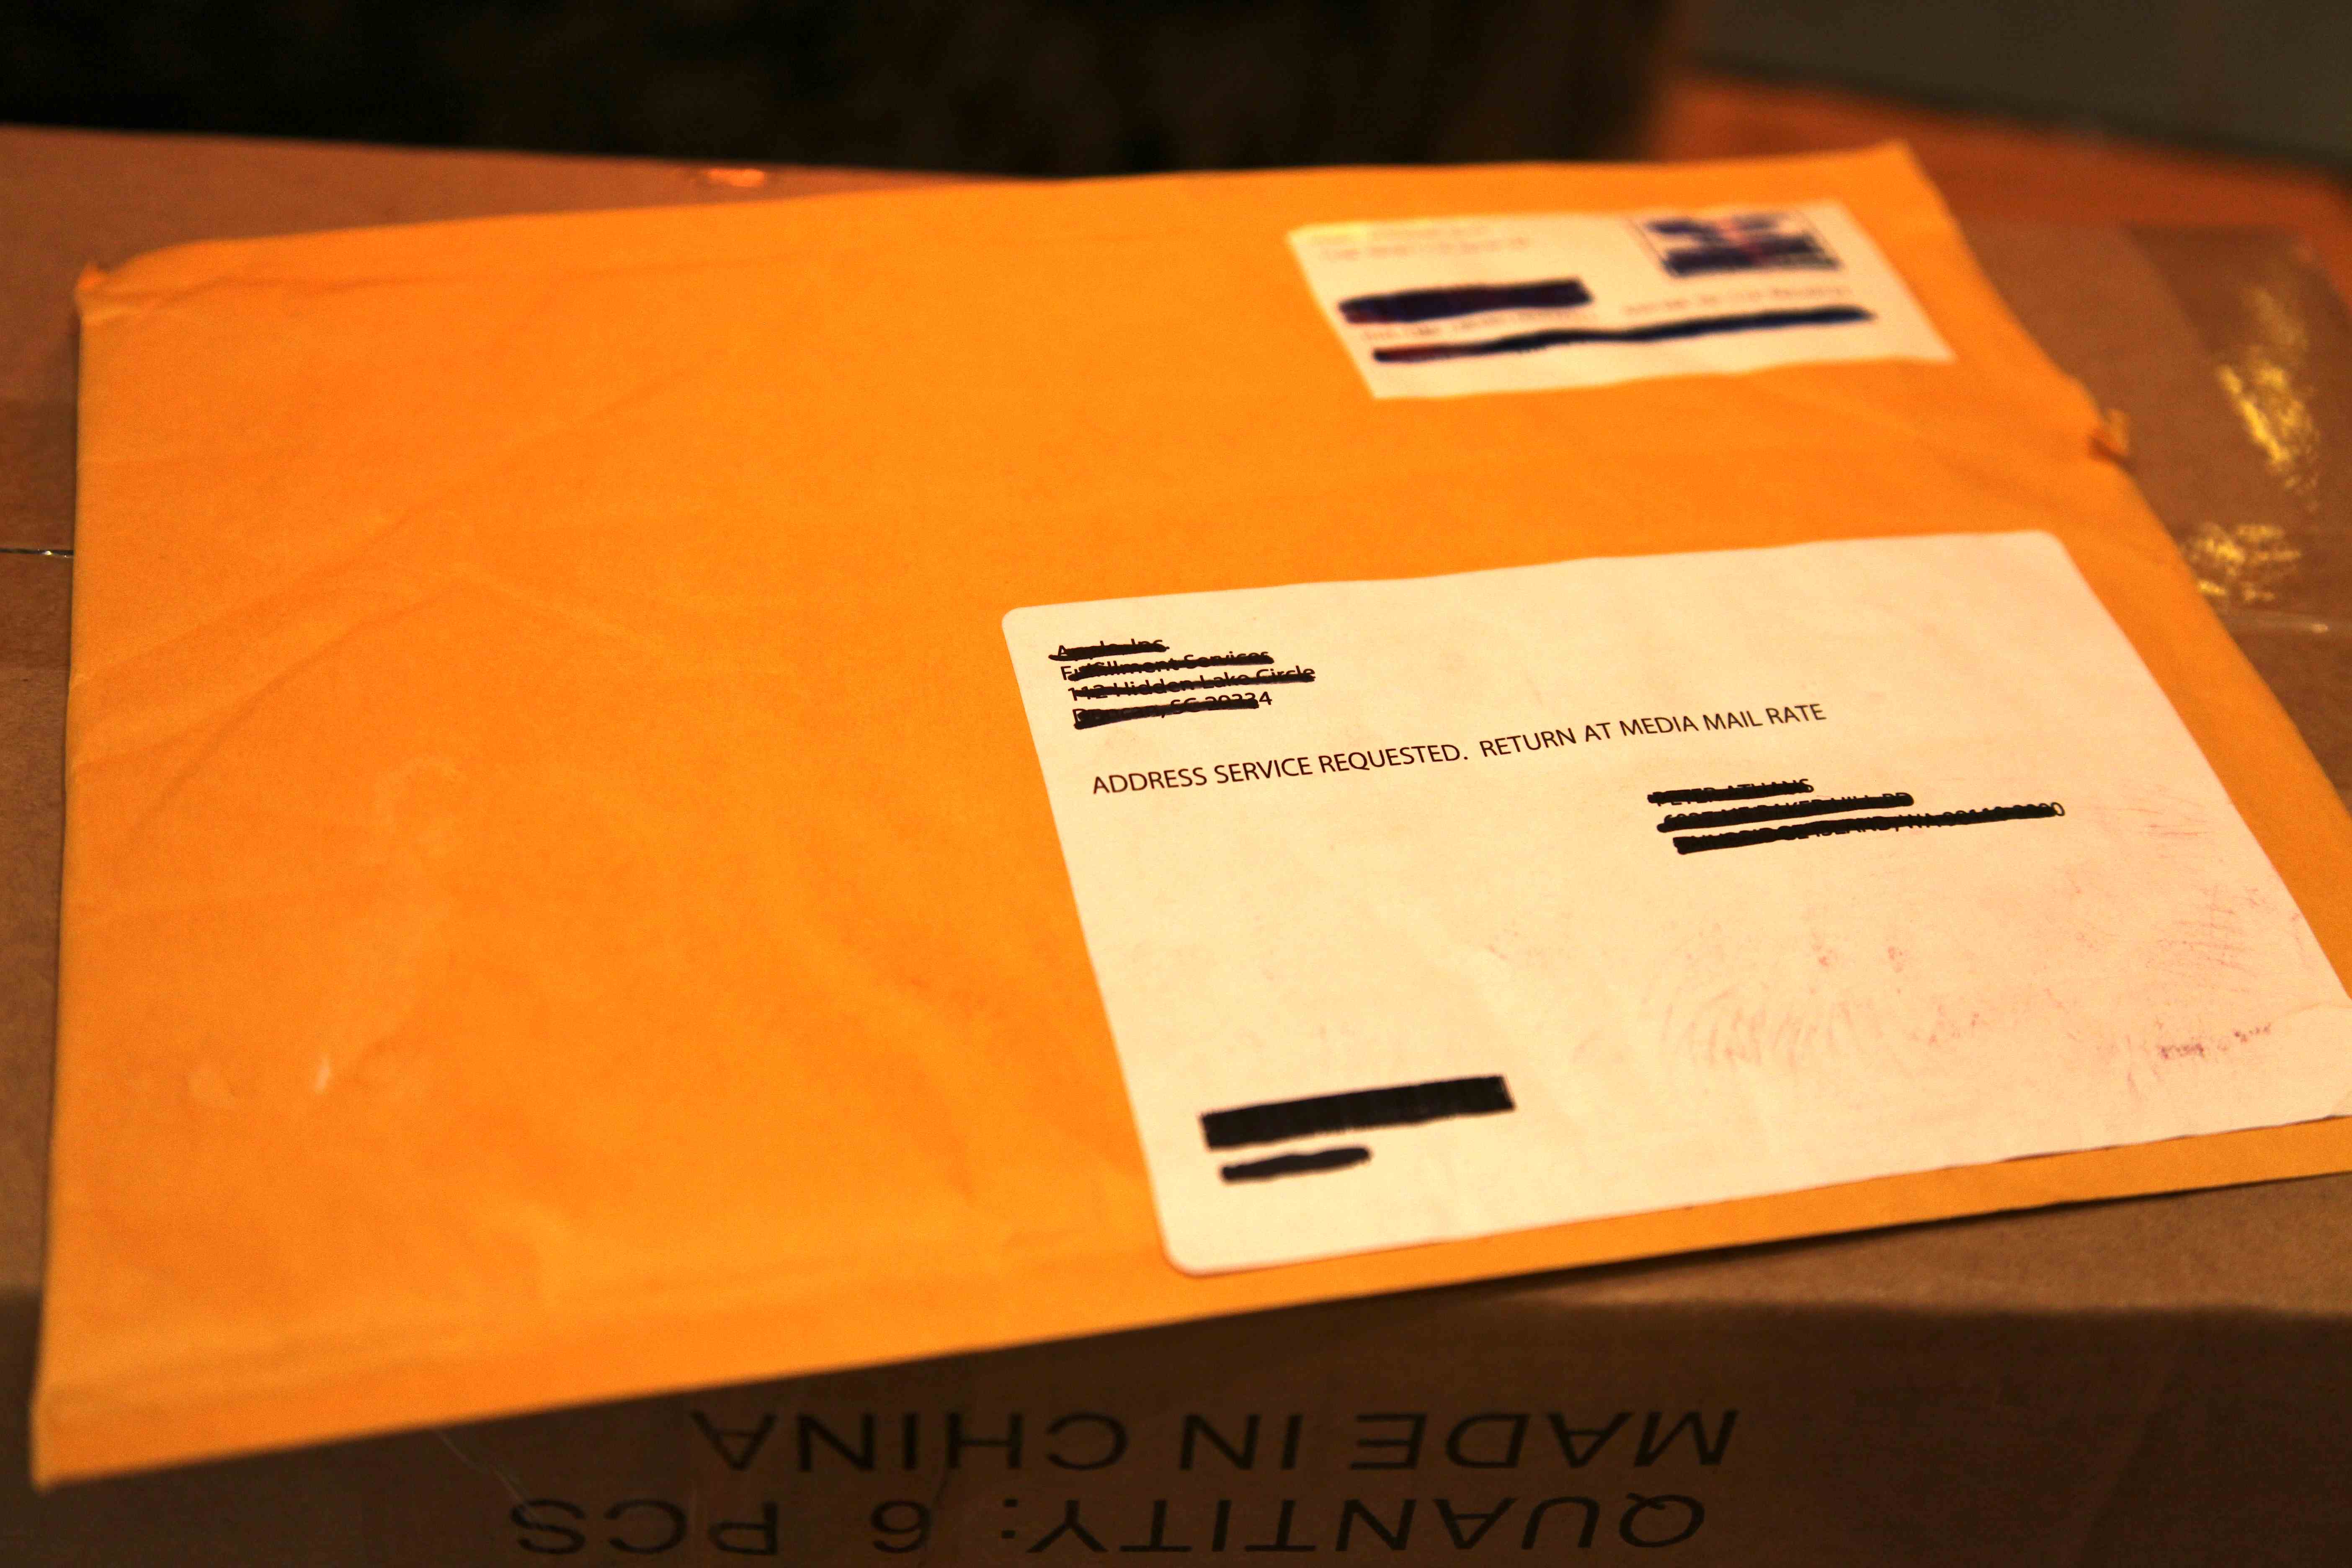
48) Note paper: Notes can be written down on any scrap paper. We write notes on the backside of letters with only one side printed, that come in the mail: envelopes, anything with room for a few paragraphs, a list, or some doodles.

47) Wrapping Paper: There are so many wonderful alternatives to wrapping paper, including cloth, paper bags, your children’s artwork, and chip bags. We have a stash of reusable cloth bags that I make each year to use as gift bags. We save wrapping paper, too, and reuse it and reuse it and…

Chip Bag Gift Bag

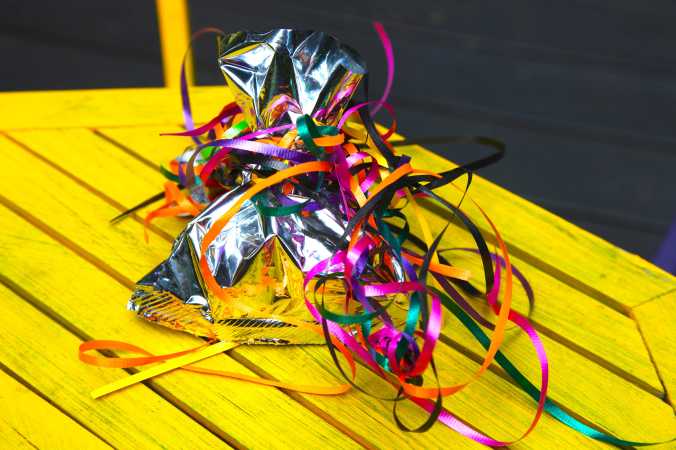
Chip bag turned gift bag.

46) Fly Paper: We’ve started making our own sweet fly paper and it works most of the time..

Hanging out to dry. Photo © Liesl Clark

45) Pot Scrubbers: Crumpled up aluminum foil works. Really. Don’t laugh. It totally works.

44) Planters: Almost anything can be converted into a planter — you just have to use your imagination. If it can hold anything, it can be a planter. I’ve seen bras and toilets as planters, bike helmets, and baby shoes. Here are 5 planters that I photographed while in Nepal.

43) Trellises: As above, trellises are a garden feature that can include whimsical reuse. Here are 25 beautiful trellises you can make from your trash.

42) Chicken Bedding: We use cut grass, dried leaves, roadside grass and — our favorite — shredded paper.

Shredded Paper Bedding Photo © Liesl Clark

41) Yogurt Maker: Skip the yogurt maker and make your own in glass jars. It’s easy.

img_1601-photo-c2a9-liesl-clark

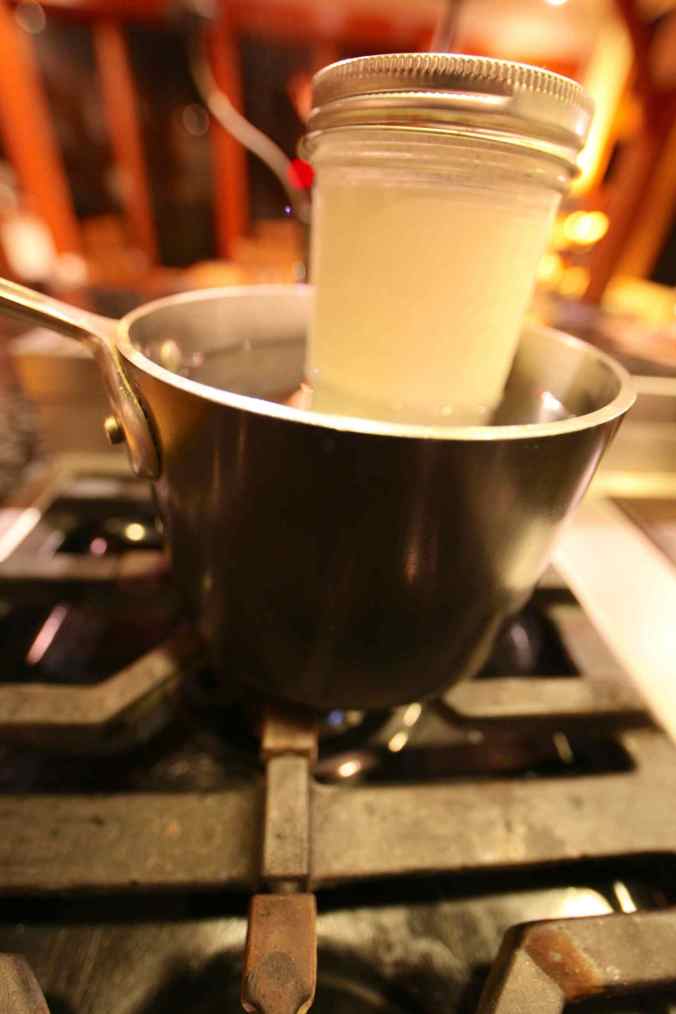
Off-The-Grid Yogurt Over The Pilot Light ©Liesl Clark

40) Window Washing Liquid: Vinegar and water works perfectly, along with newspaper instead of microfiber rags or paper towels.

No-Smudge Newspaper Method. Photo © Liesl Clark

39) Laundry Detergent: Try this DIY recipe and save some money.

38) Dish soap: Here’s a DIY Dish Soap recipe that’ll surprise you.

37) Salad Dressings: Remember simple balsamic and olive oil dressings? Just make your own delicious dressings in a jar. They get better with age and will give you no excuse for not eating your greens. Try our favorite recipe and you won’t be disappointed.

Adding Vinegar to Taste is Best. Photo © Liesl Clark

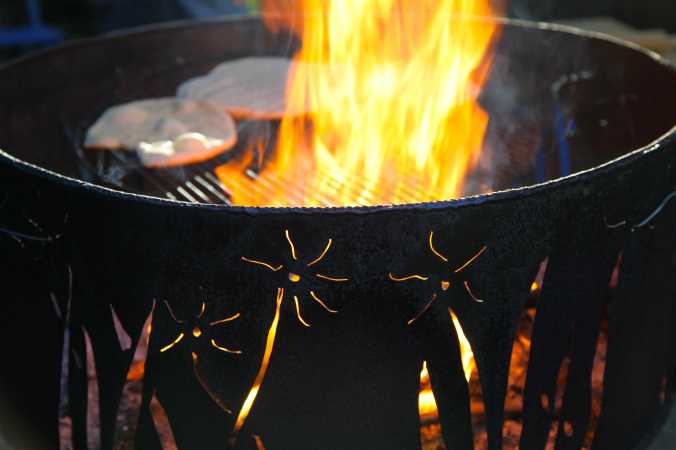
36) Fire Starters: These are so easy to make and they make excellent gifts.

35) Balloons: If you visit Balloons Blow on the Web, you’ll understand why you never want to buy them again. And as an alternative, try a pretty no-sew bunting.

34) Saran Wrap: We never use plastic food wrap any more, now that there’s the ultimate reusable alternative.

33) Gift Tags: We’ve been known, come Christmas, to repurpose last year’s cards as gift tags. You can do the same with all the pretty cards you receive throughout the year — turn them into tags to add to your gifts.

32) Padded Envelopes: We receive so many of these throughout the year, and reuse them of course, that we even give away in our local Buy Nothing group a box or 2 to other local businesses that can reuse them.

Don't Buy New! Reuse Your Padded Envelopes.

31) Christmas Ornaments: Ornaments are one of the sweetest items to make, as they’re treasured year after year. It’s a family tradition.

Click Through For Trash Backwards Trash to Treasure Ornament Roundup in our app!

30) All-Purpose Cleaner: Orange peels and vinegar will style you with an all-purpose cleaner you’ll love.

DIY All-Purpose Household Cleaner

29) Fruit Vinegar: Fruit scrap vinegar is one of the DIY recipes that’s really changed my buying habits. I make a better apple cider vinegar, red wine vinegar, and blackberry vinegar than I can buy in the store.

Vinegars Photo © Liesl Clark

28) Potatoes, Arugula: If you’re a gardener, you’ll understand this. When you inadvertently leave a potato or two in your garden, you end up with more next year. Same goes for arugula which always goes to seed in our garden. We never have to replant it. So we simply don’t buy it.

27) Garlic Crusher: In a pinch, use a wide knife to whack at your garlic cloves. Or, go caveman-style as I do and find a great stone for crushing.

Garlic Crushing Pestle.jpg Photo © Liesl Clark

26) Furniture/Floor protectors: So many items can be used to protect your floors from the scratching legs of your furniture. Flip flops are one among many.

25) Silica Gel: We get a lot of silica gel through products that are sent to my husband for his work and then give it away. Silica gel has so many uses! If you need it, just ask on your Buy Nothing group and you’ll likely find plenty.

Silica Gel, Photo by Liesl Clark

24) Beach Toys: So many beach toys are washed up on our beaches, obviously left behind by others, I’d love to see people simply stop buying them. There are great alternatives to buying these redundant plastic items.

Metal beach toys from the thrift shop, photo by Rebecca Rockefeller

23) String: We rarely buy string anymore, because we aren’t ashamed to say we salvage it from all sorts of items, like our chicken feed sacks.

22) Doorstops: Get creative with your doorstops and you’ll find joy in refraining to buy one.

Boot Doorstop © Rebecca Rockefeller

21) Easter Egg Dye: We discovered a great reuse for an Easter egg dye that we’ll definitely use again — magic markers! Whether they’re used up or not, soaking them in water for a while doesn’t hurt them one bit.

Use your dried up Non-Toxic Markers for Easter Egg Dye

20) Paper towels: Um, use cloth ones.

A few good rags in a basket = alternative to paper towels. Photo © Liesl Clark

19) Hair ties: Look in every parking lot and on any sidewalk and you’re bound to find a hair tie or 2. I mean it, they’re everywhere. I find them on trails in the woods, too.

Hair Ties and Hair Clips Recovered From the Parking Lots and Sidewalks of the World. Just wash them. Photo © LIesl Clark

18) Pens: As above, look in every parking lot and on the side walks. Pens are everywhere.

Pens Recovered on Puget Sound Beaches

17) Ribbons: Simply look on every shoreline and ribbon can be found there.

Ribbon Found on Our Beaches (including the spool), Photo © Liesl Clark

Ribbon Found on Our Beaches (including the spool), Photo © Liesl Clark

16) Styrofoam Packing Peanuts or bubble wrap:  (Just ask for it on your Buy Nothing group.)

15) Ziploc bags: Wash them.

Gaiam Bag Dryer, Photo © Liesl Clark

Gaiam Bag Dryer, Photo © Liesl Clark

14) Plastic children’s toys: Just ask any parent for them, they’ll gladly give you a box or 3.

13) Books: Of course, I do support buying books from your favorite author, but for many of the books you’ll need throughout the year, use your library!

12) Plastic straws: Plastic straws are a scourge upon the land and water. Use your lips, or find a glass, bamboo, or metal alternative.

plastic straws recovered from Point No Point and Schel-Chelb Estuary, WA, photo by Liesl Clark

11) Cigarette Lighters: Plastic cigarette lighters replace matches way too often. We still collect cool looking matchbooks from bars and restaurants.

Lighters Recovered from Puget Sound Beaches

Lighters Recovered from Puget Sound Beaches

(For these last 10, be sure to visit Suburban Pioneers for their full post)

10) Post-Its

9) Plastic Funnels

8) Microwavable Neck Pillow

7) Pet Fur Remover (Brush or Stone)

6) Travel Toiletry Containers

5) Rubber Bands

4) Reusable Grocery Bags

3) Pet Poo Bags

2) Cleaning Rags

1) Plastic Leftovers Containers

What can you add to our list?  Enjoy your frugal living!

Doll House Haunted House

It was a dark and stormy night…(yes, we get plenty of these in the Pacific Northwest) and a couple of innovative kids created a mini haunted house from items they found in boxes and toy collections. They wanted to create something to play with but also to put on display outside the front door, without purchasing anything new. This haunted doll house is now a treasure, simply because they transformed a few everyday items and found some seasonal ones to add to the ambiance. The key is: Buy nothing and craft a cool Halloween decoration.

Here’s how this easy rainy-day project can quickly come to fruition for you, too:

1) A dollhouse will need to be your centerpiece.

2) Then, a glow-stick-style flashlight that glows a flourescent green will need to be procured from a closet. Or, use a regular flashlight and use some green plastic sheeting as a gel for your light.

3) Tiny plastic bugs must be curated out of your vast collection of creepy crawlies.

4) Next comes a search for white yarn scraps you might have thrown in the waste basket but thought better of. These will serve as cob webbing.

5) And finally, any tiny otherwise useless Halloween bits and bobs you’ve accumulated from previous years will make your mini haunted house’s yard art especially intimidating. If you don’t have anything, just ask for them on your local Buy Nothing group.

6) Put on some scary mood music (Pandora can be great for that), and let the mini doll-style Halloween fun begin.

What no-buy, no-waste Halloween ideas have you crafted up?

10 DIY Fire Pits

The allure of the fire pit. Photo © Liesl Clark

The allure of the fire pit. Photo © Liesl Clark

We love outdoor “rooms” with fire pits. They extend your outdoor time by weeks. Seems the latest craze is repurposing metal things into fire pits. Here’s a list of some of the most innovative ones we could find:

1) Metal Wheelbarrow Fire Pit: If you’ve got a metal one that’s broken down, try to turn it into a fire pit. It’ll look cool in your back yard.

2) Washing Machine Drum Fire Pit: Our app users love this. Next time someone you know is getting rid of their washing machine, ask for the drum inside. They make beautiful fire pits.

3) Paver Brick Fire Pit: Brick and concrete pavers make easy fire pit insulation material. There are many tutorials to find on the web for these homemade fire rings.

4) Wash Pail Fire Pit: A metal wash pail can work as a fire pit. Just be sure that if it’s galvanized you give plenty of time for the chemicals on the metal to burn off.

5) In-Ground Fire Pit: This is a classic and easy fire pit to make at home.

6) Old Grill Fire Pit. Wait for an old grill to come up on your Buy Nothing group for this fire pit option.

7) Shopping Cart Fire Pit: My favorite, with built-in log storage rack.

8) Industrial Wire Waste Fire Bowls: You can always try your hand a making fire bowls like these.

9) Tractor Rim Fire Ring: If you have access to a tractor rim, it makes a great fire ring.

10) Castiron Bathtub Fire Pit: Maybe you have an old tub hanging about?

Low Impact Trekking

By Mr. Everest

A Journey Beneath Dhaulagiri. Photo © Liesl Clark

A Journey Beneath Dhaulagiri. Photo © Liesl Clark

In most parts of the world, the higher we journey, the more rarified the air and pristine the environment. But in Nepal, that truth is changing. Twenty thousand visitors per year travel to the Mount Everest region, and thousands climb the 20,000 foot trekking peaks to catch glimpses of the world’s highest mountains. It’s imperative that we strive to leave as little impact as possible, and take steps to reverse some of the impacts left behind by others.

IMG_3030

This summer, we’ll be on our 13th journey through Nepal with our children, and feel fortunate to be able to share our work in the Himalayas with them, continuing the friendships they’ve established after 12 consecutive years of coming to this rugged country every spring or summer.  Exploring the outdoors brings joy to my 10 and 13 year old daughter and son and is integral to who they are.

Our children go on expeditions with us in Nepal.

Our children go on expeditions with us in Nepal. © Liesl Clark

My wife, Liesl, and I strive to pass on to them the 7 principles of leave no trace, established by the Center for Outdoor Ethics. I’ve added my personal insights and recommendations to the basic principles that you might find useful in planning for your next trip into the wilderness, whether alone or with your family and friends. The less impact we have on the environment, indeed even in our own backyards, the more readily our unique ecosystems and all the flora and fauna therein can thrive.

1) Planning your trip ahead of time and preparing is the first step. Take extra care to gain cultural knowledge of the behavior and the accepted norms of the country you’re travelling in. Learn about the environment you’re going into, whether it’s a pristine alpine wilderness or a heavily used high desert. Memorize which habitats are the most at risk and stay clear of them. Knowing this can make a difference in the choices you make for camping and recreating. Establish contingencies and have a plan in place for all contingencies.

Spinning prayer wheels in Kagbeni. © Liesl Clark

Spinning prayer wheels in Kagbeni. © Liesl Clark

Here are a few steps you’ll need to take in the planning phase that will greatly reduce your impact:

a) Get rid of all excessive packing of items you’re bringing with you. Remove the packaging from batteries, for example so you don’t bring that unnecessary paper and plastic (called blister packs that are not recyclable) with you.

b) Procure the right medicines and medical supplies for your trip. Remove the unnecessary packaging.

c) Bring maps and navigation materials like a compass or GPS.

IMG_4248

d) Set up the necessary insurance you’ll need in the event of a medical evacuation or helicopter rescue.

e) Where will your water sources come from? Please avoid plastic bottled water and plan to bring your own reusable water bottle to be refilled. Bring a Steripen for ultraviolet water purification, a water filter, or iodine tablets to treat your water.

2) Travel and camp on durable surfaces. For most trekking, you don’t need big heavy boots. You can travel in lighter trail shoes which don’t impact the terrain as much, causing erosion. Avoid going over people’s stone walls or walking through gardens. If you open gates, close them behind you. The point here is that you’re leaving no trace that you passed by. This is one instance where you don’t want to leave a big impression behind.

Sometimes travelling by foot is more reliable than by jeep. This jeep lost its fuel tank en route up the Kali Gandaki River. © Liesl Clark

Sometimes travelling by foot is more reliable than by jeep. This jeep lost its fuel tank en route up the Kali Gandaki River. © Liesl Clark

3) Have a plan for dealing with your waste:

a) If you’re in a National Park, use blue bags or something similar to pack out your own human waste. If you’re trekking, use outhouses. Otherwise, carry a small trowel or shovel and dig catholes. Carry your own toilet paper and burn it.

b) Carry out all plastics from your bars and all packaging from your food. A compression sack can do the trick to keep the waste in one place in your pack and consolidated.

c) Carry out the batteries from cameras and other equipment. These should be disposed of responsibly. Either take them home with you if you’re travelling in a country that doesn’t recycle them, or research where your nearest recycling facility is at the end of your trip. We stockpile all our batteries on our expeditions and bring them home.

d) Water: This might be the single most important step you take. Bringing your own reusable bottle saves the environment from hundreds of plastic bottles potentially littering the landscape. If others see you using a Steripen, a filter, or water tablets, they’ll see how easy an option it is. You can always ask for boiled water, but this water requires fuel to boil contaminants. A Steripen or hand-filter will mean you can get water wherever you want and it’ll be cold. It will also be free! I use a Steripen that has a solar charger attached to it so I’m not reliant on power or batteries to use it. Learn where the potable water stations are so you can support these efforts to stop people from buying bottled water.

Using a Steripen means we can have fresh cold water anywhere. © Liesl Clark

Using a Steripen means we can have fresh cold water anywhere. © Liesl Clark

e) When you’re on your way out, pay it forward by removing any waste you see in the environment. Especially if you come across potentially toxic waste like batteries or CFL light bulbs. These shouldn’t be anywhere outside, helping to remove these things and disposing of them safely, helps zero-offset your impact.

Removing a battery from a village water source. © Liesl Clark

Removing a battery from a village water source. © Liesl Clark

4) If you’re cooking on your own, be sure that you know where you should and shouldn’t have fires. Use local fuel that you can find easily and use those in substitution of wood fires.

IMG_1708

a) If you’re trekking where there are villages nearby, eating locally is a great way to reduce waste. The more local produce and indigenous food products you can eat from nearby fields and kitchens the less imported foods are needed to support your journey. We eat in homes and tea shops wherever we can in Nepal, where you’ll always find dhal bhat a Nepali dish of rice and lentils along with side dishes of locally grown vegetables.

Local Fresh Goatsmilk Yogurt in Kolapani. © Liesl Clark

Local Fresh Goatsmilk Yogurt in Kolapani. © Liesl Clark

b) Save your organic waste rather than throwing it outdoors to decompose. In some environments like the desert, even eggshells take an inordinate amount of time to break down. If you’re passing through villages, local farmers will be happy to take your stockpiled organics to feed to their stock animals (chickens, cows, yaks) or put in their compost piles.

5) Leave the natural environment as it is. Refrain from picking flowers or taking mementos from the natural world. Take only photos, leave only footprints.

IMG_3324

6) Be respectful of wildlife and don’t disturb any birdlife, mammals or any animals you come across.

7) Be respectful of other travellers using the same environment. The same goes for locals. Try to learn some of their language so you can greet them and ask a question. For starters, learning how to say hello, goodbye (often the same word), thank you, good morning, and counting to three will get you far. And, as in step #1, be aware of cultural norms.

9-hour day in jeep will put any 7-year-old to sleep. © Liesl Clark

9-hour day in jeep will put any 7-year-old to sleep. © Liesl Clark

Most of all, be in the moment and enjoy the journey, and where it takes your mind and heart.

BT0C5138

10 Things You Never Need to Buy

We got our inspiration for this post by reading Suburban Pioneers’ list of 10 common products you never need to buy, so we thought we’d spread the wealth and add to their list. So, this is really about 20 things you never have to buy. Do read their list first.

If we all compiled lists of 10 “Never Buy” items complete with explanation, we’d live in a utopian circular economy, my dream economy.  After reading our list, then compile your own and send it along in the comments below. I actually already have a list of 100 items, but I’m going to work up to it, so I don’t overwhelm you.

So, here goes: 10 common items you should never have to buy —

1) Paper towels (Um, use cloth ones.)

2) Hair ties (look in every parking lot and side walk. I’m serious.)

Hair Ties and Hair Clips Recovered From the Parking Lots and Sidewalks of the World. Just wash them. Photo © LIesl Clark

3) Pens (Look in every parking lot and side walk. I can’t tell you how many hundreds of pens I’ve found in public places.)

Pens Recovered on Puget Sound Beaches

4) Ribbons (Look on every shoreline.)

Ribbon Found on Our Beaches (including the spool), Photo © Liesl Clark

5) Styrofoam Packing Peanuts or bubble wrap (just ask on your local Buy Nothing group.)

6) Ziploc bags (wash them.)

Gaiam Bag Dryer, Photo © Liesl Clark

7) Plastic children’s toys (just ask any parent for them, they’ll gladly give you a box or 3.)

These Plastic Toys Were Being Thrown Away. Photo © Rebecca Rockefeller

Oh, and if the parents in your neighborhood want to hang on to all that plastic, just make your own toys. Here are a few (hundred) ideas for toys you can make from stuff in your home to get you started:

Click through for innovative ideas for making your own toys or reusing them at Trash Backwards

8) Books (use your library!)

9) Plastic straws (use your lips.)

plastic straws recovered from Point No Point and Schel-Chelb Estuary, WA, photo by Liesl Clark

10) Plastic cigarette lighters (use matches, especially from matchbooks you collect from bars and restaurants.)

Lighters Recovered from Puget Sound Beaches

OK, so now it’s your turn. What’s on your list?

Reducing Waste on Earth Day One School at a Time

Schools love Earth Day because it’s a kid-friendly time of year to educate and celebrate Mother Earth while taking stock on how we’re measuring up with our waste footprint. A couple years ago, we took the opportunity to audit 2 schools’ waste on Earth Day week, and the impact of the exercise has huge potential. But it’s up to the schools themselves to learn from the experience and find easy ways to change their collective behavior.

This article walks you through an informal audit that can take as little as 1 hour to conduct, if you have a few hands to help. We’ve also cut a short video to inspire you to do your own waste audit in the classroom with the kids. It’s hilarious, because it involves our trash, and enlightening at the same time.

1) Weigh the trash that the school is planning to throw away. In this case, we had 2 weeks’ worth of one school’s trash. There are approximately 45 students and 6 staff in the school.

A Carload of Trash = 2 Weeks' Worth of One School's Waste.

Total Trash Headed to the Landfill = 23.31 lbs.

2) Start sorting! Can anything be diverted? Start with recyclables. This school recycles, but there’s always room for improvement. We found a lot of recyclable paper and plastic in the trash.

We sorted 2 bags'-worth of recyclables out of the landfill-bound trash.

Total Recyclables Diverted from the Landfill: 9.24 lbs.

3) Are there any organics, meaning compostable materials in the trash? Remove them from the trash, pile them up, and weigh them. This school has a Bokashi composter, but there’s always room for improvement.

Compostables Found in the Trash.

Compostable matter is a resource! Put it back in the earth by composting it or sending it to the worm farm.

Throwing away a dried-up plant and soil? We put the soil and plant in the compost and the 4" pot can be reused.

Total Compostables Diverted from the Landfill: 6.27 lbs.

4) Are there any reusable items in the trash? Separate them out and weigh them. A lot of pencils, some clothing, and bookmarks were recovered from the trash for donation to an organization that needs these items.

These pencils can be reused. Photo © Liesl Clark

Total reusable items: 5.76 lbs.

5) Are there any polyethylene plastic bags in the trash? Separate them out and weigh them. We found 45 totally clean trash bags in the waste.

Mount Polyethylene. Photo © Liesl Clark

Total plastic bags: 1.16 lbs.

6) Are there other specialty recycling items in the trash, like scrap metal, batteries, printer cartridges, and styrofoam peanuts? They don’t need to go in the trash.

Packing Peanuts Can Be Recycled at UPS or Freecycled.

Total speciality recycling items: 0.52 lbs.

7) Are any of the compostable items good for chickens to eat? Separate them from the trash and weigh them.

Chicken Vittles, Courtesy of School Lunch.

Total chicken bucket items: 0.36 lbs.

8) Now re-weigh your trash headed to the landfill.

Final Landfill Tally? 3.76 lbs.

Total Trash Headed to Landfill Post-Sort: 3.76 lbs.

That’s a diversion of 19.55 lbs. or 2 and 3/4 trash bins-full. We pay $4.00 per trash can of waste at our transfer station. This waste audit saved the school (or the school’s volunteer who takes the trash to the landfill) $11.00. In one year, that’s a savings of $286.00. For a small school, that’s a significant savings!

How can we keep our school waste down in the future? Here are some simple recommendations that any school can follow to reduce their landfill waste:

Recommendations

1) If your school doesn’t have a composting program in place, consider starting one or a worm bin. Failing that, a parent volunteer who has a farm or garden will happily take your organic waste away for their own compost. See your organics as a resource!

2) Place a small recycle and compost bin next to every landfill trash bin in your school. This way you give everyone a CHOICE.

3) Clean and wet paper towels can be recycled. Place a recycle bin in the bathrooms for this along with a sign reminding people that the bin is for their clean and wet paper towels. Or better yet, lose the paper towels and switch to cloth ones. This school did.

4) Set up specialty recycling containers where appropriate. For example, a plastic bag recycling spot should go in every classroom and in the lunchroom and kitchen. A school volunteer can come and pick up the plastic bags once a week and take them to the grocery store for recycling. I’ve happily done it for our children’s schools for years.

Do the same for other items such as batteries and printer cartridges. These items should never be put into the landfill. Your community will have a recycling location for them, or look “batteries” or “printer cartridges” up in our Trash Backwards app. Staples takes printer cartridges worldwide and most municipal recycling programs have a safe disposal location for batteries.

5) If your school has a pencil sharpening area, place a can near the sharpener for collecting shredded pencil bits for the compost. Also place a donation can for the small pencils that your teacher might want you to throw away. Children at our libraries in Nepal would love those pencils, or let the students take them home for their homework. The image below, shows a yellow pencil stub my son found in a schoolyard outside one of our Magic Yeti Children’s Libraries in Nepal, lined up with the pencils we sorted out of a school’s waste yesterday:

Yellow pencil found in a schoolyard in Nepal vs. the pencils (and shapeners) discarded in a 2-week period by one US school.

The pencils can go to good use in the hands of kids who have no pencils in Nepal.

These discarded colored pencils will bring joy to children living at 14,000 feet in the rainshadow of the Himalaya. Trash. Backwards.

6) Each classroom could have a reuse bin for students to throw items (like the discarded pencils) that others could take for reuse or donation. Some students might be able to use a plastic container that might otherwise be thrown away, for example.

7) Set up a chicken bucket in the food-eating areas. You’ll likely have a family or 2 that have chickens. Getting the students involved in seeing their food waste as a resource for another animal is a good thing. The families can switch off chicken bucket pickup each week. We use a galvanized bucket decorated by our children for our chickens.

6) Be aware of what’s headed to the landfill monthly and set community goals to reduce even further. If your cleaning service doesn’t empty the trash bags but simply removes a bag no matter how much waste is in it and replaces it with another, you might recommend they pour the trash from all your waste bins into a single bag, to conserve plastic trash bags.

This trash bag only had a single dry paper towel in it.

If they use single-use swiffer dusters, perhaps invest in a reusable micro-fiber swiffer duster.

If your school laminates a lot. Consider going lamination-free. Laminate is a non-recyclable plastic, is costly, and isn’t the most healthy material for children to be handling on a daily basis. Using reusable plastic sleeves might be a more sustainable option.

8) Educate parents and students about food packaging used in school lunches. Plastic snack packaging was the single-most thrown-out item in this school’s landfill waste. Encouraging students and staff to find plastic-free options will make a large dent in your overall waste bill. Students, when made aware that plastic is forever, often prefer plastic-free lunches. A popular option to suggest is a “pack it in, pack it out” policy for school lunches, putting the waste onus on parents and students, not the school. Parents can then see what their kids are truly eating, or not, and modify their portions and lunch choices accordingly, saving money and waste.

Single Most Common Item in Landfill Trash = Snack Wrappers.

Have you found this information useful? Share it with others, especially your school!

Mermaid’s Tears For Earth Day

By Finn Clark when he was age 9 (With Some Help from his Mom)

Last Friday was Earth Day at our school, a Montessori school called Voyager, and we created art from plastic my family found on the beaches of Bainbridge Island and the Olympic Peninsula. For the past 2-3 months, we have collected plastics that we find on our shorelines and in parking lots and watersheds, stream beds and estuaries headed toward the sea.

For our spring break, we camped at Second Beach, in Olympic National Park, and were amazed at the amount of plastic washing ashore from the Pacific Ocean’s waves. My little sister and I collected plastic for about an hour and hardly made a dent in the plastics spread across the sand.

When we woke up in the morning little bits of plastic seemed to sparkle along the high tide line, thousands of tiny shards and pieces worn and broken down by the action of the waves. Plastic can’t decompose, it just gets smaller and smaller until it becomes a thick soup in our waters. But the most disturbing pieces of plastic are miniscule nurdles, little round white discs, that are the raw plastics used to make anything that is plastic. One scientist went to hundreds of beaches around the world and found nurdles on every beach he studied, even on beaches in countries where plastics aren’t manufactured. Some people call them “mermaids’ tears,” and I think that’s a good name because they make me sad, too.

They’re toxic, sadly, as they act like a sponge, absorbing persistant organic pollutants (POPs) like DDT and PCB that are afloat in our waters. The yellower the nurdle, the more toxic it is.

We brought the larger chunks of plastic to our school for Earth Day and made 4 panels of art, following the rainbow spectrum of colors, to show people that every color imaginable is found on our favorite beach. Now that art will be hung at our school to remind us that maybe we should rethink the plastics we use everyday and find better alternatives that will biodegrade or break back down naturally into the environment.

My mom and her good friend, Rebecca, are trying to provide solutions to this problem of plastic in our environment, one piece at a time. That’s what a whole website, called Trash Backwards that Rebecca and my mom created is about. The most common things we find on the beaches, the straws, pens, plastic bottle caps, toothbrushes, and fireworks are a few of the items they’re researching and trying to find non-plastic alternatives for us all to use.

What common items have you found on your beach, in your parking lots, or sidewalks? Tell us, list them below, even a single word will do, and we’ll start researching non-plastic alternatives so we can live lives a little less plastic in the future.

Beachside Reuse

April is the month we visit Grammy on Anna Maria island in Florida. She lives in a sweet little house, one of the originals on the island, now surrounded by large 3-story condos. I feel like we’re in that story, The Little House, by Virginia Lee Burton, about the tiny house that stayed put and a big city was built right around it. This cottage is the epitome of “If it ain’t broke, don’t trash it.” It survives, a cottage-in-the-rough amidst million dollar resort-style rentals, hotels, and Grammy keeps it tidy, functional, and full of simple beachside reuses.

The Little Cottage in the Rough, Anna Maria Island. Photo © Liesl Clark

A low coffee table by the phone holds phone books (Grammy doesn’t use the internet — actually the table doesn’t hold phone books, but a sagging box does just under the coffee table.) But the floor isn’t level so the table wiggles when items are placed on it. Solution? Grammy placed shells under the legs of the table, just like carpenter’s shims, to shore up the legs and prevent any movement.

Shells For Shims. Beachside Reuse at its Best. Photo © Liesl Clark

A plastic soda bottle fish adorns her antique fishnet on the sunroom wall. This fish, spray painted pink on the inside, was simply cut so fins and a tail were articulated, a glue gun was used to seal the fins and tail, and glitter glue was used to create the effect of gills. Done! A cute sparkly pink fish for her household decorations.

Coke Bottle Sunfish © Liesl Clark

An ancient palm tree was cut down on the property years ago. Today the stump is used as a planter for succulents and cacti.

Trunk Planter For Beach Cacti. Photo © Liesl Clark

Shells hung along the wall of Grammy’s potting shed add texture and bright Florida light to any day. These would make interesting downspouts on a gutter.

Potting Shed Shell Adornment. Photo © Liesl Clark

And geraniums in a tree trunk that frames nearby boats inspires the gardeners in us all!

A hole in a trunk makes room for pretty geraniums. Photo © Liesl Clark

Fabric Scrap Tiny Tents For Little Hands

Our daughter has been sewing avidly since she was 6. She loves to design and sew her own doll clothes and to make little spaces for her toy animals out of fabric scraps. Here’s a great project for small hands and a fun sewing project for 2, using up fabric scraps and old trousers, too!

Step 1: Trace a perfect circle onto a stiff fabric like felt, fleece, or corduroy (we used some old corduroy pants of mine). The circle will determine how tall your tent will be. We cut ours about 6″ wide.

Step 2: Cut that circle in half and then trace it onto a pretty fabric of your choice which will be the outer fabric of your tent.

Step 3: Cut the half circle out of your pretty fabric.

Step 4: Pin the rounded edges of the half circles together, stiff fabric facing in on one side and nice fabric facing in on other.

Step 5: Sew the pinned rounded edge of the 2 half circles together.

Step 6: Turn the half circle right-side-out so the sewn edge is hidden. Fold it in half and then sew the remaining straight edges together as shown in the photo.

Step 7: Turn this right side out and you have a cute closed tipi/tent for little animals or people to live in (or a pointed hat for a doll!)

Step 8: A variation on this tent/tipi is to add a door: Simply leave a couple of inches of “flap” left open on the last straight edge and sew the flaps back about 2-3 cm so you have a tipi opening opening.

Looking for more ideas to use up your fabric scraps? Please visit our Trash Backwards app that has reuses for everything in your home!

Click Through for Fabric Scrap Reuses at Trash Backwards.