10 Toughest Steps to Reduce Your Plastic Footprint

If you’ve followed our guides to zero waste, which are simple ideas to get you thinking about reducing unnecessary plastics in your home environment, you’re doing really well! But you’ll likely still have plastics in your trash can every day, like I do. These are the toughest steps we take to get beyond our fear of being judged and push through the next level of plastic-free(dom) and even closer to zero waste:

1) Figure out what your biggest plastic vice is and find a plastic-free alternative. One of my family’s weaknesses is Amy’s frozen organic burritos. My children love them and they’re easy to heat up for school lunches. But we also love to eat burritos and enchiladas for dinner from delicious dried black beans that we slow cook and then assemble the burritos and enchiladas from scratch. Solution? Make an extra-large batch of burritos on burrito night and save them for school lunches. You can even freeze quite a few so you have your very own Amy’s-style yummies to keep the earthlings happy at school.

Amy's Burrito Packaging Isn't Recyclable. So, We Try To Make Our Own. Photo © Liesl Clark

If your vice is raw bars or granola bars and snack bars, find a baker near you who makes them and order them plastic-free. On Bainbridge Island, Rebecca makes Rawbecca Bars that are better than anything I’ve ever purchased in a store. She’ll make them for you in bulk, in many flavors, and totally plastic-free. We’ve ordered them in bulk to take on our expeditions in the Himalayas because they last over a month. Our local bakery also makes some unbelievably tasty peanut butter raw bars that I can order up waste-free.

We love crackers but can’t find our favorite varieties without plastic packaging. And our homemade crackers are better than any bought in a store. So, once in a while, we’ll make our own to help reduce our impact. And we’ll make enough for 2-3 days. They go fast.

Homemade Seed Crackers, Recipe at Slim-Shoppin. Photo © Liesl Clark


2) Stop buying plastic containers and come to love glass. I love glass containers of all sizes and can’t find anything that I can’t store in them.

Peek in my fridge and you'll find jars of all shapes and sizes: Patron bottle for flax seed oil, homemade yogurt in a large mason jar, homemade salad dressing in a jam jar and bulk yeast for our bread in another mason jar. Photo © Liesl Clark

3) Buy your cheese plastic-free. This might take some hutzpa on your part, but if you talk sweetly to your deli counter people, they’ll likely let you buy their bulk (often gourmet) cheese without any of their packaging. Just bring your own container and act confidently when you ask if they can just put their cheese it it. Smile, say “cheese.” Then, at home, store it in a beautiful glass cheese container. It stays fresher longer and looks delicious in there.

IMG_3147 Photo © Liesl Clark

We store our cheese in a large glass container, like our friends in France do. © Liesl Clark

4) Same goes for meat and fish. Buy it fresh, bring your own container, and store in glass.

5) Just say “no” to plastic clamshells. Clamshells? These are the polystyrene boxes that hold fresh berries and cherry tomatoes. Yes, it might mean you’ll have to say goodbye to these delicious food items until they’re in season and you can get them at your local farmer’s market. Refusing them sends a message to your grocer that you just won’t buy produce in that packaging. Better yet, take a letter to your grocery store’s customer service department and let them know that you, and a whole lot of other people in our community, are refusing to buy fresh produce in clamshells.

Clamshell Polystyrene Packaging Can't Be Recycled Where We Live. Photo © Liesl Clark

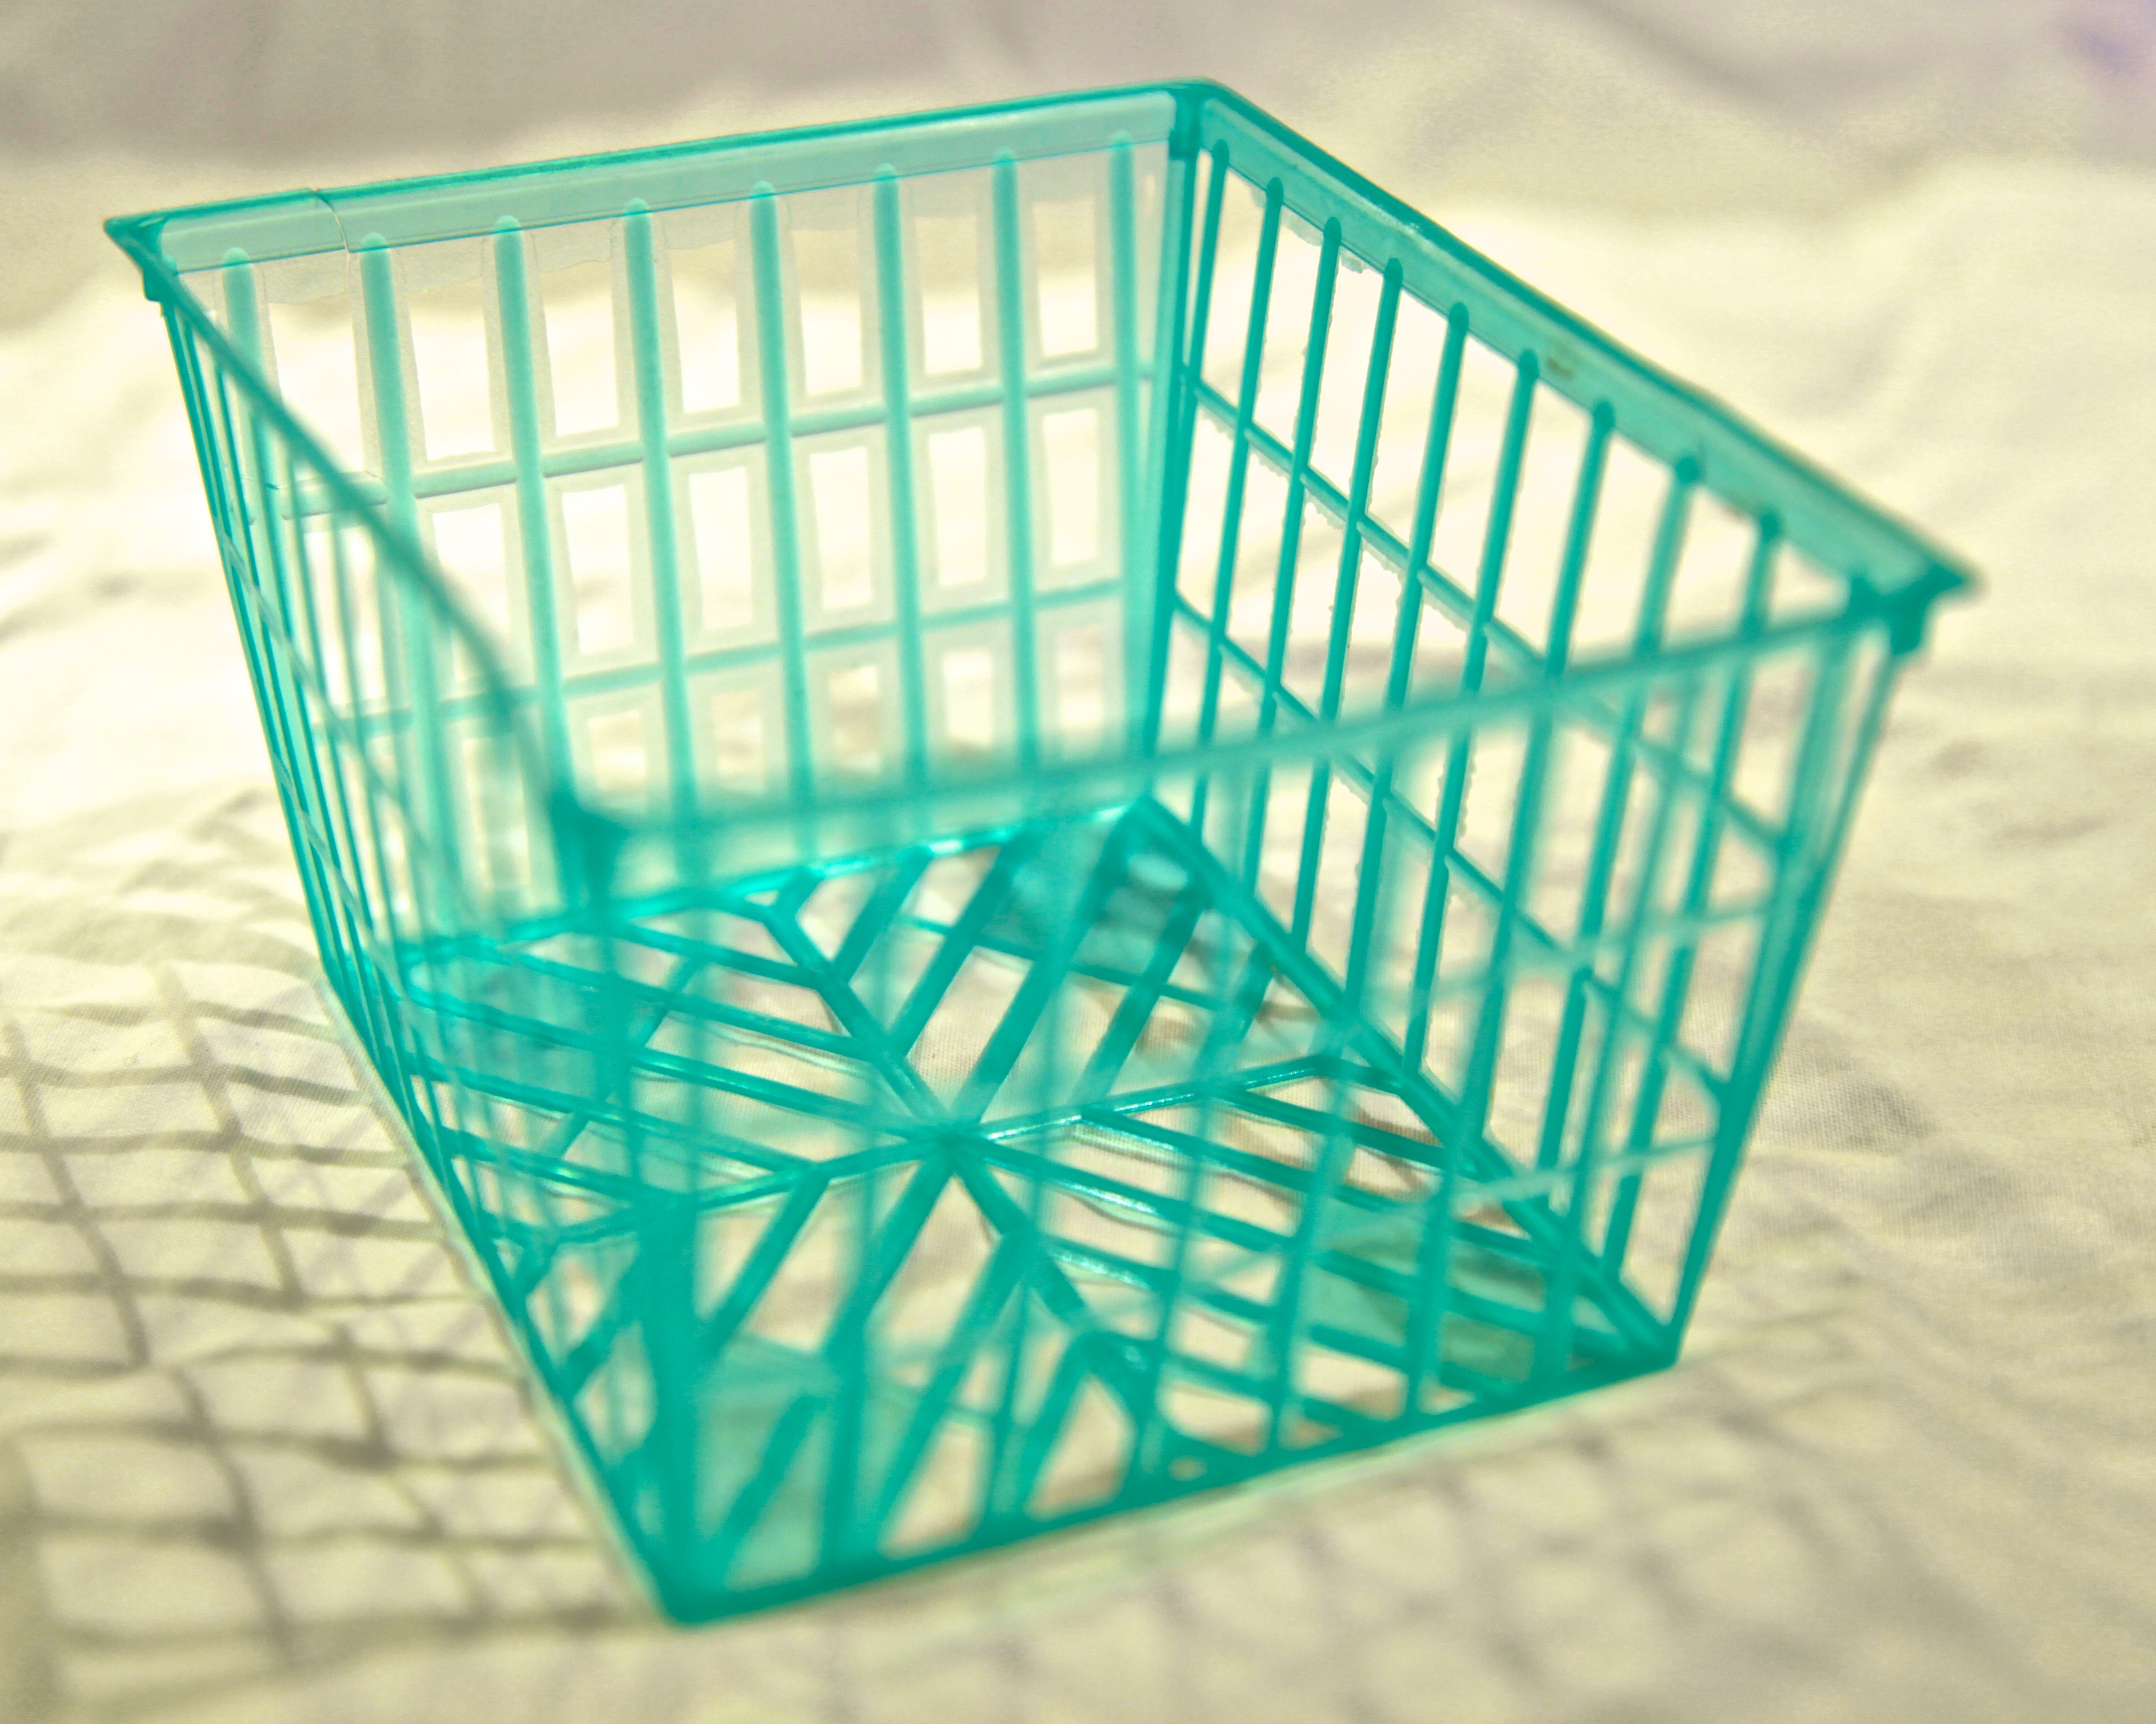
6) Say “no” to plastic mesh produce baskets (see above.) And use our letter to your grocer to do some good.

Plastic Mesh Produce Basket

7) Flowers don’t need to be wrapped in plastic for the journey home. First let your florist know you’ll carry them home sans plastic in your bag or basket, or your own two hands like you do at the farmer’s market or from your garden to your table.

Plastic-free flowers have less impact. Photo © Liesl Clark

8) Try a less plastic toothbrush. It’ll make you feel good. Some are so plastic-free they can be used as kindling when you’re done with them.

Toothbrushes Made Entirely of Bamboo are an Excellent Plastic-Free Alternative

9) Switch to homemade powder toothpaste. I’m still perfecting our recipe, but it’s basically baking soda, a few drops of stevia and a few drops of organic peppermint extract. The kids like it and we’ve reduced our toothpaste tube waste significantly.

DIY Zero Waste Toothpaste and Miswak Toothbrush Sticks, photo by Rebecca Rockefeller

10) Exert your buying power by choosing products that are entirely plastic-free. You’ll thank yourself later when your wood/metal/rubber/glass item is still functioning years later. I can attest to this for useful household items I’ve bought like pencil sharpeners, colanders, cheese graters (ones with plastic handles break), rakes, rubber spatulas (that’s why they call them rubber and the wooden handles are nicer to hold), soup ladles, straws (glass ones have a lifetime guarantee). My list could go on and on. I’ve never regretted purchasing a sometimes more expensive plastic-free item.

What are the toughest steps that you’ve taken to reduce the persistent plastics that you can’t seem to eradicate from your bin? Please let us know in the comments below so we can all try to come up with solutions together to help you reduce them.

DIY Tooth Powder (Plastic-Free Toothpaste)

When you’re trying to go plastic-free, toothpaste is a crux issue for most people. But crux no more! We have a plastic-free toothpaste/tooth powder recipe that’ll keep you happy and make you wonder why we all strayed from this basic recipe years ago in the first place.

Plastic-Free Tooth Powder is Easy to Make. Photo © Liesl Clark

I remember the days of tooth powder. It came in a family-size metal bottle with a top on it that you could shake over your toothbrush and the powder would come out. Pretty basic. But this stuff was great and I wonder why we’ve replaced it with paste in a plastic tube?

My family has used variations of this recipe for the past 4 years, on-again and off-again, and we’re always happy when we get back to using it. The baking soda cleans my teeth better than any other toothpaste out there.

And it takes less than 3 minutes to put it together:

2 tablespoons Baking Soda

2 pipette stoppers-ful of liquid stevia (liquid stevia comes in glass jars with stoppers)

1/4 teaspoon organic peppermint flavor (It’s a combination of sunflower oil and peppermint oil)

1/8 teaspoon organic mint extract

Mix your ingredients together in a small bowl or small mason jar.

The next step is perhaps the toughest: Finding the right container to hold and apply your tooth powder with. I found a pretty vanilla extract bottle with a small lid that works perfectly. We just shake it over our toothbrushes over the sink and if any powder falls into the sink it’s an added bonus for cleaning the sink! Baking soda has many uses. Cleaning your teeth AND your sink are just 2 of them.

My vanilla jar with a pretty paper label. The kids love it and our sink stays extra clean! Photo © Liesl Clark

So, why not give it a try? You’ll love the clean feel of this toothpaste/powder. It’s truly somewhere half-way in between a paste and a powder and feels great!

And to the question of toothbrushes:

A Bamboo Toothbrush With Plastic-Free Toothpaste is How We Roll at Chez Trash Backwards. Photo © Liesl Clark

Toothbrushes wash up on our beaches much too often, presumably because of the sewage that oft seeps into Puget Sound and the Pacific. Imagine that, some people flush their old toothbrushes down the toilet.

Going plastic-free in the bathroom is a great way to reduce our overall impact. Our post on toothbrushes can help you find ones that have less plastic and we’ve also found some helpful reuses for your old brushes so they can be utilized for special jobs around the house.

Kick The Can (Habit) And Slow Cook Your Beans

By Mr. Everest

Cooked beans are a staple in our family. Whether they’re pinto or black beans, we cook up a pot of beans at least once a week. Today, the house smelled wonderful as the beans cooked in the slow cooker with garlic and onions.

Nothing smells better than a pot 'o beans in the kitchen. Photo © Liesl Clark

For the past 3 years, we’ve gone plastic-free in the culinary arts so that means no canned food. Most cans have bisphenol A (BPA) in them which is an epoxy resin-like substance that is an endocrine disruptor and a chemical linked to cancer. Beans in a can are among the top BPA-laden canned foods out there. When we converted our kitchen over to a plastic-free one, canned beans were a favorite staple we had to rethink. But the Greek ancestry in me knew it wouldn’t mean we’d go without beans for long. My Dad always had a pot of lentils on the stove, so why not do the same with pinto and black beans?

Crock Pot Beans. Photo © Liesl Clark

Every few days I pull out the slow cooker, throw some beans in (say 4 cups-worth) add quadruple the amount of water, throw in a bay leaf from our friends’ tree, several cloves of garlic from our garden (whole cloves are fine), a few extra garlic skins, chopped onion, and about a teaspoon of sea salt. Each time I do it the recipe changes but this is a basic one that works. Put the cover on the slow cooker and let ‘er cook for about 18 hours or until your beans have reached their desired tenderness. No stirring is required. Just leave the slow cooker alone and enjoy the rest of your day.

Red onion, chives and garlic with black beans. Photo © Liesl Clark

We buy our beans in bulk, 25 lbs at a time, so they come to us in a big paper feed sack. We then store them in glass jars for easy access.

Bean Storage in Large Glass Jars. Photo © Liesl Clark

I tend to turn half of the cooked beans into refried beans (just mash ’em down as you fry them with a little more garlic and onion and add some cumin and liquid aminos for salt) and then make burritos or enchiladas that we can freeze for easy school lunches to reheat for the kids. We also make black bean soup with them or just a simple bean dip.

IMG_5177 Photo © Liesl Clark

These beans are always better than anything I’ve eaten from a can, and they cost about a tenth of the price. But the real benefit of kicking canned food is the mindfulness of slow-cooking and making your staples from scratch. Cooked beans in a slow cooker are so simple, yet they require a few minutes of forethought and planning for the meals that your family will enjoy in the week ahead. Four cups of dried beans will result in about 8 cups of cooked beans, enough for a family of 4 to enjoy for a week in many different creations. As your home fills with the buttery and savory smell of cooking beans, enjoy the pleasure, as my Dad did, of slow-cooked food and the sweet time it takes for the flavors to blend together completely.

How To Fix Dead Ballpoint Pens

I promise, I haven’t gone off the deep end. I hate to throw things away that don’t need to be tossed, and most pens that stop writing can be fixed in a matter of seconds.

Fix Those Pens

We had a few hundred pens to test after having collected them from boxes bound for a dumpster. Sure, we had saved them from the landfill, but did they work? Most did, but the 30 or so that wouldn’t write just needed a little nudge. The roller ball was locked in place by dried-up ink from lack of use and we decided to put an age-old remedy to the test. If you put the tip of a ballpoint pen in a flame for a second or two it heats up the ball and gets it moving again.

Moving parts are all that’s needed when you know there’s still ink in that pen. Here’s how we did it. This ain’t rocket science:


I had 2 excellent lab testers to do the job. The result? Thirty pens saved! And, why do we do this? Because we find too many plastic pens out in the environment, on our beaches, sides of roads, sidewalks. Every time we go to the beach or to town, we find pens.

Papermate Washed Ashore at Point No Point, WA © Liesl Clark

Paper Mate Washed Ashore at Point No Point, WA © Liesl Clark

I don’t think I’ll ever need to buy a pen again. They’re everywhere, and most are made of plastic so they’re here to stay, forever. Let’s try to fix the ones that don’t work and give them a second, third, and fifth life if necessary. And when all the plastic pens have been used up, we can start buying one special metal pen a year, like my husband does. He carries it with him and uses it religiously, because it’s his one pen, his favorite pen, meticulously made, and ready for him to write beautiful things because it’s well made and doesn’t dry up so easily.

Hang Children’s Art From a Stick

How to simply display your children's art. Photo © Liesl Clark

Children’s art is precious. Do you have a good way to display it? We frame some of our favorites, but wall space is a premium in this house and the refrigerator can only hold a few masterpieces. Inspired by Suburban Pioneers’ use of a stick to display photos, I decided to try my hand at creating a stick art hanging system for our home office wall suited for enjoying children’s artistic creations.

Art on a Stick. Our New and Easy Hanging System. Photo © Liesl Clark

We have no lack of sticks out here under the canopy of trees in the Northwest, so my daughter and I tiptoed out to the forest and found ourselves a very long thin branch with some moss and lichen on it.

Three long nails, a stick, some wire, and some clothes pins or large clips is all you need. Photo © Liesl Clark

I hammered three nails into the wall to hold it in place, and wrapped some wire around the branch and nails to secure it. Then I used the same scrap wire to attach some clothes pins and large clips to the branch for holding the artwork.

Leave the moss intact and use a wire to afix your clothes pins and clips to your stick. Photo © Liesl Clark

Voila! A stick-centered art display.

Branch Out With Your Children's Art. Photo © Liesl Clark

How do you display your children’s art?

8 Reuses For Unmatched Socks

Sock Singles Party on Our Floor. Photo © Liesl Clark

We all know about sock-hungry dryers. Well, I believe drawers are sock-eaters, too. Somehow socks go into dresser drawers in pairs but come out as singles, forever abandoning the sacred union. We started a special box of single socks a few months ago and decided it was high time we searched the house for all socks to take a full tally of the situation.

Sorting Socks is Sorta Fun. Photo © Liesl Clark

Sorting Socks is Sorta Fun. Photo © Liesl Clark

It was the perfect task for a 7 year old, searching through every drawer in the house and coming up with nearly 100 single socks! The laundry room coughed up a few more. Then, we got to work with our matching game. Thirty pair were reunited! But sadly, about 40 odd socks now have no mate. What to do?

Reunited Socks After Nearly a Year. Photo © Liesl Clark

I’m vowing to have a moratorium on sock-buying for at least a year, or until our dryer and drawers have consumed them all. This family has way too many socks. In the meantime here’s a list of what we’re doing with our 40 odd socks:

1) A few special unions have been created, and we look forward to showing them off at school as soon as possible.

Do you approve of this union. Speak now or forever hold your peace. Hey, mismatched socks are in! Photo © Liesl Clark

2) I put one in the freezer to use over our ice pack. It’ll protect a child’s skin against that cold pack.

Single sock turned ice pack cover. This penguin motif seemed appropriate. Photo © Liesl Clark

3) The 7-year-old, has her sights set on a few sock creatures, like this adorable sock hippo named “Emma” that she made the other day.

Sock + Rubber Bands + Bits & Bobs = Sock Hippo. Photo © Liesl Clark

4) I invented a new type of yarn, like T-shirt yarn, but it’s….Sock Yarn! This stuff is easy and kinda cool to make.

My new favorite "ribbon." Sock Yarn. Photo © Liesl Clark

First, find a single sock and cut strips into it without fully reaching the edge. A great photo that explains it in a tutorial for T-shirt yarn is here. You’ll then cut diagonally, linking the strips together in a spiral cut. It’s easy!

Cut strips into your sock but not all the way to the edge. Photo © Liesl Clark

Then stretch your sock yarn out so it curls in on itself:

Stretch Your Sock Yarn to Let It Curl. Photo © Liesl Clark

You might attract a feline in the process. Sock yarn makes an excellent cat play toy.

Kitties live for soft sock yarn. Photo © Liesl Clark

Willa. Ready to Wear Her Sock Yarn. Photo © Liesl Clark

Roll your yarn into a ball and you’re done!

Sock Yarn. Try It. Photo © Liesl Clark

Sock Yarn. Try It. Photo © Liesl Clark

5) A travel utensil holder is a sock reuse I’ve been meaning to do. Now it’s done.

Sock Travel Utensil Holder. Photo © Liesl Clark

Just use a piece of your sock yarn to tie it shut.

Sock Ribbon to Tie Up Your Sock Utensil Holder. Photo © Liesl Clark

Socks make excellent pencil holders too, just use an extra thick sock.

6) I saved a few socks for our rag basket, for dusting and other fine-rubbing I might need to do on furniture or countertops.

7) Cut the toe section out and use your sock tube as a travel coffee mug cozy.

sockcozy

My Favorite Sock Reuse: Travel Coffee Mug Cozy © Liesl Clark

8) The rest went back into the super duper sock box under the bed in waiting for sock sorting day next year when I vow yet again to never buy new socks and then learn how to darn the odd ones that remain. Actually, each week on laundry day we take the single socks and open up the box to see if the missing mates are inside. I have the box sorted by color, darks to lights, so the task goes quickly:

IMG_1750

Can you believe how many unmatched socks we have?

Do you combine unmatched socks, in an effort to stave off buying yet another pair? Or is there a special reuse you’d love to share? We have a few hundred more you might want to check out at our Trash Backwards app.

Click Through for Sock Reuses at Trash Backwards.

Rockin’ Valentines

IMG_1729

Gratitude to all of you who venture here to read about our trials and jubilations as we journey toward a lower impact life. These little rocks were gathered down at our nearby beach and turned into missives of love and positive affirmation by my daughter for her classmates and friends.

IMG_1730

A few stones and some scrap yarn brought smiles to 26 fourth grade students, proof that the simple things in life can still be perceived as beautiful and grounding. We wish you a happy Valentines Day, a day of love and kindness, and a break from it all.

IMG_1731

Love and gratitude,

Liesl, Pete, Finn & Cleo

Zero Waste Vacuum Cleaning

By Liesl Clark

Using a vacuum cleaner in a (trying to get close to) zero waste home can be challenging, if you don’t have a bagless vacuum. Here’s what I’ve discovered over the years about reducing vacuum cleaning waste from my household:

Skip the Vacuum Cleaner Altogether? Now wait! Don’t stop reading because you think I’ve gone too far here. I can attest to the fact that in places where vacuum cleaners don’t exist, brooms can definitely do the trick! You just need a really great stiff broom for picking up the dirt. And, there’s no method better than taking your carpet outside and shaking it or beating it with a broom. If you have wall-to-wall carpet, I guess you’re out of luck, but a good stiff broom can do wonders.

I’ve had a few house cleaners help me in my day, and I’m always amazed to see how many of them choose to use the vacuum cleaner without first sweeping up the wooden floor. Broom and dustpan are the fastest route to frugal and zero waste floor-cleaning. I even have a cool collection of brooms I’ve gathered from all over the planet. In my travels to homes far from the conveniences of electricity and vacuums, I’ve witnessed the cleaning of rugs and carpets the old-fashioned-and-often-much-cleaner-way. Soft brooms sweep the often dirt floors, and stiff brooms are used to sweep the carpets. I’m amazed at how efficient they are so we use a broom on our carpets much of the time.

My Favorite Broom, Natural & Sustainable, Great for Wood Floors, Photo © Liesl Clark

Outside, we have a game of trying to shake a carpet with a partner on the other end and see who gets shaken-off first.

Empty the Bag! We used to have a vacuum we loved, but it came with bags that fill up and must be thrown out….or do they? After accumulating a few full bags, tossing ’em, and buying more (they’re expensive!) I discovered it was almost as easy to empty them into our brush pile outside and reuse them! We’d reuse our bags at least 30 times. Emptying the vacuum cleaner bags is an opportunity my children fight over. It’s fun. Really. Especially when we find a long-lost (and favorite) plastic baby goat in there. Those little baubles that get sucked up by the vacuum are given a second life.

See How Fun It Is? Photo © Liesl Clark

Now, a very ecologically-sound friend of mine says, “No, No! don’t empty those vacuum-cleaner bags because the dust and dirt in your home is toxic from the detritus that comes from your asbestos-bearing furniture or PVC and BPA-laden rugs.” I do respect her point, but I have to argue that our own dirt off our shoes is likely from the garden, our furniture is almost all made of natural materials, our home is recycled old timbers, and our carpets are antique natural-fiber carpets from Tibet and Egypt that we’ve bought from people we know, colored with vegetable dyes. I think we’re pretty safe. But this is not to say that everyone is safe to dump out their vacuumed dust into the environment. But aren’t our landfills part of our environment?

My Full Vacuum Cleaner Bag, Photo © Liesl Clark

I often empty our vacuum cleaner dust into our compost bin, except we find myriad little plastic bits from art projects that I try to take out by hand and throw back into the art bin (truly.) If you think your home and furniture (including mattresses) are mostly plastic-free, the dump-out-your-vacuum-bag-contents method of frugal vacuuming might be for you.

Dusting the Compost & Pulling the Plastic Out Later, Photo © Liesl Clark

Otherwise, there are bagless vacuums on the market these days. We’ve just acquired one, so our days of bag saving are over and we just dump our floor dust right into the compost. These days, it’s mostly dog and cat hair. I’d love to hear what you do with the dust and dirt from your home?

Fun with vacuum cleaner bags, Photo © Liesl Clark

Please note: If you have allergies or a particular sensitivity to dust, wearing a handkerchief or just mask around your mouth and nose is advised. Another friend empties her vacuum particulates into a plastic bag first, and then dumps it into her compost, to prevent the dust particles from escaping into the air. Shaking  out your vacuum cleaner bag is fun, especially when you know you’re defying the marketing department of your vacuum cleaner company. And, hey, you might find your lost wedding ring or favorite bauble for the effort.


Fun Emptying Vacuum Cleaner Bags, Photo © Liesl Clark

DIY Mason Jar Soap Dispenser

I’ve eyed the useful mason jar soap dispensers made by creative people and thought I’d try to make one myself. Was it difficult? Not at all. This DIY project takes a few minutes to pull off.

All you need is a mason jar with a wide mouth lid, a push pump from a discarded soap or hand cream dispenser (I had to cut mine down so it would fit in my pint jar,) a pair of pliers, and a Sharpie.

Mason Jar + Lid, Pliers, Sharpie, and Pump. Photo © Liesl Clark

Find the center of your flat mason jar lid and punch a hole in it with a can opener (oh right, that’s one more tool you’ll want.)

Making Your Center Hole. Photo © Liesl Clark

I was able to make a hole quite easily with my pliers. Draw a circle around the hole that’s in the center of your lid, is in my first picture, and start to pull the hole apart, making it wider and wider.

Starting to Make Your Center Hole Wider. © Liesl Clark

You simply keep pulling the pieces of metal wider and wider around the edges of your circle until they’re just wide enough for your pump to fit through.

It Will Start To Look Like a Flower. Photo © Liesl Clark

When you have sufficient room for your pump, slip it through but try to keep the fit quite tight.

Thread The Pump Through the Hole. Photo © Liesl Clark

I pressed the edges of the metal lid down tight against the lid to prevent any future cuts when I need to add soap to my dispenser. You can use a silicone sealant to lock the pump down to its center hole and smooth out your sharp edges.

Sealed Soap Dispenser. Photo © Liesl Clark

This whole project took 5 minutes once I had gathered my supplies.

DIY Soap Dispenser, Ready For Use. Photo © Liesl Clark

When we went away on vacation our cat knocked over a pretty glass dispenser I gave my husband for Christmas. My husband is the dishwasher after dinner and I wanted him to feel like he had a cool “tool” to use at the sink.

Our cool new kitchen 'tool:" Our DIY soap dispenser. Photo © Liesl Clark

We mostly use baking soda for our dishes, but this liquid soap gives great suds if you like ’em and makes a mild hand soap, too. Our current liquid soap is an extremely watered-down (like 6:1 water to soap) biokleen dish soap.

DIY Dish Soap Dispenser. Photo © Liesl Clark

Valentines: The Original Folk Art Scrap Hack

Handmade Paper Valentines, An Original Folk Art. Photo © Liesl Clark

I remember having to make valentines cards in elementary school for each of my classmates. The handmade cards tended to come from whatever scrap paper, lace, and paper doilies we had around our home. Each valentine was different, a scrapper’s attempt at making beauty from what was available.

Scraps of Paper. All You Need to Make an Original Valentine. Photo © Liesl Clark

And then things changed, and there was a new ethic afoot: Skip the handmade valentine and buy a mass-produced version for your friends, complete with a stash of sweets. All you had to do was fill in your name, the recipient’s name, and add a packet of hearts. It certainly was a time-saver, but these so-called valentines felt like a cop-out and an opportunity for some not-so-creative folks to make money off of us. I’m still a big fan of the hand-crafted valentine. You might say the valentine is an original form of folk art, and some still practice it today.

Our kids, over the past few years, have been assigned, at school, to make valentines for their classmates from materials found in their home. Alas! We could bring back the tradition. Here are a few examples I’ve pulled from our photos over the years:

1) The Traditional Scrap Paper Valentine:  We first gathered our scrap paper and cut out traditional hearts on card stock we had rescued from the landfill. We also save pretty scrap paper from magazines and junkmail so we have plenty of colors and textures to choose from for projects like this.

Cutting, folding, and gluing paper is all it takes to make a valentine. Photo © Liesl Clark

2) A Scrap Fabric Valentine:  Then we found some pretty scrap fabric and cut out hearts to glue to the reclaimed card stock. Those felt a little more 3D and folksy.

Add a fabric scrap to your valentine for a more 3D effect. Photo © Liesl Clark

3) Bookmark Valentines:  Cut long strips of paper about 2 inches wide by 6 inches long.

Paper strips from handmade paper. Photo © Liesl Clark

Punch a hole (we punched a star, really) into one end of each strip.

Punching a hole in the end of your strip. Photo © Liesl Clark

Tie a little ribbon or scrap fabric through the star, and you’ll have bookmarks ready to decorate as useful valentines.

Bookmark Valentines are Useful. Photo © Liesl Clark

4) Valentine Heart Wands: In our pantry, we found some pie tins and colorful plastic straws we had found on the beach, saved, and washed. These would become our raw ingredients for heart wands we made for several of the students:

Heart wands are easy. All you need are pie tins, straws, and a glue gun. Photo © Liesl Clark

Cut a heart out of your pie tin and glue it to the end of a straw. They work with pretty sticks, too. And if you want to embellish your silvery pie tin heart, you can glue a smaller heart to your tin heart.

Hearts of Paper and Hearts of Tin. Photo © Liesl Clark

The Tin Man would be proud.

Heart Wands From Pie Tins and Straws. Photo © Liesl Clark

We've been making these for years. Photo © Liesl Clark

5) Wire and Yarn Hearts:  We often craft wire hearts from scavenged wire and then wrap them in yarn. The children love hanging them around the garden. The little heart below was made by my daughter when the deer ate her bleeding hearts. She was so saddened by the loss of her hearts, she placed a fence around them and crafted this wire heart on the outside for the deer to eat, still leaving them something to enjoy. The sweetness of a 6-year-old is undying.

A wire and yarn heart to help protect the bleeding hearts from the deer. Photo © Liesl Clark

6) Classic Hand-Stitched Valentine: My daughter love to sew by hand. These hand-stitched valentines took her a month to make, but she poured her love and talent into each one. She left a little pocket in each to be filled with organic jelly beans, her favorite treat we buy in bulk at our local store. These are pretty easy to make so long as you have felt. We asked for felt on our local Buy Nothing group, and neighbors had plenty to share! She cut out hearts in varying sizes with my pinking shears and then layered them and sewed them together, leaving a pocket at the top.

IMG_0347

7) Produce Sticker Heart:  This one might be a bit of a stretch, but for those health-conscious sweethearts in your life, why not craft a produce sticker heart valentine? It was a cathartic exercise, for me, because those plastic stickers to announce that we’ve bought organic produce bother me greatly. No tutorial necessary, right?

Produce Stickers are Pink and Perfect for this Healthy-Heart Valentine. Photo © Liesl Clark


Send in a picture of your own homemade valentines. We’d love to share them with all our sweethearts.