How To Fix Dead Ballpoint Pens

I promise, I haven’t gone off the deep end. I hate to throw things away that don’t need to be tossed, and most pens that stop writing can be fixed in a matter of seconds.

Fix Those Pens

We had a few hundred pens to test after having collected them from boxes bound for a dumpster. Sure, we had saved them from the landfill, but did they work? Most did, but the 30 or so that wouldn’t write just needed a little nudge. The roller ball was locked in place by dried-up ink from lack of use and we decided to put an age-old remedy to the test. If you put the tip of a ballpoint pen in a flame for a second or two it heats up the ball and gets it moving again.

Moving parts are all that’s needed when you know there’s still ink in that pen. Here’s how we did it. This ain’t rocket science:


I had 2 excellent lab testers to do the job. The result? Thirty pens saved! And, why do we do this? Because we find too many plastic pens out in the environment, on our beaches, sides of roads, sidewalks. Every time we go to the beach or to town, we find pens.

Papermate Washed Ashore at Point No Point, WA © Liesl Clark

Paper Mate Washed Ashore at Point No Point, WA © Liesl Clark

I don’t think I’ll ever need to buy a pen again. They’re everywhere, and most are made of plastic so they’re here to stay, forever. Let’s try to fix the ones that don’t work and give them a second, third, and fifth life if necessary. And when all the plastic pens have been used up, we can start buying one special metal pen a year, like my husband does. He carries it with him and uses it religiously, because it’s his one pen, his favorite pen, meticulously made, and ready for him to write beautiful things because it’s well made and doesn’t dry up so easily.

My Pet Peeve About Pet Poop

Warning: The contents of this blog post might be disturbing, if you don’t like thinking about, or looking at, s**t.

Imagine hiking along a pristine trail in the Pacific Northwest with your dog. It’s a perfect spot with majestic trees, spring birds singing their first songs of spring. But your eye is caught by not one, but four or five little wads of plastic bags, placed carefully along the trail, loaded with a hiker’s canine crap. The numbers of plastic bags filled these days with dog waste on the trail can be quite shocking. Are pet owners intending to leave these plastic methane bombs there for me to pick up? Or, are they planning to come back one day to gather up the not-so-hermetically-sealed pathogen-filled goodies?  I believe they think they’re doing the environment a favor by just bagging them up in plastic, assuming they’ve done their service to the planet, thinking, “No methane escaping today!”

IMG_1425

Which is worse? This plastic bag or what’s inside? Well, now both are there to stay, on the trail. And the methane’s out of the bag. Sailor doesn’t know what to make of it.

I’m not going to get into the reasons why dog owners are bagging Fido’s fecal stuff. Suffice it to say, tail-wagger’s turds are one of the biggest contributors to water pollution in urban and suburban settings. We live on an island where we’re surrounded by Puget Sound. Everything ends up in our waters, given our torrential rains. So, doggie’s doodoo left in the rain can be considered the next nutrient to enter the Sound. But there’s definitely nothing nutritious about the stuff.

IMG_1441

This isn’t Sailor’s poop. Just another example of what’s found trailside on our island paths. Trowel anyone? This might be the most environmentally-sound means of pet waste disposal.

We use a Bokashi Pet Waste Composter for our cat’s waste, and since our dog mostly poops in one spot on our property, we’re doing our best to bring it inside and flush it down the toilet. He eats no meat, mostly our veggie meals, and a few bites of the cat’s dry food each day. The EPA says flushing is the most environmentally-sound thing we can do with Rover’s #2, considering we live just feet from Puget Sound. But putting your dog’s fecal matter into a plastic bag and leaving it on the trail to stay forever is, by my calculations, two counts of littering.

IMG_1416

One of my favorite authors, Susan Freikel, who wrote Plastic: A Toxic Love Story, summarizes the situation perfectly in a recent article for LiveScience:

Dogs can harbor lots of viruses, bacteria and parasites — including harmful pathogens like e coli, giardia and salmonella. (A single gram contains an estimated 23 million bacteria.) Studies have traced 20 to 30 percent of the bacteria in water samples from urban watersheds to dog waste. Just two to three days of waste from 100 dogs can contribute enough bacteria, nitrogenand phosphorous to close 20 miles of a bay-watershed to swimmingand shellfishing, according to the U.S. Environmental Protection Agency.It also can get into the air we breathe: a recent study of air samples in Cleveland, Ohio, and Detroit, Mich., found that 10 to 50 percent of the bacteria came from dog poop.

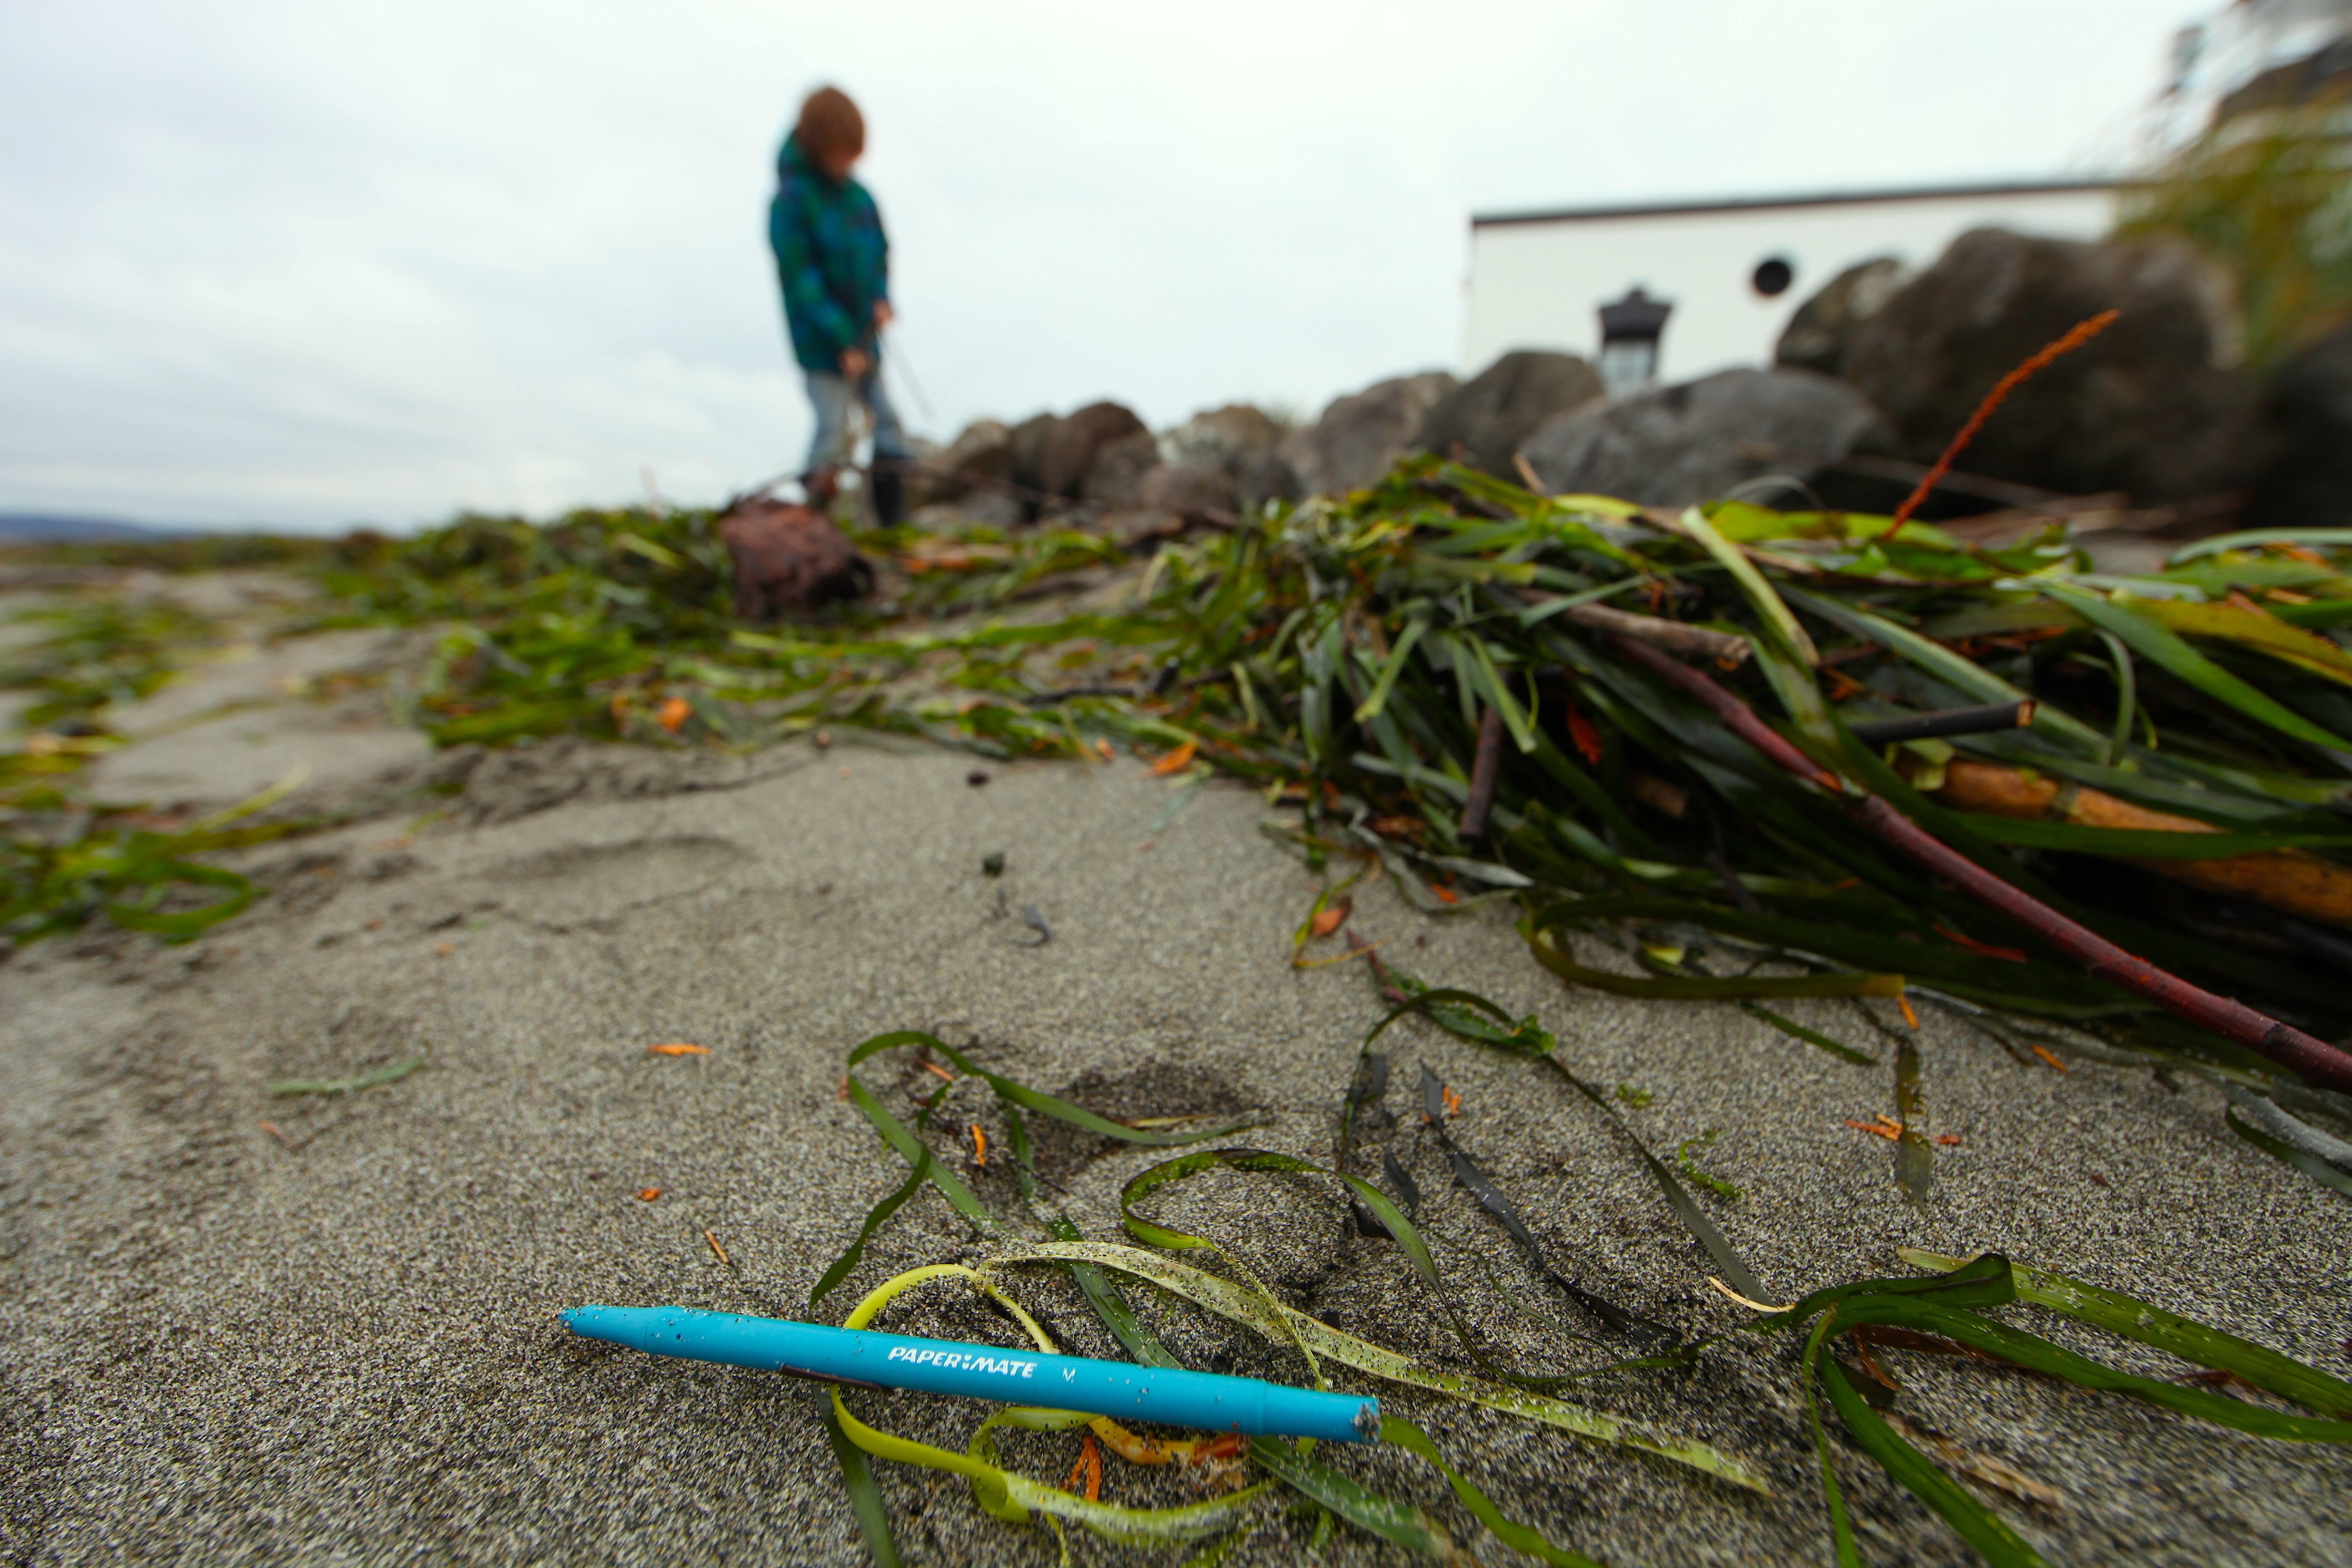
I understand the reasoning behind bagging your pet’s waste. But (wait for it) I’ve seen hundreds of pet waste bags, still filled with said waste, washed up on beaches along our shorelines. These floaters stay extra-buoyant in their plastic packaging. It’s one kind of plastic waste we’ve had to leave out there on the beaches as we can’t bring ourselves to pick it up. I have visions of whales and sea lions ingesting the knotted bags of eco-dog-love left behind by doo-gooders of Puget Sound.

Is there a more environmentally friendly way to dispose of our pet’s waste? According to this Huffington Post article, Paul Canella’s Poop Bags are biodegradable. But, those presumably will just go into the landfill, with the same toxins and microbes deemed unhealthy to humans leaching into our watersheds. Some scientists suggest that burying your dog’s waste, as you would your own, might be the best method for disposal along the trail. One foot deep, below the runoff zone, is safe. Are you willing to start digging in your public park? Probably not.

We have a bit of a merde mess in our over-poopulated urban settings, but in a few places, like Portland and Boulder, enterprising people have developed pet waste processing companies that compost your four-legged friend’s feces. It turns out hot commercial composters could actually use Fido’s fuel. One dog-friendly park, in Gilbert, AZ, lets you toss your turds into a bin that turns it into a flame for a lantern in the park while you let your dog have some off-leash fun.

IMG_1782

Yet another plastic-encapsulated trailside turd.

The plastic bagging of dog droppings just isn’t cutting it. We’re making a bigger mess of things in our wild places, watersheds, and maritime environments. There are now flushable bags made for caca collection, and this might be one of the easiest and eco-aware options out there.

IMG_1445

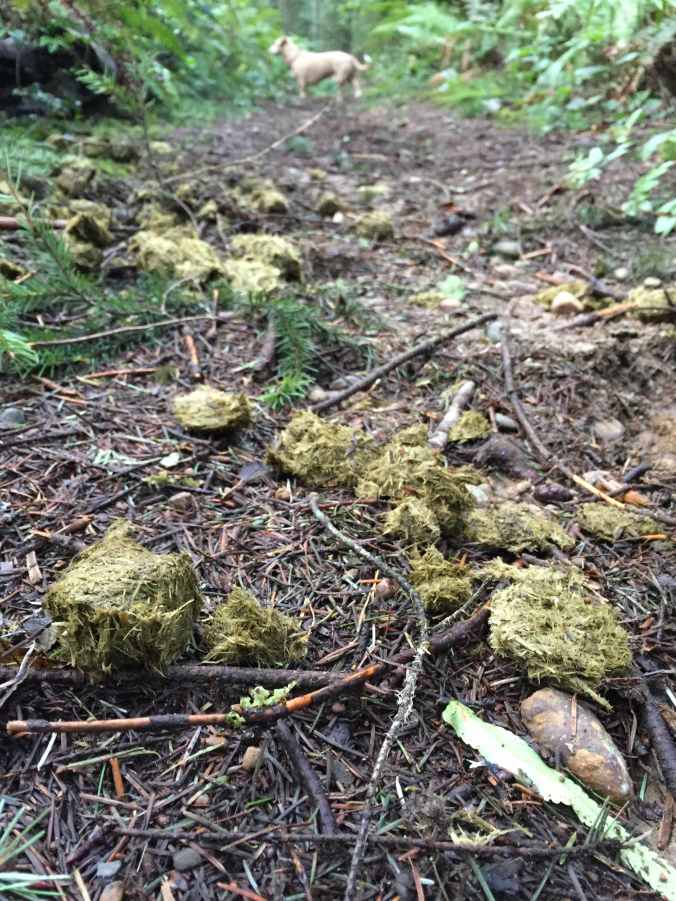
Vegetarian waste left behind by horses is of no concern.

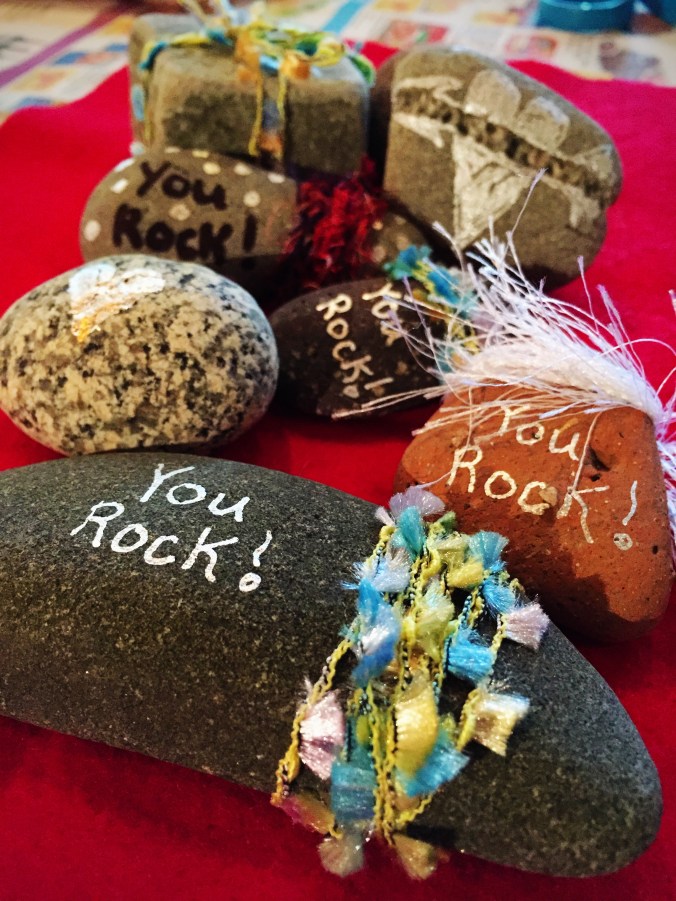
Until we have anaerobic pet waste composters in each city, we’ll have to settle for the lesser evils available to us for disposing of it. And the next time I come across plastic-sealed scat, I have a pocketful of hand-written notes that I plan to leave behind, scribbled on paper, to accompany the abandoned excrement: “Did you forget this? This PPOO (plastic poo) needs a PPU (prompt pickup) by you.”


Hang Children’s Art From a Stick

How to simply display your children's art. Photo © Liesl Clark

Children’s art is precious. Do you have a good way to display it? We frame some of our favorites, but wall space is a premium in this house and the refrigerator can only hold a few masterpieces. Inspired by Suburban Pioneers’ use of a stick to display photos, I decided to try my hand at creating a stick art hanging system for our home office wall suited for enjoying children’s artistic creations.

Art on a Stick. Our New and Easy Hanging System. Photo © Liesl Clark

We have no lack of sticks out here under the canopy of trees in the Northwest, so my daughter and I tiptoed out to the forest and found ourselves a very long thin branch with some moss and lichen on it.

Three long nails, a stick, some wire, and some clothes pins or large clips is all you need. Photo © Liesl Clark

I hammered three nails into the wall to hold it in place, and wrapped some wire around the branch and nails to secure it. Then I used the same scrap wire to attach some clothes pins and large clips to the branch for holding the artwork.

Leave the moss intact and use a wire to afix your clothes pins and clips to your stick. Photo © Liesl Clark

Voila! A stick-centered art display.

Branch Out With Your Children's Art. Photo © Liesl Clark

How do you display your children’s art?

The Adventures of Blue Bear

DSC_0723

Photo © Liesl Clark

There once was a time, not too long ago, when our children were very small but what some might call brave. They ventured (as they still do) each year to the other side of the planet, to the Himalayas, and those first years were precious because they didn’t know they were doing something special.

DSC_0566

Photo © Liesl Clark

They thought everyone travelled to the base of Mount Everest to live the good life.

DSC_0700_DL.png

Their years spent over the winter months with our Sherpa family, Ang Temba and Yangin, in the village of Khunde at 12,600 feet, are among the happiest months of our lives. We had no distractions, committing our time to the children’s well-being up there, enjoying the simple pleasures of family company and the rhythms of Himalayan winter life. The life lessons the village taught us over the years are the reason why we’ve created this blog.

Finn Yakboy

Photo © Liesl Clark

One of those winters, we met Peter Olander, who volunteered to join us in Phortse, a village just a few hours beyond Khunde, where we established our second Magic Yeti Children’s Library in the Solu-Khumbu district of Nepal. Peter’s patience with the quixotic movements of our children on the trail, sometimes like herding cats, and his selfless dedication to the families of Phortse, humbled us deeply. He came to know how important a little bear named “Blue” was to our children’s movement up the trail. Blue Bear strapped himself in with 3-year-old Finn on every journey, whether it be by horse or the back of his Mom, Dad, or a dzopkyo (a cross between a cow and a yak.)

DSC_0733

Photo © Liesl Clark

We later learned of Peter’s talents as an artist and storyteller. Please join us in reading his book about Finn and Blue Bear. This tiny blue denim bear was a little boy’s purpose on the world’s highest mountain trails just a few years ago:

Peter caught the essence of the magic of the Khumbu, the mysticism, and a child’s imagination that can be sparked by books and stories about children like Finn and his intrepid bear. Peter is uploading the story page-by-page (it takes time) to his website, and his paintings are original works of beauty that we cherish deeply. Thank you, Peter, for this gift, and for capturing these moments that transcend time to a place and a people graced by the compassion of mountain deities.

Click this image to get to the story:

(Readers, please check back, on Peter’s website, to follow Blue Bear’s story!)

DSC_0086

Photo © Peter Athans

8 Reuses For Unmatched Socks

Sock Singles Party on Our Floor. Photo © Liesl Clark

We all know about sock-hungry dryers. Well, I believe drawers are sock-eaters, too. Somehow socks go into dresser drawers in pairs but come out as singles, forever abandoning the sacred union. We started a special box of single socks a few months ago and decided it was high time we searched the house for all socks to take a full tally of the situation.

Sorting Socks is Sorta Fun. Photo © Liesl Clark

Sorting Socks is Sorta Fun. Photo © Liesl Clark

It was the perfect task for a 7 year old, searching through every drawer in the house and coming up with nearly 100 single socks! The laundry room coughed up a few more. Then, we got to work with our matching game. Thirty pair were reunited! But sadly, about 40 odd socks now have no mate. What to do?

Reunited Socks After Nearly a Year. Photo © Liesl Clark

I’m vowing to have a moratorium on sock-buying for at least a year, or until our dryer and drawers have consumed them all. This family has way too many socks. In the meantime here’s a list of what we’re doing with our 40 odd socks:

1) A few special unions have been created, and we look forward to showing them off at school as soon as possible.

Do you approve of this union. Speak now or forever hold your peace. Hey, mismatched socks are in! Photo © Liesl Clark

2) I put one in the freezer to use over our ice pack. It’ll protect a child’s skin against that cold pack.

Single sock turned ice pack cover. This penguin motif seemed appropriate. Photo © Liesl Clark

3) The 7-year-old, has her sights set on a few sock creatures, like this adorable sock hippo named “Emma” that she made the other day.

Sock + Rubber Bands + Bits & Bobs = Sock Hippo. Photo © Liesl Clark

4) I invented a new type of yarn, like T-shirt yarn, but it’s….Sock Yarn! This stuff is easy and kinda cool to make.

My new favorite "ribbon." Sock Yarn. Photo © Liesl Clark

First, find a single sock and cut strips into it without fully reaching the edge. A great photo that explains it in a tutorial for T-shirt yarn is here. You’ll then cut diagonally, linking the strips together in a spiral cut. It’s easy!

Cut strips into your sock but not all the way to the edge. Photo © Liesl Clark

Then stretch your sock yarn out so it curls in on itself:

Stretch Your Sock Yarn to Let It Curl. Photo © Liesl Clark

You might attract a feline in the process. Sock yarn makes an excellent cat play toy.

Kitties live for soft sock yarn. Photo © Liesl Clark

Willa. Ready to Wear Her Sock Yarn. Photo © Liesl Clark

Roll your yarn into a ball and you’re done!

Sock Yarn. Try It. Photo © Liesl Clark

Sock Yarn. Try It. Photo © Liesl Clark

5) A travel utensil holder is a sock reuse I’ve been meaning to do. Now it’s done.

Sock Travel Utensil Holder. Photo © Liesl Clark

Just use a piece of your sock yarn to tie it shut.

Sock Ribbon to Tie Up Your Sock Utensil Holder. Photo © Liesl Clark

Socks make excellent pencil holders too, just use an extra thick sock.

6) I saved a few socks for our rag basket, for dusting and other fine-rubbing I might need to do on furniture or countertops.

7) Cut the toe section out and use your sock tube as a travel coffee mug cozy.

sockcozy

My Favorite Sock Reuse: Travel Coffee Mug Cozy © Liesl Clark

8) The rest went back into the super duper sock box under the bed in waiting for sock sorting day next year when I vow yet again to never buy new socks and then learn how to darn the odd ones that remain. Actually, each week on laundry day we take the single socks and open up the box to see if the missing mates are inside. I have the box sorted by color, darks to lights, so the task goes quickly:

IMG_1750

Can you believe how many unmatched socks we have?

Do you combine unmatched socks, in an effort to stave off buying yet another pair? Or is there a special reuse you’d love to share? We have a few hundred more you might want to check out at our Trash Backwards app.

Click Through for Sock Reuses at Trash Backwards.

Rockin’ Valentines

IMG_1729

Gratitude to all of you who venture here to read about our trials and jubilations as we journey toward a lower impact life. These little rocks were gathered down at our nearby beach and turned into missives of love and positive affirmation by my daughter for her classmates and friends.

IMG_1730

A few stones and some scrap yarn brought smiles to 26 fourth grade students, proof that the simple things in life can still be perceived as beautiful and grounding. We wish you a happy Valentines Day, a day of love and kindness, and a break from it all.

IMG_1731

Love and gratitude,

Liesl, Pete, Finn & Cleo

Zero Waste Vacuum Cleaning

By Liesl Clark

Using a vacuum cleaner in a (trying to get close to) zero waste home can be challenging, if you don’t have a bagless vacuum. Here’s what I’ve discovered over the years about reducing vacuum cleaning waste from my household:

Skip the Vacuum Cleaner Altogether? Now wait! Don’t stop reading because you think I’ve gone too far here. I can attest to the fact that in places where vacuum cleaners don’t exist, brooms can definitely do the trick! You just need a really great stiff broom for picking up the dirt. And, there’s no method better than taking your carpet outside and shaking it or beating it with a broom. If you have wall-to-wall carpet, I guess you’re out of luck, but a good stiff broom can do wonders.

I’ve had a few house cleaners help me in my day, and I’m always amazed to see how many of them choose to use the vacuum cleaner without first sweeping up the wooden floor. Broom and dustpan are the fastest route to frugal and zero waste floor-cleaning. I even have a cool collection of brooms I’ve gathered from all over the planet. In my travels to homes far from the conveniences of electricity and vacuums, I’ve witnessed the cleaning of rugs and carpets the old-fashioned-and-often-much-cleaner-way. Soft brooms sweep the often dirt floors, and stiff brooms are used to sweep the carpets. I’m amazed at how efficient they are so we use a broom on our carpets much of the time.

My Favorite Broom, Natural & Sustainable, Great for Wood Floors, Photo © Liesl Clark

Outside, we have a game of trying to shake a carpet with a partner on the other end and see who gets shaken-off first.

Empty the Bag! We used to have a vacuum we loved, but it came with bags that fill up and must be thrown out….or do they? After accumulating a few full bags, tossing ’em, and buying more (they’re expensive!) I discovered it was almost as easy to empty them into our brush pile outside and reuse them! We’d reuse our bags at least 30 times. Emptying the vacuum cleaner bags is an opportunity my children fight over. It’s fun. Really. Especially when we find a long-lost (and favorite) plastic baby goat in there. Those little baubles that get sucked up by the vacuum are given a second life.

See How Fun It Is? Photo © Liesl Clark

Now, a very ecologically-sound friend of mine says, “No, No! don’t empty those vacuum-cleaner bags because the dust and dirt in your home is toxic from the detritus that comes from your asbestos-bearing furniture or PVC and BPA-laden rugs.” I do respect her point, but I have to argue that our own dirt off our shoes is likely from the garden, our furniture is almost all made of natural materials, our home is recycled old timbers, and our carpets are antique natural-fiber carpets from Tibet and Egypt that we’ve bought from people we know, colored with vegetable dyes. I think we’re pretty safe. But this is not to say that everyone is safe to dump out their vacuumed dust into the environment. But aren’t our landfills part of our environment?

My Full Vacuum Cleaner Bag, Photo © Liesl Clark

I often empty our vacuum cleaner dust into our compost bin, except we find myriad little plastic bits from art projects that I try to take out by hand and throw back into the art bin (truly.) If you think your home and furniture (including mattresses) are mostly plastic-free, the dump-out-your-vacuum-bag-contents method of frugal vacuuming might be for you.

Dusting the Compost & Pulling the Plastic Out Later, Photo © Liesl Clark

Otherwise, there are bagless vacuums on the market these days. We’ve just acquired one, so our days of bag saving are over and we just dump our floor dust right into the compost. These days, it’s mostly dog and cat hair. I’d love to hear what you do with the dust and dirt from your home?

Fun with vacuum cleaner bags, Photo © Liesl Clark

Please note: If you have allergies or a particular sensitivity to dust, wearing a handkerchief or just mask around your mouth and nose is advised. Another friend empties her vacuum particulates into a plastic bag first, and then dumps it into her compost, to prevent the dust particles from escaping into the air. Shaking  out your vacuum cleaner bag is fun, especially when you know you’re defying the marketing department of your vacuum cleaner company. And, hey, you might find your lost wedding ring or favorite bauble for the effort.


Fun Emptying Vacuum Cleaner Bags, Photo © Liesl Clark

DIY Mason Jar Soap Dispenser

I’ve eyed the useful mason jar soap dispensers made by creative people and thought I’d try to make one myself. Was it difficult? Not at all. This DIY project takes a few minutes to pull off.

All you need is a mason jar with a wide mouth lid, a push pump from a discarded soap or hand cream dispenser (I had to cut mine down so it would fit in my pint jar,) a pair of pliers, and a Sharpie.

Mason Jar + Lid, Pliers, Sharpie, and Pump. Photo © Liesl Clark

Find the center of your flat mason jar lid and punch a hole in it with a can opener (oh right, that’s one more tool you’ll want.)

Making Your Center Hole. Photo © Liesl Clark

I was able to make a hole quite easily with my pliers. Draw a circle around the hole that’s in the center of your lid, is in my first picture, and start to pull the hole apart, making it wider and wider.

Starting to Make Your Center Hole Wider. © Liesl Clark

You simply keep pulling the pieces of metal wider and wider around the edges of your circle until they’re just wide enough for your pump to fit through.

It Will Start To Look Like a Flower. Photo © Liesl Clark

When you have sufficient room for your pump, slip it through but try to keep the fit quite tight.

Thread The Pump Through the Hole. Photo © Liesl Clark

I pressed the edges of the metal lid down tight against the lid to prevent any future cuts when I need to add soap to my dispenser. You can use a silicone sealant to lock the pump down to its center hole and smooth out your sharp edges.

Sealed Soap Dispenser. Photo © Liesl Clark

This whole project took 5 minutes once I had gathered my supplies.

DIY Soap Dispenser, Ready For Use. Photo © Liesl Clark

When we went away on vacation our cat knocked over a pretty glass dispenser I gave my husband for Christmas. My husband is the dishwasher after dinner and I wanted him to feel like he had a cool “tool” to use at the sink.

Our cool new kitchen 'tool:" Our DIY soap dispenser. Photo © Liesl Clark

We mostly use baking soda for our dishes, but this liquid soap gives great suds if you like ’em and makes a mild hand soap, too. Our current liquid soap is an extremely watered-down (like 6:1 water to soap) biokleen dish soap.

DIY Dish Soap Dispenser. Photo © Liesl Clark

Valentines: The Original Folk Art Scrap Hack

Handmade Paper Valentines, An Original Folk Art. Photo © Liesl Clark

I remember having to make valentines cards in elementary school for each of my classmates. The handmade cards tended to come from whatever scrap paper, lace, and paper doilies we had around our home. Each valentine was different, a scrapper’s attempt at making beauty from what was available.

Scraps of Paper. All You Need to Make an Original Valentine. Photo © Liesl Clark

And then things changed, and there was a new ethic afoot: Skip the handmade valentine and buy a mass-produced version for your friends, complete with a stash of sweets. All you had to do was fill in your name, the recipient’s name, and add a packet of hearts. It certainly was a time-saver, but these so-called valentines felt like a cop-out and an opportunity for some not-so-creative folks to make money off of us. I’m still a big fan of the hand-crafted valentine. You might say the valentine is an original form of folk art, and some still practice it today.

Our kids, over the past few years, have been assigned, at school, to make valentines for their classmates from materials found in their home. Alas! We could bring back the tradition. Here are a few examples I’ve pulled from our photos over the years:

1) The Traditional Scrap Paper Valentine:  We first gathered our scrap paper and cut out traditional hearts on card stock we had rescued from the landfill. We also save pretty scrap paper from magazines and junkmail so we have plenty of colors and textures to choose from for projects like this.

Cutting, folding, and gluing paper is all it takes to make a valentine. Photo © Liesl Clark

2) A Scrap Fabric Valentine:  Then we found some pretty scrap fabric and cut out hearts to glue to the reclaimed card stock. Those felt a little more 3D and folksy.

Add a fabric scrap to your valentine for a more 3D effect. Photo © Liesl Clark

3) Bookmark Valentines:  Cut long strips of paper about 2 inches wide by 6 inches long.

Paper strips from handmade paper. Photo © Liesl Clark

Punch a hole (we punched a star, really) into one end of each strip.

Punching a hole in the end of your strip. Photo © Liesl Clark

Tie a little ribbon or scrap fabric through the star, and you’ll have bookmarks ready to decorate as useful valentines.

Bookmark Valentines are Useful. Photo © Liesl Clark

4) Valentine Heart Wands: In our pantry, we found some pie tins and colorful plastic straws we had found on the beach, saved, and washed. These would become our raw ingredients for heart wands we made for several of the students:

Heart wands are easy. All you need are pie tins, straws, and a glue gun. Photo © Liesl Clark

Cut a heart out of your pie tin and glue it to the end of a straw. They work with pretty sticks, too. And if you want to embellish your silvery pie tin heart, you can glue a smaller heart to your tin heart.

Hearts of Paper and Hearts of Tin. Photo © Liesl Clark

The Tin Man would be proud.

Heart Wands From Pie Tins and Straws. Photo © Liesl Clark

We've been making these for years. Photo © Liesl Clark

5) Wire and Yarn Hearts:  We often craft wire hearts from scavenged wire and then wrap them in yarn. The children love hanging them around the garden. The little heart below was made by my daughter when the deer ate her bleeding hearts. She was so saddened by the loss of her hearts, she placed a fence around them and crafted this wire heart on the outside for the deer to eat, still leaving them something to enjoy. The sweetness of a 6-year-old is undying.

A wire and yarn heart to help protect the bleeding hearts from the deer. Photo © Liesl Clark

6) Classic Hand-Stitched Valentine: My daughter love to sew by hand. These hand-stitched valentines took her a month to make, but she poured her love and talent into each one. She left a little pocket in each to be filled with organic jelly beans, her favorite treat we buy in bulk at our local store. These are pretty easy to make so long as you have felt. We asked for felt on our local Buy Nothing group, and neighbors had plenty to share! She cut out hearts in varying sizes with my pinking shears and then layered them and sewed them together, leaving a pocket at the top.

IMG_0347

7) Produce Sticker Heart:  This one might be a bit of a stretch, but for those health-conscious sweethearts in your life, why not craft a produce sticker heart valentine? It was a cathartic exercise, for me, because those plastic stickers to announce that we’ve bought organic produce bother me greatly. No tutorial necessary, right?

Produce Stickers are Pink and Perfect for this Healthy-Heart Valentine. Photo © Liesl Clark


Send in a picture of your own homemade valentines. We’d love to share them with all our sweethearts.

Swiss Chard Is Two Veggies In One

Don’t throw those swiss chard stalks out! We’ve discovered a delicious thing or 3 to do with them.

Swiss Chard Stalks are Pretty and Delicious. Photo © Liesl Clark

I’m ashamed to say our swiss chard has been languishing in the garden because our family just hadn’t taken to these easy-to-grow greens, until now…

Swiss Chard From the Winter Garden Being Washed in the Farm Sink. Photo © Liesl Clark

First, separate your chard leaves from the stalks and cut your stalks into 4″ long pieces. Save them in  a bowl. Aren’t they pretty?

Chard Stalks in a Bowl Awaiting Further Instructions. Photo © Liesl Clark

Spicy Swiss Chard Chips:

We all know what kale chips are. Well, try making chips with your swiss chard, too. They’re a delicious and nutritious substitute for potato chips. By adding a little garlic powder, salt, and some chili powder, you won’t be able to eat just one.

Turn your oven to 275 degrees. Place your chard pieces on a baking sheet or glass baking pan. Add a tablespoon of olive oil per baking pan and toss the chard leaves with equal amounts of sea salt and garlic powder and chili powder. That’s it! Add your spice to taste and be sure to not make it too salty.

Bake for 20 minutes and then turn the leaves over and bake another 10 minutes if needed. Your bake time depends on your baking dish.

Spicy Swiss Chard Chips Disappear Quickly. Photo © Liesl Clark

Enjoy!

Chard Stalk Pickles:

Now take your stalks and if you have a bottle of Claussen pickle juice waiting for something delicious to throw in, just stuff a few of your raw stalks in the bottle and within a few hours you’ll have delicious chard stalk pickles. My kids love them.

Raw Claussen Swiss Chard Stalk Pickles. Photo © Liesl Clark

I found another recipe for delicious pickled swish chard stalks at Cookistry. But if you want to read my entertaining version with home-grown photography, here we go:

Blanch your stalks in boiling salted water for about 3-4 minutes. You want them to stay crunchy so be sure to not overcook them. Drain the stalks and try a few at this stage. Aren’t they delicious? We loved the slightly salted cooked stalks so much we saved a few and had them as a side dish with dinner.

Find a mason jar or 2 and put your stalks in them.

Then, bring the following ingredients to a boil and make sure everything is completely dissolved:

2 cups water
3/4 cup white vinegar
1  1/2 teaspoons salt
2  1/2 teaspoons sugar

Pour your water into your mason jars with chard stalks in them and screw the tops on. Put them in the refrigerator when they’ve cooled and you can enjoy these pickles for a few weeks.

Pickled Chard Stalks. Photo © Liesl Clark

Do you have a favorite chard stalk recipe? I was so excited to find a way to save them from the compost bin or chicken yard I’d love to learn of other chard stalk rescue recipes.