Olive Oil Tin Turned Celery Container

I love olive oil tins. They’re reminiscent of the Old World where reuse of large tins is commonplace. When I think of how I’ve seen olive oil tins reused, I imagine geraniums on a sunny step in colorful olive oil planters in Italy or hammered out oil tins used as roofing or wall siding in Nepal.

2 Lovely Olive Oil Tins, What To Do? Photo © Liesl Clark

I saved a couple of tins this year and other than using them as a flower vase, I couldn’t think if anything special to do with them. And then my son started having a celery craving. I hate storing celery (or anything) in plastic bags in the refrigerator, so we started storing it in large mason jars with a a couple inches of water for the stalks to stay fresh. And then the idea hit me: Turn an olive oil tin into a refrigerator celery container. It holds 2 large celery bunches perfectly!

First Use an Old-Style Can Opener. Photo © Liesl Clark

You’ll need a Swiss Army-style jack knife with a can opener to remove the oil tin lid. And if that doesn’t work, get out the tin snips. Make sure you bend and file down all rough and sharp edges.

Our new celery tin. Photo © Liesl Clark

Be sure to put a few inches of water in your tin to keep the celery crisp and fresh. Then, throw it in the fridge! Our celery lasts weeks in this custom-made tin crisper.

A Tin of Celery Works Beautifully in our Plastic-Free Fridge. Photo © Liesl Clark

Gone are the days of limp celery in the vegetable drawer.

Celery in a Tin in a Plastic-Free Fridge. Photo © Liesl Clark

DIY Bamboo or Stick Fence

Bamboo + Electrical Wire = Pretty Garden Fence.

This bamboo fence, in Kalopani, Nepal, is one of my favorite garden fences I’ve come across while traveling. It’s a simple construction of bamboo sticks and woven electrical cord to hold the whole structure together. Here, people use what they have at hand to create beauty in an unforgiving alpine environment at 7,500 feet.

The electrical wire serves to hold the fence together.

Several 1-foot-high sticks are placed vertically in the ground about 5 inches apart and a long bamboo stick is split down the middle and placed horizontally across the vertical sticks, all woven together by an old electrical cord tied and knotted at the corner of the fence.

The horizontal piece is split in half.

It’s a simple construction and quite attractive for a high altitude flower garden at the base of Dhaulagiri, the world’s 7th highest mountain.

IMG_6524 © Liesl Clark

If you’re looking for some more interesting ideas for fencing materials, we might have what you’re looking for in our Trash Backwards app.

What have you used for fencing?

Wine Cork Pot Lid Grips

cork potgrippers

No Need for Potholders © Liesl Clark

Wine Cork Pot Lid Grips: Lift off hot pot lids with your fingers! Simple wine cork-stuffed handles mean no need for pot holders around the stove. Cram the corks tightly into the handle of your pot lid and you’ll never need to remove them again.

IMG_1383

Those are my 10-year-old’s fingers, lifting a hot pot. © Liesl Clark

They’re dishwasher and sink-washing safe, too! Smart. Easy.

IMG_1391


Zero Waste Shipping: Padded Envelopes & Mailers

Refuse & Reduce: We never buy anything for shipping, like envelopes, bubble-pack mailers, Tyvek pouches, padded envelopes and boxes because we receive so many of them. As a small production company, why buy new ones when plenty come in the door?

“Because they’ll look used and that won’t be professional if you reuse them,” you might say.

Since we’re all about reuse, there’s no problem gussying up a used envelope to resend to a client or partner, especially if we bring attention to the fact that we’ve given it a second life and ask them to reuse it, too. We have no problem reusing boxes for shipping, why not reuse padded envelopes? When I see a corporation reuse an envelope, I try to let them know how cool I think that is. A few weeks ago I received some of my hard drives back from WGBH/NOVA and it came in a box that was reused. It was probably the box I sent it in.

Simply sticking a new address label over the old one doesn’t take much thought. We often use a little piece of scrap paper and some glue or tape to cover over the old address and make a new label. Staples or tape can be used to reseal the mailer.

Share Your Excess Mailers: I save up my mailers so I can share them on my local Buy Nothing group. Neighbors are happy to come and get them, for reuse. Just before Christmas, I was able to offload a pile of padded envelopes to a neighbor who needed them for a company mailing. Using my old mailers definitely saved him some money. I included some blank mailing labels so he could cover up my address, but I often use a Sharpie to black-out the addresses and bar codes on previous mailers.

Don't Buy New! Reuse Your Padded Envelopes.

You can add a small heart to the envelope with the words “Reuse Me” in it to encourage the recipient of your envelope to reuse it, too.

Have Fun and Encourage Others to Reuse

If you are a company that regularly uses padded envelopes for shipping, ask for them in your Buy Nothing group and get the good word out to others that stockpiling them, for sharing, is a good idea, rather then throwing them away.

What about Tyvek plastic envelopes that have logos on them or come from FedEx, yet you want to use the USPS instead? I simply turn them inside out!

A plastic padded envelope can be used both inside and out.

Turn Your Padded Envelope Into Something Cool! Creme de la Craft has a great tutorial for transforming your padded envelope into an ipad case. Simple. Smart.

Recycle Tyvek Plastic Envelopes & Mailers: If you ever have too many to use and can’t offload them, did you know you can recycle Tyvek envelopes through Dupont? For small quantities (less than 25 envelopes/month), turn any Tyvek® envelope inside out, so the unprinted white surface shows on the outside. Stuff the inside-out Tyvek®envelope with other used Tyvek® envelopes for recycling. Address and mail the envelope to: Tyvek® Recycle Attn. Shirley B. Wright 8401 Fort Darling Road Richmond, VA 23237. Easy!

Make Your Own Mailers: If you’ve run out of mailers and no one has them for you on your Buy Nothing Group, make your own using cereal or cracker boxes. Adventures in Fluff has simple instructions on how to make your own paperboard envelope. You’ll wonder why you ever bought them in the first place after making one or 2. And they’re very cool because they send a message of reuse to your mail recipient.

Now your shipping is getting closer to zero waste!

If you’re looking for more ideas on how to make envelopes or reuse those you receive in the mail, please visit our Trash Backwards app where all items in your home and office can be reused, recycled and rethought.

25 Reuses For Tea Leaves

The Many Uses for Tea Leaves. Photo © Liesl Clark

1) Tea: Reuse your tea leaves for….more tea! Just reinfuse.

2) Compost: Tea leaves are an excellent material for your compost, tea bags and all.

3) Worm Food: Worms love used tea leaves as much as coffee grounds.

4) Eye Compress: Place cool wet used tea bags (or loose tea even) over your eyes to remove the puffiness (eyes closed, please). Tea is an anti-inflammatory and it can also remove rings under your eyes. Pink eye and styes are also combatted by used tea bag compresses.

5) Sting or Itch Remover: Used wet tea is known to remove itchiness from rashes and stings. Try it!

6) Deodorizer: From removing odors from your fridge to your carpet and dog bed, dry used tea is a wonder stink remover.

7) Acne Prevention: Green tea leaves rubbed over your face helps prevent acne.

8) Incense: Add some tea leaves to your favorite incense and burn it. It adds a nice smell.

9) Foot Deodorizer: If you have bad smelling feet, soak them in a bowl or sink full of brewed used tea leaves.

10) Insect Repellant: Burn dried tea leaves outside if mosquitoes are a problem. They don’t like the odor.

11) Plant Water: Used tea leaves soaked in water for a day makes excellent plant water/fertilizer and mulch.

12) Fertilizer: Here’s a good article on using tea leaves as fertilizer.

13) Window Cleaner: Long-steeped used tea leaves make a great window washing liquid.

14) Make Chagra: Chagra is a used tea leaf product made in Japan that essentially is used in the household for many of the ideas above — deodorizers and fertilizers.

15) Floor and Furniture Shine: Mop floors and wipe down furniture with brewed used tea leaves. The tannins in the tea will add a shine to your wood.

16) Toilet Stain Remover: Try pouring your wet used tea leaves into the bottom of your toilet where you might have stains. Leave them there for a while and then flush ’em down the toilet. They might help remove your toilet stains.

17) Hair Dye: Dye your hair in black tea (save up your used tea bags for this) and see if you like the results. Tea will also add shine to your hair.

18) Soothe Burns and Sunburns: A teabag with wet leaves can help soothe your burns.

19) Rose Food: Roses love the tannins in tea.

20) Meat Tenderizer: Soak meat in a tea leaf infusion to tenderize.

21) Tea Dye Your Fabrics: For an antique look try dying your garment in tea.

22) Carpet Freshener: Sprinkling dried tea leaves over the carpet and vacuuming up removes odors and dust.

23) Raise Silk Worms: Silk worms love lea leaves. Start your own farm.

24) Wart Remover: Tea is reportedly an excellent wart remover. Apply wet leaves or used tea bag to warts and eventually they’ll disappear.

25) Divine Your Fortune: Reading tea leaves, or tasseography, is an ancient craft. Learn it.

Do you have more tea reuses to add?

DIY Dryer Lint Fire Starters

By Finn Clark

Finn's DIY Fire Starters

We live in the Northwest where the winters are long and wet. Like most 9-year-olds, I’m interested in (and learning about) fire and what my parents call “combustibles.”

I like to forage for wood with my wood-cutting tools.

Our home is heated almost entirely by wood and since we forage for our own wood in our forest, it’s often pretty wet. I decided it was time to make some fire starters for cold wet nights when nothing wants to burn. These things will definitely help start your wet wood burning, especially if you use 2-3 of them. Here’s how:

The things you'll need: Lint, egg cartons, wax scraps, string, shredded paper, matches.

Gather together:

Lint

Egg Cartons

Wax Scraps (we melt ours into pie tins for easy re-melting)

Wick String or Just Plain String,

Shredded Paper, Paper Scraps, and/or Sawdust

Matches

Melt your wax and dip the wick string in it to make a true wick.

Next, you’ll need to melt down your wax scraps. I place our previously-melted wax scraps in a pie tin with another pie tin underneath and place the double-layer pie tins over our pilot light on the stove. That’s enough to melt the wax in the tins and it’s safe for little hands like mine that could get burned by the wax. Dip your string in the melting wax to make a true candle wick. They burn more slowly and readily with the wax infusion.

Mix your lint and shredded paper (and saw dust if you have it) together in a big bowl.

While your wick is drying, mix all your lint with shredded paper and you can add sawdust and small wood chips if you have them.

Really really mix it well.

I think I like the mixing part the best.

Cut your wicking into little wicks.

Now that your wick is dry, you can cut it into small 2-3 inch wicks for each fire starter.

Stuff your dry ingredients (wick in the middle) into each egg carton cup.

Now you can stuff your lint mixture into the egg carton cups. We take a small handful, wrap it around a wick, and then jam it (with the wick standing up in the middle like a candle wick) into each cup.

Pour your melted wax over the whole mess. Lots of it.

We then pour our melted wax over the top of the paper/lint/wick-filled egg carton. I let my mom do it because even though we have 2 pie tins under the wax, it could spill and hurt me.

Another angle of Mom doing the pouring. It was cold in our house so she's wearing a down vest. That's why we needed fire starters -- to get the fire started.

Do you see little matches standing up in the back row there? That’s my secret ingredient. I like to use matches dipped in wax as my wicks. They’re actually home-made water-proof matches but that’s another post for a later time. They work really really well as wicks, too.

These are my fire starters.

When your wax has solidified and cooled, the fire starters are ready to be used. Simply rip off a single cup at a time and light your wick when you’ve placed your fire starter where you want it in your well-laid fire.

Lighting our fire starter is the best best part.

Now we get to enjoy a warm winter wet wood fire.

Our warm winter fire by home-made fire starters brings smiles.

New Year’s Reduce, Reuse, Recycle (Re)Solutions

New Year's Reduce, Reuse, Recycle Re(Solutions) Bring Simplicity and Joy. Photo © Liesl Clark

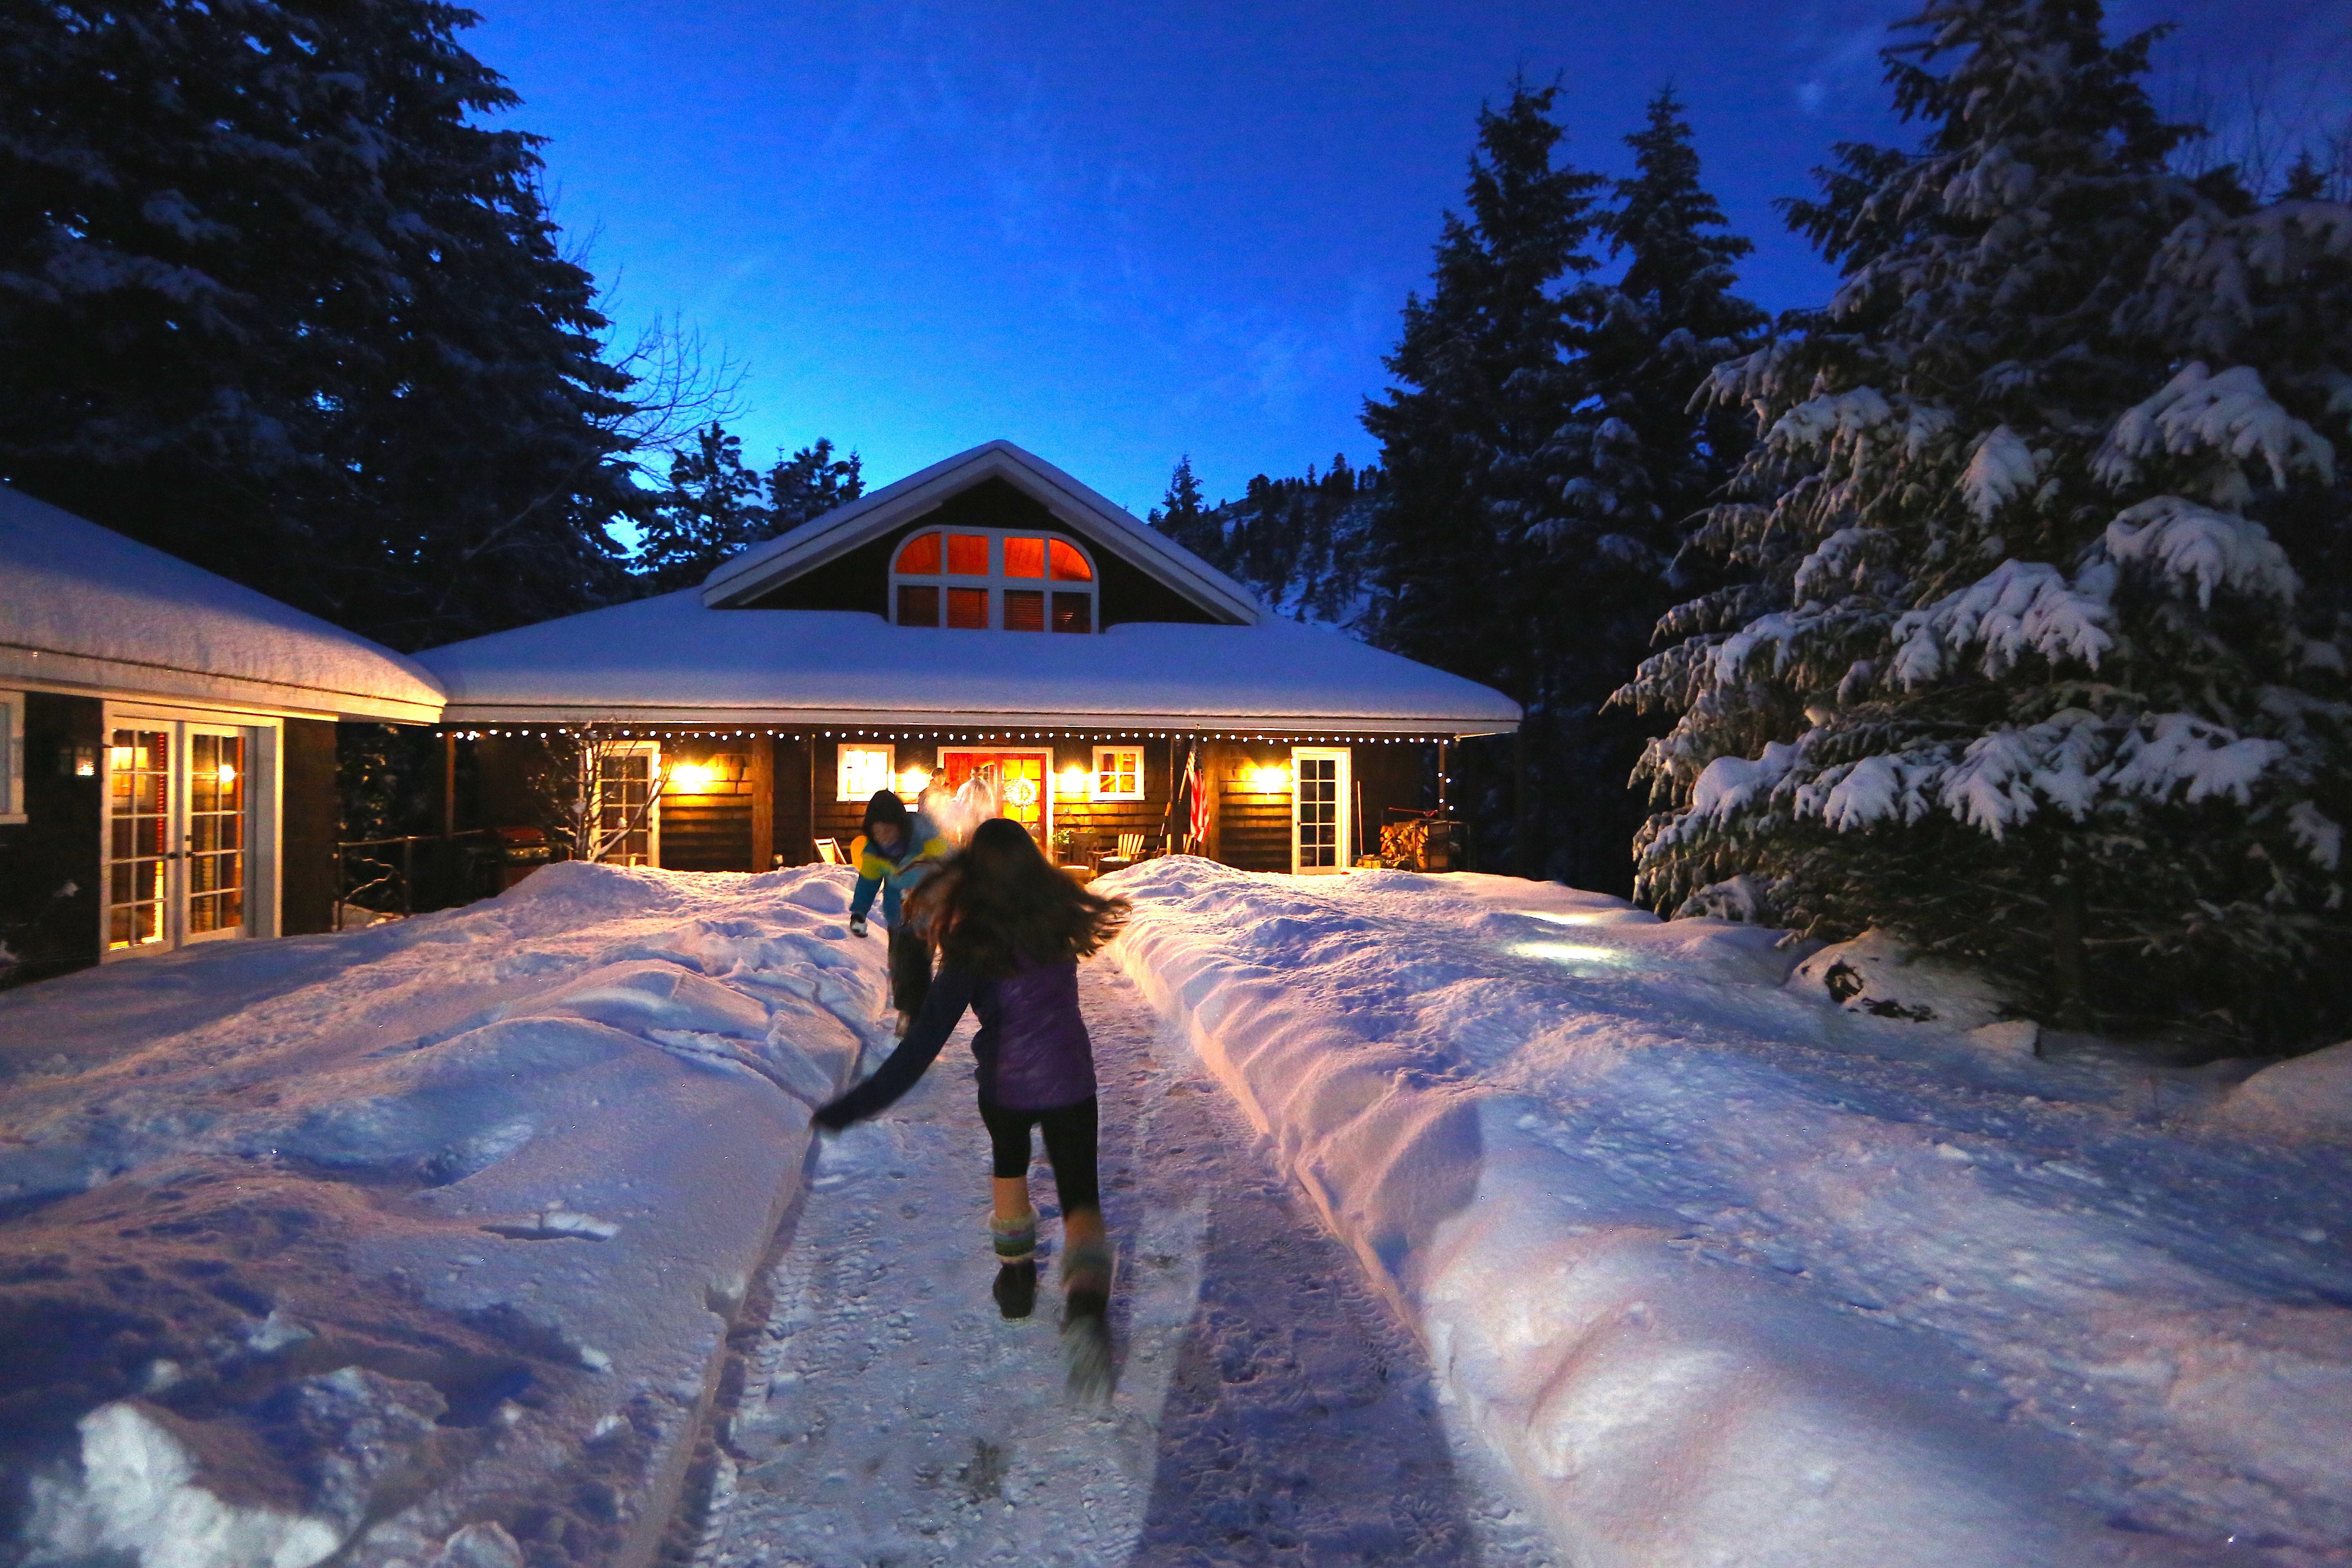
New Year’s Reduce, Reuse, Recycle (Re)Solutions Bring Simplicity and Joy. Photo © Liesl Clark

In the New Year, I believe many of us have dreams of simplicity, homes de-cluttered and made minimal yet functional. Can this be achieved in a sustainable manner? Yes!

Sustainably reducing our junk brings a sense of freedom and joy, and I can tell you from experience that it’s entirely attainable, without trashing the environment. The key is to take simple steps toward offloading your excess items. As a byproduct, you’ll find real pleasure in seeing the value in your things and the joy they can bring others, rather than just tossing them into the landfill.

Here are 9 of our favorite New Year’s (Re)Solutions to help you reduce the stuff weighing you down:

I suggest you take a week to truly de-clutter and reduce.

STEP ONE: Each day of the week choose one room to focus on, so you don’t wear yourself out on day one. Do a decluttering pass through the room, carrying a box which will hold the items you’re ready to offload.

STEP TWO: Can any of your unwanted stuff be reused? Join your local Buy Nothing group, a gift economy where people share what they have with their neighbors. Keeping our stuff in our local materials economy is one of the greatest gifts you can give your own community, connecting you to the people around you and helping us all to reduce our consumption. See if there’s a group near you or ask the founders team to start a group in your area if you’re willing to be a local admin.

You can then post each of your items in your group. Don’t be shy! Your stuff is another person’s treasure. People give cement blocks away in our group, sticks, even used bubble wrap, extra pans of homemade lasagna, chicken feed, and unwanted jewelry. There’s no such thing as “trash” in our groups as you may find an artist who could use your discarded item or a small business owner who needs bubble wrap for packaging their items for shipping. If you don’t have a Buy Nothing group in our area, then move on to step 3.

STEP THREE: Have a few spare boxes ready to hold your leftover unwanted and unused items in your garage, basement, attic or spare room where you can then separate the pile into distinct categories:

1) Stuff to Donate to an Animal Shelter: Do you have old blankets, towels, or extra pens and pencils hanging about? You’d be surprised to learn what items most animal shelters could use. Here’s a typical wish list for a local shelter.

To find an animal shelter near you, click to The Humane Society‘s website where they have links to the best resources for locating local animal shelters. All you need to do is input your zip code to find a local shelter. Most have a wish list online, but you can call to find out their specific needs.

2) Stuff to Donate to a Charity That Will Come and Pick Things Up: There’s nothing better than people who come to you and take away your unwanted stuff. Donationtown has a website where you can input your zip code a find a charity that will come to your home and pick reusable household items up. But if you have a local charity, like GoodWill where you can drop off your items, that’s another great option.

Are you seeing the forest through the trees? Ridding of your excess stuff sustainably isn't so hard. Photo © Liesl Clark

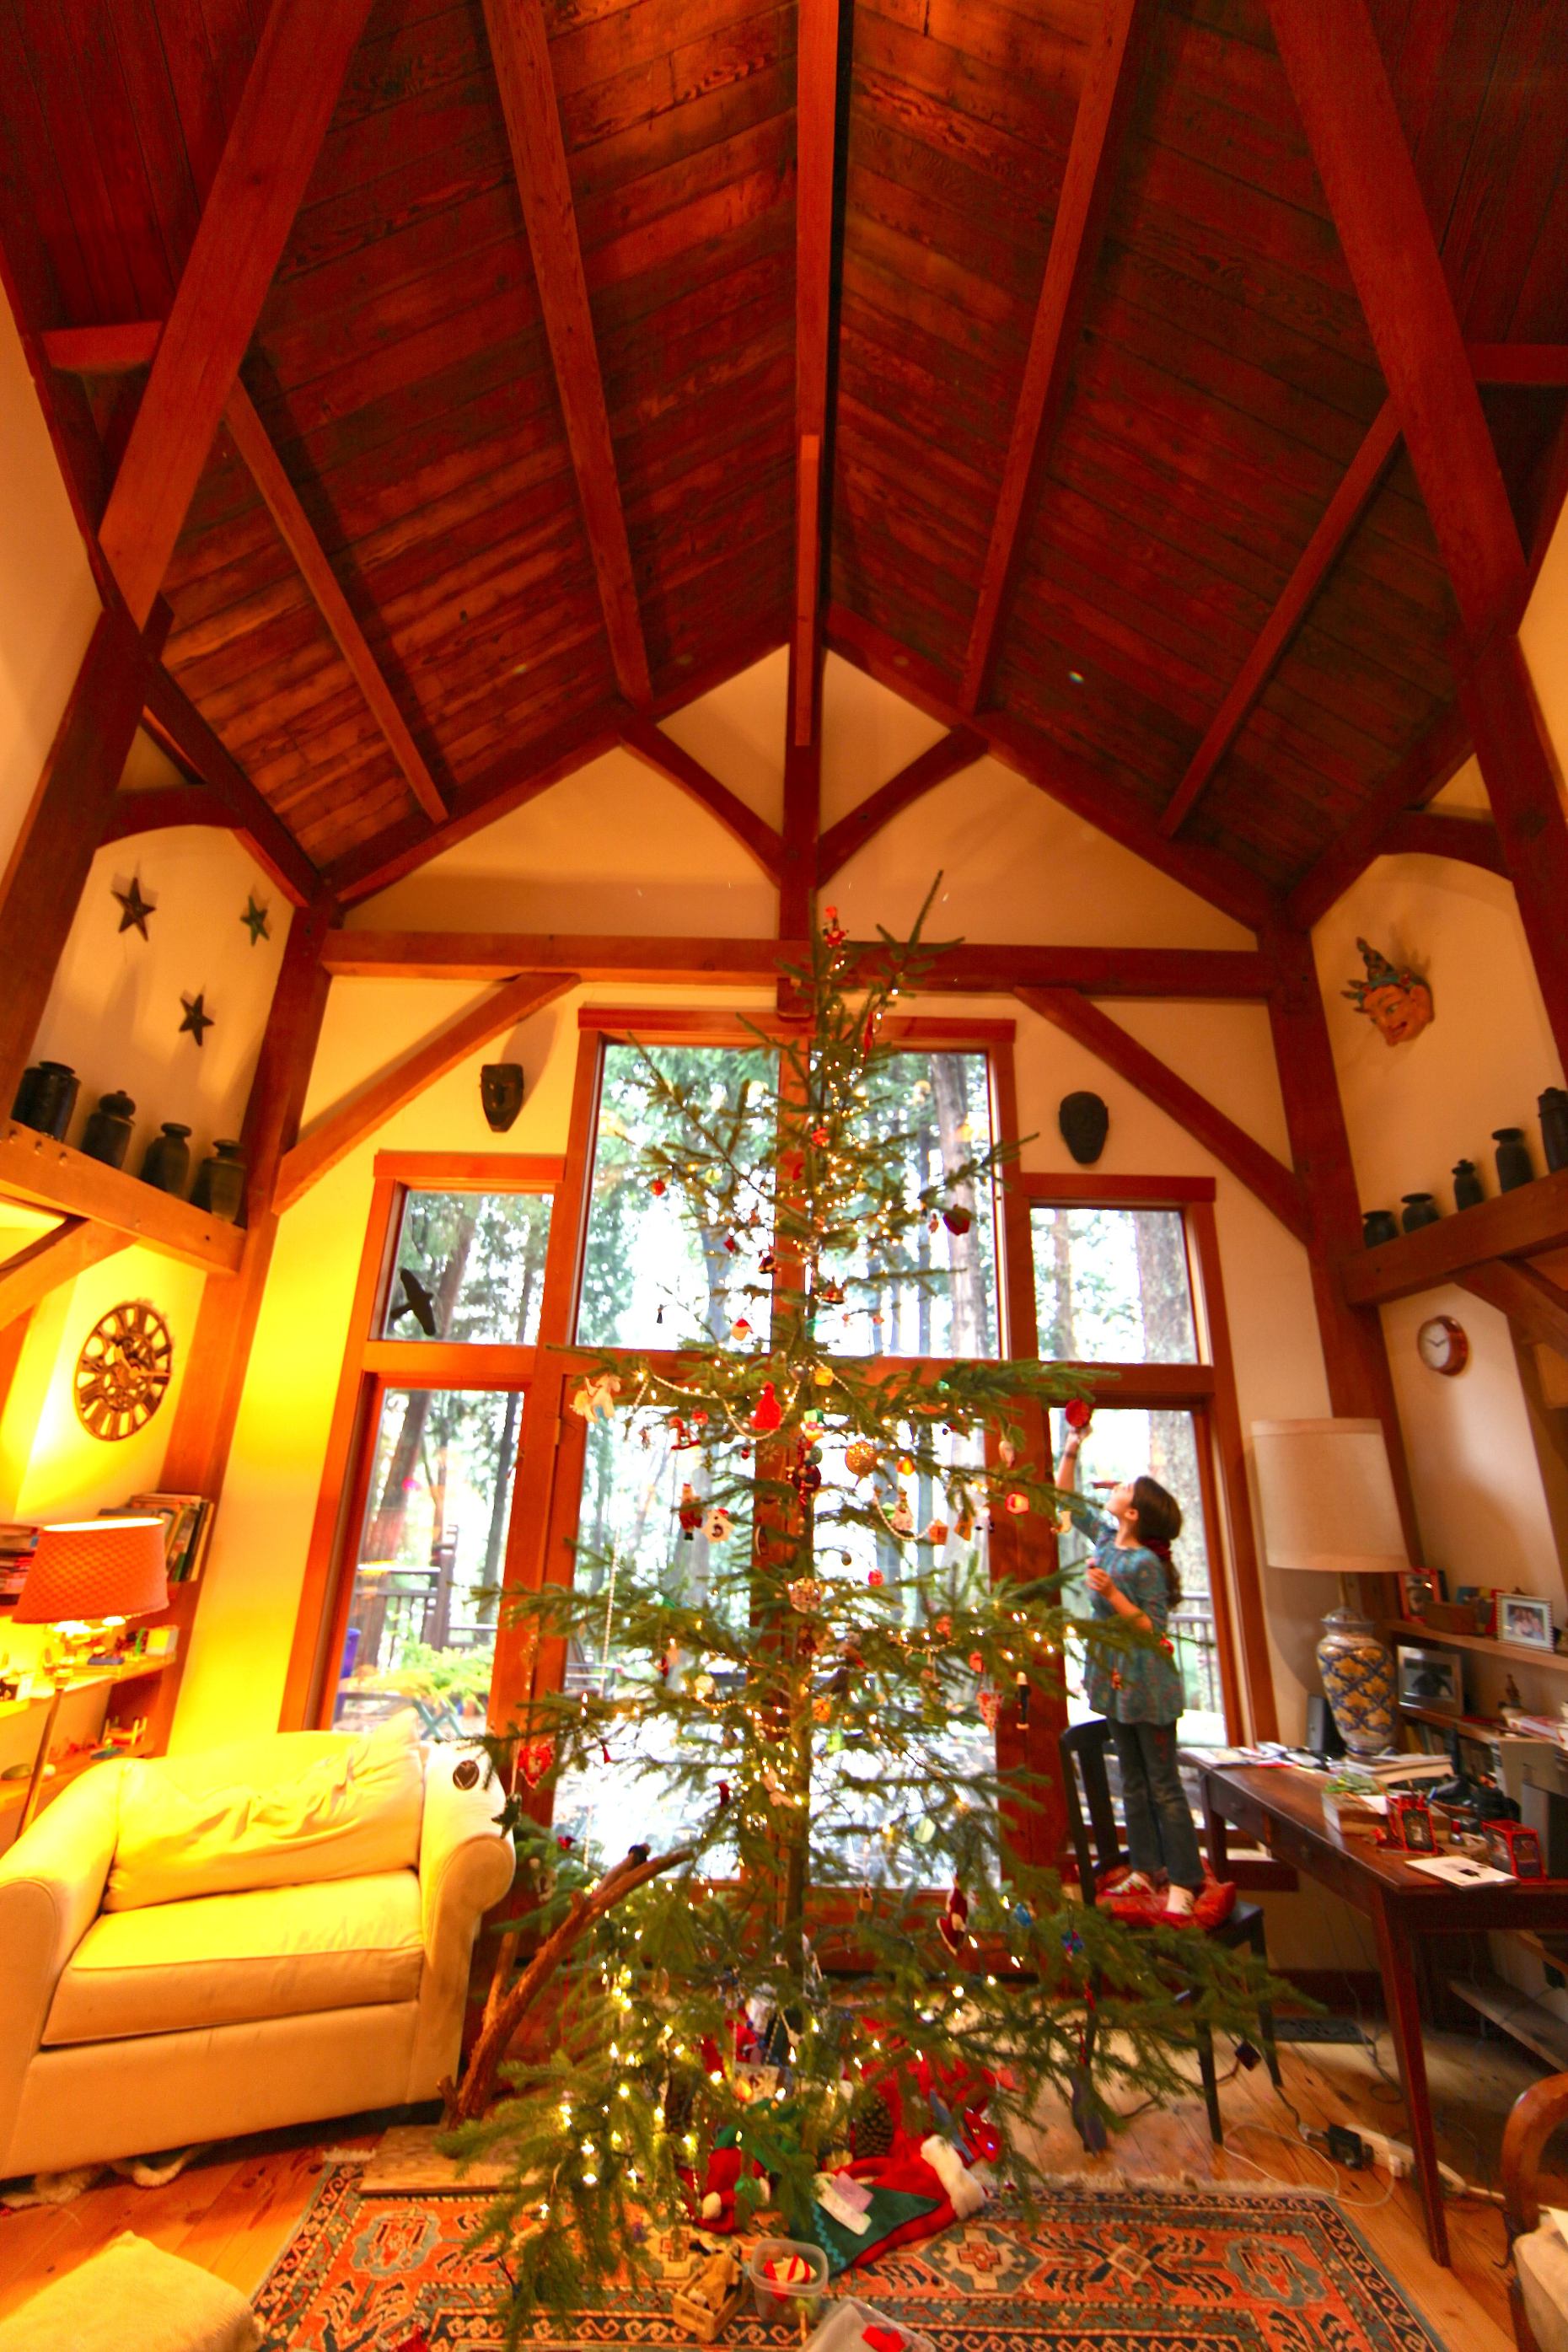
Are you seeing the forest through the trees? Ridding of your excess stuff, sustainably, isn’t so hard. Photo © Liesl Clark

3) Electronics Recycling: Take stock of your e-waste — your electronics that no longer work or that you haven’t used in a year or 2, and take them to Best Buy! Best Buy is one of North America’s top e-waste recyclers and you can easily find one near you. This task is a simple one: load up a cart with your old TV, computers, vacuum cleaner, and wheel it through the front door and there will be a place by the front door to leave your electronics for recycling. Done.

You Can Recycle 3 Electronic Items Per Visit to Best Buy

You Can Recycle 3 Electronic Items Per Visit to Best Buy

4) Metals can go to a nearby scrap metal facility: We save our metals in a special box to be taken periodically to our scrap metal bin found at the local transfer station. Metals of all types have value and can be repurposed into new items made of metal. Saving things that are primarily made of metal can benefit your scrap metal facility greatly and keep those precious materials out of the landfill and in our materials economy for years to come.

5) Do you have a cupboard filled with plastic containers? Reduce it by half and you probably won’t miss what you’ve removed. Save your favorite ones for storing dry goods in and then go through your jars and do the same thing. If you have extra lids, recycle them. Or if you’re missing lids, recycle the jars or containers themselves. The new year is a time to take stock and simplify! I reduced my jars by half and passed the good ones with lids on to our local senior center that collects them for projects. Check with your senior center to see if they can use them or post your jars on your Buy Nothing group. Someone will have a use for them.

6) If you’re trying to reduce old stockpiled boxes of random stuff, make a pledge to go through one box at a time. Give yourself time to go through it and separate the items into recyclable items and those that can be given away and reused. I try to remind myself that we’re stewards of our stuff on this planet and our job is to, at the end of your stuff’s usefulness to you, dispense with it responsibly.

Stockpiled Boxes in the Attic: Emptying Them Out One Per Week is Do-able.

Stockpiled Boxes in the Attic: Emptying Them Out One at a Time, Even One a Day Makes the Task Do-able.

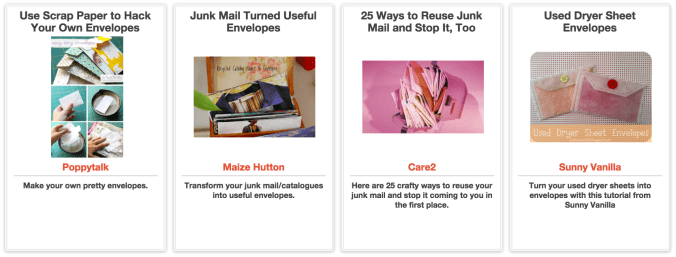
7) If you have old family photos you want to reduce, you can always check with family members to see if they want them. By scanning them digitally, you can save them on a small thumb drive and then you have the photo paper waste to think of. There are some great ideas out there for photo reuse, like turning them into tile coasters or donating them to a scrap art store. Remember, your old family photos do have potential value, especially for your family’s future generations.

8) Books: If there were ever an easy item to help you get rid of, it’s books! Most libraries want your books as do many non-profits worldwide.  We have a local “Books and Beer” get-together every few months in our Buy Nothing group where we can meet neighbors and share our books.

9) Make a promise to yourself to be mindful of what you acquire. Promise that all new things going into your home this year will be used and loved extensively, not squirreled away in yet another box to be offloaded at the end of the year. If you don’t take my advice, you might want to listen to a slightly different perspective on reducing. It all results in the same thing, however, less waste and less unnecessary clutter in your life for stepping out into a new year.

There is an elegance to beginnings and endings of years. Make yours a stuff-free one by following our simple steps. Photo © Liesl Clark

There is an elegance to beginnings and endings of years. Make yours a stuff-free one by following our simple steps. Photo© Liesl Clark

Post-Holiday Zero Waste Living

Carefree Holiday Fun in Zero Waste Style

Carefree Holiday Snowball Fun in Zero Waste Style © Liesl Clark

Some reliable sources say Americans produce 25% more waste over the year-end holidays than we do the rest of the year. I’m not surprised, given the household waste-management we’re undergoing this time of year. Our consumption, through gift giving/receiving and party-throwing, is at an all-time high.

Trimming the Tree, Photo © Liesl Clark

What steps can we take to make this year a game-changer, reducing our impact at years’ end? Here are some easy zero-waste practices that should make you feel good:

  1. Recycle Your Live-Cut Christmas Tree: Most communities have tree recycling options available. Boy Scouts in some communities conduct drives to collect trees and chip them up into compost, for example. Other communities will allow you to put your tree in your yard waste bins.
  2. Reuse Your Live Christmas Tree: We throw ours in our brush pile and then cut it up for kindling once the wood has cured. But we’ve created a list of 15 reuses for your Christmas tree if you’re interested.
  3. Take a moment to turn off your power, enjoy a few hours of power disconnection with family for introspection and connection. We do this for an entire day and the appreciation for each other, and the magic of slowing down comes back  into our lives.

    Ace Hardware is Doing Good Things in Our Hometown © Liesl Clark

    Ace Hardware is Doing Good Things in Our Hometown © Liesl Clark

  4. Recycle your broken holiday/tree lights: When your lights stop working (and, sadly, these things are so poorly made their working life is not very long), don’t throw them away. Most communities have a local option for recycling string lights. Ace Hardware, for example, is our local drop point on our island. But if you can’t find a local venue, you can send your lights to Light Source, in Texas, where they sell used string lights for recycling and give the proceeds back to charity. Or, better yet, collect a few from friends and neighbors and send the tangled mess in a larger box so you know you’ve diverted more than your own from your waste stream. The Refining Company in Medford, OR also recycles holiday lights. Recycling string lights is a booming business in China and although the practices aren’t the most environmentally-sound, thousands of tons of string lights are kept out of our landfills. The Atlantic has a must-read article about the recycling of our string lights in China to mine out the copper wiring inside. After reading the article, I swore we’d never buy string lights again. We receive thousands of unwanted string lights at our local summer community auction, so our family retrieves a few of the unwanted strings from there each summer and use them until they stop working, which, sadly, isn’t very long. IMG_0769 copy
  5. Stockpile your styrofoam and recycle or reuse: Styrofoam is the single most prolific plastic material found on our beaches. In some communities, it has been banned. If you received styrofoam as part of a gift this holiday season, consider yourself the future steward of this highly toxic material. Finding your local recycling option for year-round styrofoam stewardship is the single best thing you could do for the environment this season. In the Seattle area, for example, a free drop-off location in Kent is the place. In the meantime, ask your local zero waste group if there’s a nearby store, like Bay Hay and Feed on Bainbridge Island, that conducts drives to collect the stuff so it doesn’t end up in our waters.
  6. Save your Christmas cards for repurposing: You can always recycle the cards you get from friends in your paper recycling bin. But a fun activity is to cut off the side with the writing and save the card with its attractive artwork for future homemade gift tags. Some people use them to create wreaths for next year, too. And I found a pretty bunting idea for displaying them on your hearth.
  7. Save all ribbon for reuse: Ribbons are made of plastic and survive in our oceans unscathed for years. We’re always surprised to find ribbon from birthday balloons wrapped up in seaweed (they are also known to entangle baby seals, sea otters and sea turtles) and once we break them free from the wrack line debris, the ribbon is as good as new. Save the ribbon you receive on gifts and give the gift of life to our marine creatures by not buying more of it. If you reuse what you have, and receive in the future, you’ll never need to buy more ribbon again. Giving and receiving is cyclical like that.
  8. Find a spot to store re-usable tape: This is a true insider’s tip. There’s plenty of tape and stickers that will peel right off a bag or shiny package and it, too, can be reused. The trick is to have a convenient spot in your home where you keep it. My friend Rebecca puts hers on the side of the fridge for the kids to access easily (kids go through gobs of tape.) We put our reclaimed tape on the inside of a closet door where office supplies are kept. Family members know that’s the community tape dispenser. We haven’t bought new tape in months.
  9. Save what wrapping paper you can for reuse: You don’t need an explanation for this. It’s yet another way to see how reuse can save you money. Most wrapping paper can’t be recycled because of the materials used to make it. Composting or burning it, too, isn’t recommended because of the toxins involved. Because we are committed to not buying new wrapping paper, what do we use? We make beautiful cloth gift bags and give them to friends and family for reuse. We recycle our children’s art as wrapping paper. We use pretty cloth as wrapping paper in the Japanese style of wrapping. We keep items in their shipping boxes and decorate the boxes with ribbon we’ve found on our beaches or plastic marine debris we’ve recovered as a reminder of our mission in the first place. These packages below are how our children creatively wrap their gifts in found items from our home or the beach:

10) Pass on your unwanted faux tree through The Buy Nothing Project or give to Goodwill: Thousands of plastic trees end up in the landfill after the holidays. These aren’t meant to be single-use items. If you need to get rid of yours, pass it on to Goodwill, sell it on Craigs List, or Buy Nothing it.

11) Don’t throw away your unwanted or broken items or toys: One of the single-most satisfying activities you can do with your family is create a workspace where you can repair the items you received over the holiday that were made to break within the first 6 months’ (or sometimes 6 hours) of use.

Send us your stories of what broke, and how you fixed it! We’re looking for inspiration from you, stories about how you defied the odds and came up with a smart solution to repair or repurpose an item so it could be diverted from a landfill and have a new life.

12) Thank your tree: And finally, a special thank you movie in tribute to the pesticide-free, sustainably grown US Forest Service tree we weeded from the dense thicket on the tree-laden slopes of the Olympic National Forest:

15 Reuses For Your Live Christmas Tree

Each year's Christmas tree is reused on our property. © Liesl Clark

Each year’s Christmas tree is reused on our property. © Liesl Clark

Before you send your live Christmas tree out on the curb for yard waste pickup or to the Boy Scouts for recycling, there may be another use that’s perfect for you and your tree.

  1. Kindling: Throw your live tree in your brush pile, let it cure, and then cut it up for kindling for next fall.
  2. Save Your Perennials from Freezing: Cover your perennial beds with your cut up pine boughs to either insulate them from future sub-zero weather, or for preserving the piled up snow that’s already on them. Repeated freeze-thaw cycles can kill your best perennials.
  3. Trivets and Coasters: Cut 1” disks from the trunk to make trivets or coasters. It’s a fun project for the kids
  4. Bird Feeder: Prop up your tree outside in the back yard and trim it with strings of popcorn and birdseed ornaments so your wild birds can have a winter feast.
  5. Do Something Really Cool With Your Tree: Fabien Cappello fashioned stools from abandoned Christmas trees on the streets of London.
  6. Plant Stakes: If you don’t have access to sticks in the woods near you, strip the branches of their needles and use them to stake your indoor plants that need some extra support.
  7. Pea Sticks: You can use the stripped branches as pea sticks later in the spring. Criss-cross them to make a trellis for your peas to grow up.
  8. Marshmallow Sticks: Those same pea sticks can then be used as marshmallow-roasting sticks in the summer.
  9. Garden Edging: Cut the trunk into disks to use as a garden border if you line them up on their sides and dig them 2” into the soil. These look really pretty on the garden’s edge.
  10. Fire Starter: We save some of our needles to use in our homemade fire starters.
  11. Potpourri: Use the needles for a homemade balsam potpourri.
  12. Garden Path: Use the disks cut from your tree trunk as flat stepping “stones” in your garden path. If you have a chipper, the wood chips from your tree can make nice garden path material, too.
  13. Erosion Barrier: We have used past trees along a slope on our property to help prevent a slope from slipping. This is our ongoing brush pile that is stabilizing the slope and holding up our lawn above it nicely.
  14. Habitat: If your tree ends up in your brush pile, or out in a spot on your property, it provides cover for birds and little rodents, making a safe habitat for plenty of critters. Some experts claim that throwing a tree into your pond can provide safe cover for your fish.
  15. Save the Blue Herons: In Illinois a special Christmas tree recycling program reuses the trees as nesting materials in a blue heron rookery.
    Our Elves © Liesl Clark

    Our Elves © Liesl Clark

    What do you do with your tree? Are there any other reuses that we didn’t include?

Easiest Prettiest Ornament You’ll Ever Make

As we’re just two days to Christmas, I’ll keep this brief. But suffice it to say, this is a great children’s activity in the days before Christmas.

Items Needed:

1 Plastic Lid

Non-stick cooking oil or spray

Glue

Leftover beads, sequins, glitter, sparkly stuff

We even used some beach glass and small shells from the beach

Piece of ribbon or yarn

All you need is to pull a plastic dairy tub lid out of the recycle bin, like a large yogurt container lid. The 4″ wide version works well but you can use a small one, too, for a smaller ornament. Spray or lightly oil with non-stick cooking oil. Then pour glue into the lid. Start placing your items in the glue spaced nicely around and don’t be shy just throw it all in there. Be sure to also stick a loop of yarn or ribbon at the top to act as your hanging ribbon. Wait for a couple of days for the glue to dry. If you place your lids in the sun or in a warm place the drying time goes faster. When it’s dry, just flex the lid around a bit and the ornament will come off easily! You end up with a pretty ornament that glows and sparkles with Christmas lights behind it. Easy!

Easy Peasy Pretty Ornament From a Plastic Lid Mold

Easy Peasy Pretty Ornament From a Plastic Lid Mold