Valentines: The Original Folk Art Scrap Hack

Handmade Paper Valentines, An Original Folk Art. Photo © Liesl Clark

I remember having to make valentines cards in elementary school for each of my classmates. The handmade cards tended to come from whatever scrap paper, lace, and paper doilies we had around our home. Each valentine was different, a scrapper’s attempt at making beauty from what was available.

Scraps of Paper. All You Need to Make an Original Valentine. Photo © Liesl Clark

And then things changed, and there was a new ethic afoot: Skip the handmade valentine and buy a mass-produced version for your friends, complete with a stash of sweets. All you had to do was fill in your name, the recipient’s name, and add a packet of hearts. It certainly was a time-saver, but these so-called valentines felt like a cop-out and an opportunity for some not-so-creative folks to make money off of us. I’m still a big fan of the hand-crafted valentine. You might say the valentine is an original form of folk art, and some still practice it today.

Our kids, over the past few years, have been assigned, at school, to make valentines for their classmates from materials found in their home. Alas! We could bring back the tradition. Here are a few examples I’ve pulled from our photos over the years:

1) The Traditional Scrap Paper Valentine:  We first gathered our scrap paper and cut out traditional hearts on card stock we had rescued from the landfill. We also save pretty scrap paper from magazines and junkmail so we have plenty of colors and textures to choose from for projects like this.

Cutting, folding, and gluing paper is all it takes to make a valentine. Photo © Liesl Clark

2) A Scrap Fabric Valentine:  Then we found some pretty scrap fabric and cut out hearts to glue to the reclaimed card stock. Those felt a little more 3D and folksy.

Add a fabric scrap to your valentine for a more 3D effect. Photo © Liesl Clark

3) Bookmark Valentines:  Cut long strips of paper about 2 inches wide by 6 inches long.

Paper strips from handmade paper. Photo © Liesl Clark

Punch a hole (we punched a star, really) into one end of each strip.

Punching a hole in the end of your strip. Photo © Liesl Clark

Tie a little ribbon or scrap fabric through the star, and you’ll have bookmarks ready to decorate as useful valentines.

Bookmark Valentines are Useful. Photo © Liesl Clark

4) Valentine Heart Wands: In our pantry, we found some pie tins and colorful plastic straws we had found on the beach, saved, and washed. These would become our raw ingredients for heart wands we made for several of the students:

Heart wands are easy. All you need are pie tins, straws, and a glue gun. Photo © Liesl Clark

Cut a heart out of your pie tin and glue it to the end of a straw. They work with pretty sticks, too. And if you want to embellish your silvery pie tin heart, you can glue a smaller heart to your tin heart.

Hearts of Paper and Hearts of Tin. Photo © Liesl Clark

The Tin Man would be proud.

Heart Wands From Pie Tins and Straws. Photo © Liesl Clark

We've been making these for years. Photo © Liesl Clark

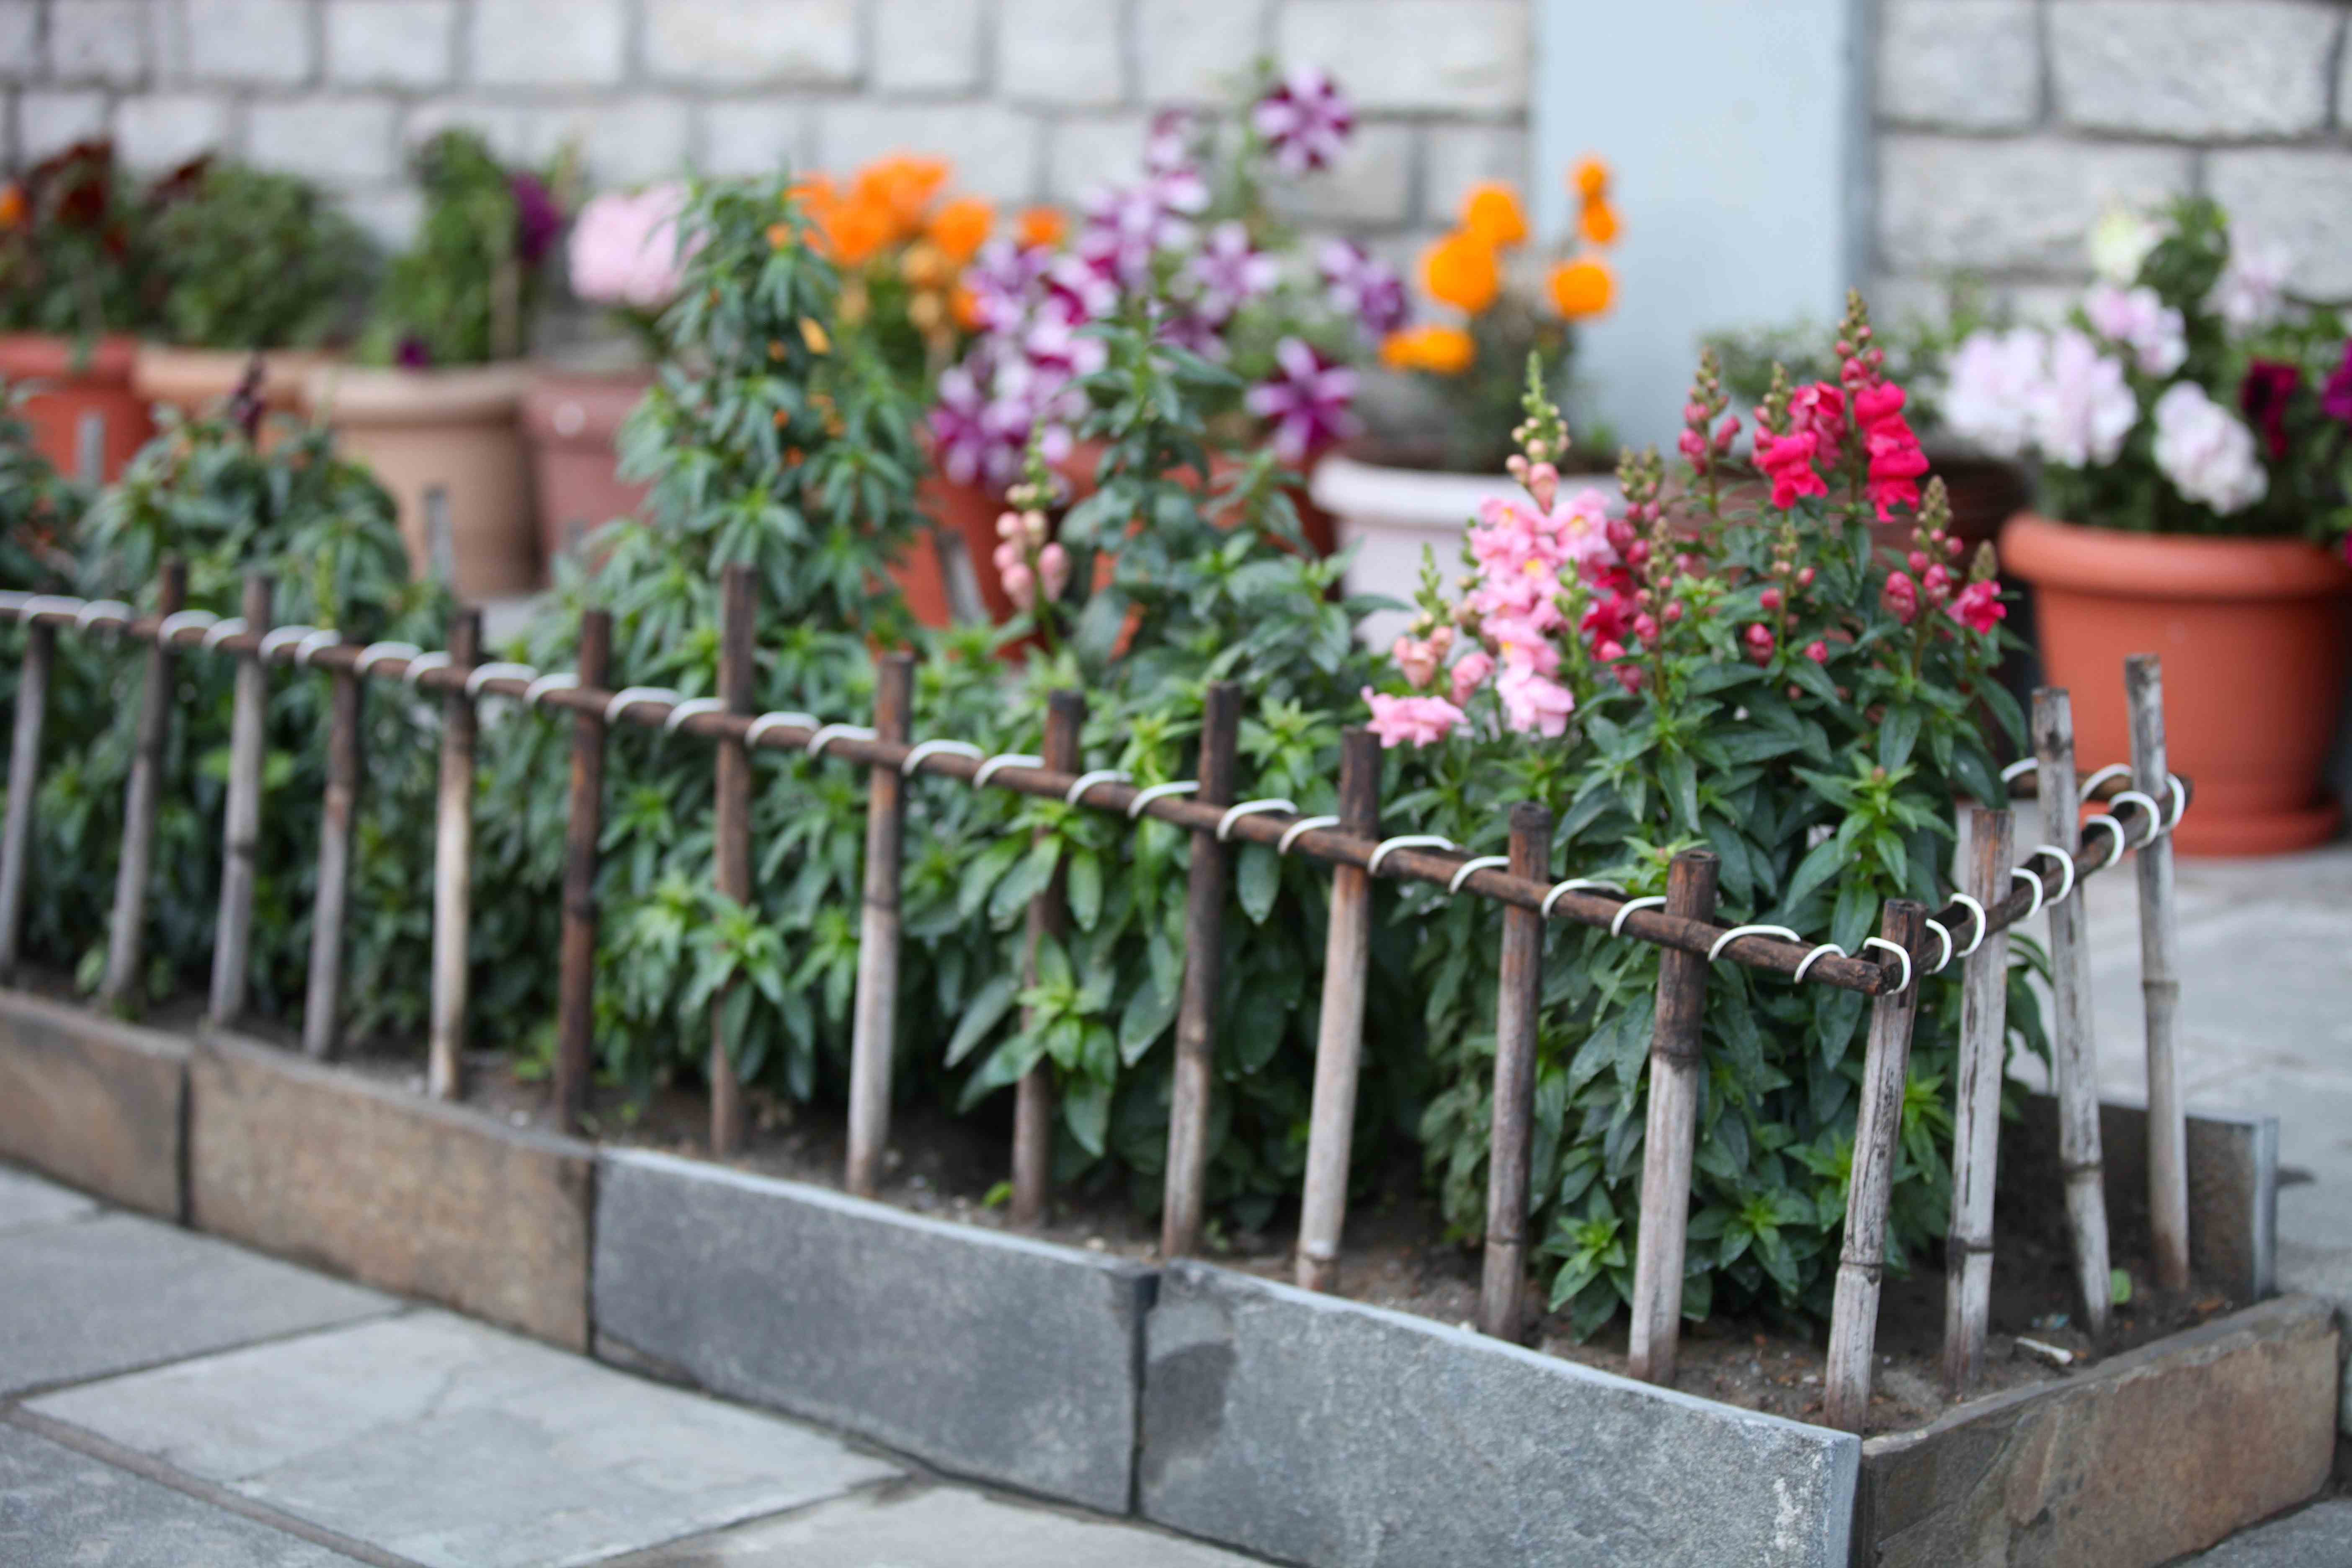
5) Wire and Yarn Hearts:  We often craft wire hearts from scavenged wire and then wrap them in yarn. The children love hanging them around the garden. The little heart below was made by my daughter when the deer ate her bleeding hearts. She was so saddened by the loss of her hearts, she placed a fence around them and crafted this wire heart on the outside for the deer to eat, still leaving them something to enjoy. The sweetness of a 6-year-old is undying.

A wire and yarn heart to help protect the bleeding hearts from the deer. Photo © Liesl Clark

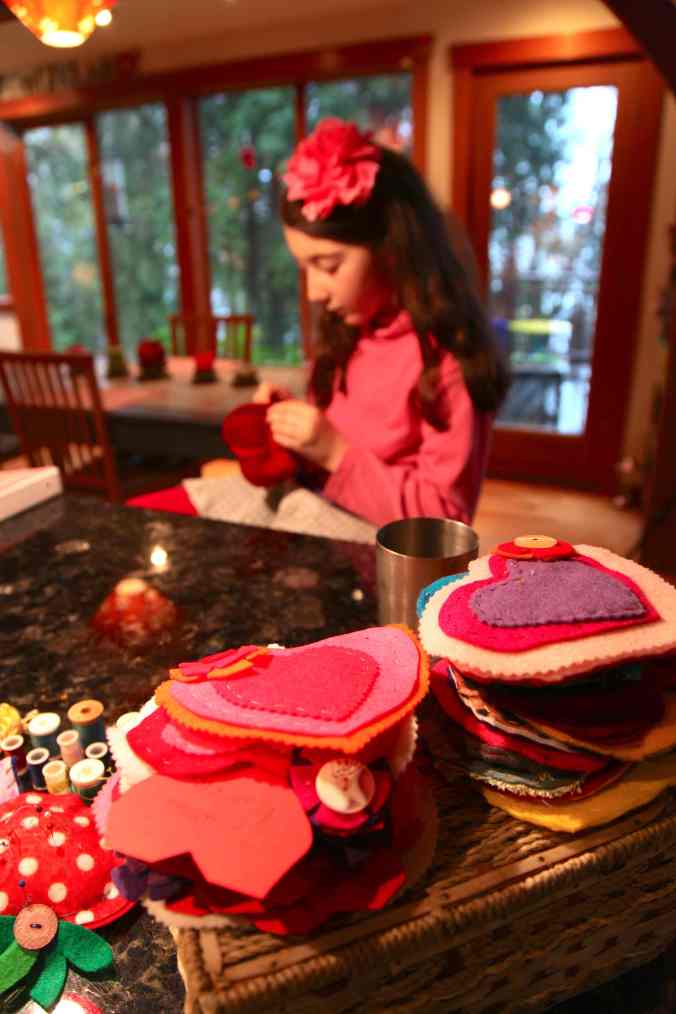
6) Classic Hand-Stitched Valentine: My daughter love to sew by hand. These hand-stitched valentines took her a month to make, but she poured her love and talent into each one. She left a little pocket in each to be filled with organic jelly beans, her favorite treat we buy in bulk at our local store. These are pretty easy to make so long as you have felt. We asked for felt on our local Buy Nothing group, and neighbors had plenty to share! She cut out hearts in varying sizes with my pinking shears and then layered them and sewed them together, leaving a pocket at the top.

IMG_0347

7) Produce Sticker Heart:  This one might be a bit of a stretch, but for those health-conscious sweethearts in your life, why not craft a produce sticker heart valentine? It was a cathartic exercise, for me, because those plastic stickers to announce that we’ve bought organic produce bother me greatly. No tutorial necessary, right?

Produce Stickers are Pink and Perfect for this Healthy-Heart Valentine. Photo © Liesl Clark


Send in a picture of your own homemade valentines. We’d love to share them with all our sweethearts.

DIY Cat Scratching Post

Give your kitty what she wants and make a real-tree natural cat scratching post! My theory is that your average carpet-remnant cat scratch tree only encourages your furball to scratch up your carpet or upholstery. If you give your cat what she wants, an actual tree branch to sharpen her nails on, she’ll leave your furniture alone. That’s what our cat does…mostly.

A Real Tree Cat Scratch Tree!

So, we went out to our brush pile and found the perfect curving fat tree limb with two Y branches growing from it so our kitty could have a few spots to climb to. I found a piece of particle board to screw the sawed-off limb onto. It was as simple as that. This scratching post has lasted 4 years and our cat still uses it happily.

We often attach bits of string with fun things for our kitty to bat at, to make it a fun playspace for her.

She loves her real tree cat scratch tree.

But here’s the best thing about this cat gym: When we’re done with it, we can break it down and burn it in our fireplace. No issues about waste here.

Do you have a DIY cat scratching post you can share here?

Yarn Scraps Are For The Birds

Spring is in the air! Save some scraps and bits to offer to your songbirds for spring nest-building. An old suet feeder will do the trick. At this time of year our feathered friends need all the help they can get.

Here are some great items that you can include:

Natural fiber yarn

String

Horsetail Hair

Shredded Paper

Feathers

Hay

Straw

Wool

Small Fabric Scraps

Cotton Balls

Cotton Wadding from Aspirin Bottles

Dried Moss

Twigs

Leaf Stems

Dog Hair

Cat Hair

So, don’t throw your yarn scraps and other bits away. Save them for the birds! In Paonia, Colorado, one spring, my son found the most unique birds nest, made entirely of yarns, hay, polyfibers, human hair, horsetail, and string.

IMG_4213 Photo © Liesl Clark

DIY Bamboo or Stick Fence

Bamboo + Electrical Wire = Pretty Garden Fence.

This bamboo fence, in Kalopani, Nepal, is one of my favorite garden fences I’ve come across while traveling. It’s a simple construction of bamboo sticks and woven electrical cord to hold the whole structure together. Here, people use what they have at hand to create beauty in an unforgiving alpine environment at 7,500 feet.

The electrical wire serves to hold the fence together.

Several 1-foot-high sticks are placed vertically in the ground about 5 inches apart and a long bamboo stick is split down the middle and placed horizontally across the vertical sticks, all woven together by an old electrical cord tied and knotted at the corner of the fence.

The horizontal piece is split in half.

It’s a simple construction and quite attractive for a high altitude flower garden at the base of Dhaulagiri, the world’s 7th highest mountain.

IMG_6524 © Liesl Clark

If you’re looking for some more interesting ideas for fencing materials, we might have what you’re looking for in our Trash Backwards app.

What have you used for fencing?

Wine Cork Pot Lid Grips

cork potgrippers

No Need for Potholders © Liesl Clark

Wine Cork Pot Lid Grips: Lift off hot pot lids with your fingers! Simple wine cork-stuffed handles mean no need for pot holders around the stove. Cram the corks tightly into the handle of your pot lid and you’ll never need to remove them again.

IMG_1383

Those are my 10-year-old’s fingers, lifting a hot pot. © Liesl Clark

They’re dishwasher and sink-washing safe, too! Smart. Easy.

IMG_1391


Garden Glove Love


Roadside Garden Glove. Photo © Finn Clark

It all started on a bike ride. We kept seeing garden gloves along the side of the road. In fact, we had seen the gloves lying there for weeks and finally decided to pick them up. One by one, over the course of about 2 weeks, we had managed to collect 20 pairs!

I Have Good Garden Glove Karma. Photo © Liesl Clark

We’re an island of avid gardeners, farmers, and a world-famous garden tour called “Bainbridge in Bloom.” Twelve months of gardening weather here on Puget Sound has afforded us 4 seasons of dirt digging. The problem is that the gardeners’ (or perhaps it’s the hired landscapers’) gloves too often end up along the sides of the roads, having fallen from the backs of landscaper’s trucks, farmers’ tractors, or islander’s cars. Being a food-grower myself, I couldn’t just let those gloves rot in the ditches.

Garden Gloves Rain or Shine. Photo © Finn Clark

My children and I have been collecting them: pulling to the side of the road, jumping out of the car, jumping back in, celebrating, for a year now and have 45 pairs plus about 50 singles ready for a mate. Do you have a single garden or work glove awaiting a partner? Don’t throw it out! Send it to us so we can marry it to one we have here because their next life is going to be GOOD.

We have gloves in every color. Photo © Liesl Clark

All pairs of gloves we reunite will go to Kathmandu to protect the hands of the rag pickers there. Life as a rag picker is tough, really tough, and many are children in their pre-teens. These kids, and plenty of adults, make a living picking through other people’s trash to compile enough polyethylene plastic or PET plastic bottles to send to India for recycling. It’s a decent living, but the conditions are among the worst on the planet.  We want to help by giving them the garden gloves we’ve found on our streets and in your garden sheds.

Give Garden Gloves or Help in Other Ways to Improve Conditions for the Rag Pickers of Kathmandu. Photo © Liesl Clark

My children and I made a movie about the rag pickers in Kathmandu. If you have a few minutes, this film short will give you a brief look into the work they do:

Most rag pickers have no gloves at all. They pick bare-handed through broken glass and human excrement to find their quarry, and the best protection they can have, in my humble estimation, is for their hands (of course it doesn’t hurt to have a face mask, too.) We’ve seen some rag pickers with just one glove, as that’s all they have.

Packed to the Gills, Ready for Zero Waste Travel

In August, we’ll be headed to Nepal again, to give gloves to Kathmandu’s rag pickers to aid in protecting them from the unsanitary conditions in which they work daily. Over two hundred rag pickers work at the city’s dump some 50 miles from Kathmandu. But countless children pick plastics from the Bagmati River as well as the streets of Kathmandu, and having a glove or two could save a child from infection, disease, and dysentery which comes with the territory.

Trash Day Curbside Pile in Kathmandu, Flattened by Rush-Hour Traffic

Want to help us protect the rag pickers, those moving Kathmandu’s trash backwards into new goods, to help reduce the mountains of garbage in the foothills of the Himalaya? There are 3 things you can do to help:

1) Use our Trash Backwards app and indicate when you’ve done something good. By clicking the “I Did It” button on any individual solution, you show us that you’ve changed your behavior to help reduce waste. These simple clicks that show what you’ve done to reduce, reuse, and recycle provide us with data to indicate whether a social movement like ours that educates through social media can make a difference. Every “I Did It” click means we can do some good, too. It’s a one-for-one correlation between your action at home/in the office and our action worldwide. For every “I Did It” click in our app, we’ll do our own good: We’ll hand out a pair of gloves to a rag picker, we’ll remove batteries from a water source in a village, we’ll collect plastics from rivers and shorelines, we’ll conduct a village waste audit. Every action you do enables us to do our greater good and ultimately find the support to do even more! So, please visit us at TrashBackwards.com and find some solutions to our global waste that you can undo in your own small scale, then hit the “I Did It” button and we’ll do the same. The more you do, the more we’ll do in return.

2) Send us your odd (or pairs of) garden gloves. We’ll likely have a match and can then get them into the hands of someone in need. Please know that the conditions are deplorable for a rag picker. Gloves could save someone from infection and truly make a difference. Does one glove have a hole in the thumb but the other is fine? Send us the good one!

Garden Glove Love

6027 NE Baker Hill Road

Bainbridge Island, WA 98110

3) Simply help fund our efforts to improve the lives of Kathmandu’s rag pickers and kids in higher villages. You can do so by donating much needed funds to the Alex Lowe Charitable Foundation so we can get our duffel bags of gloves (we donate shoes and books too) over to Nepal and remove toxic waste from the highest watersheds in the world while also helping to increase literacy in local villages. As little as $20 can go such a long way in Nepal. We’ve been bringing children’s books by porter, yak, horse, and donkey up to the highest villages in the Himalaya for 7 years now, and have opened 7 children’s libraries called The Magic Yeti Libraries. We bring books up and toxics down. Our target this summer is to remove batteries, CFL light bulbs, and plastics from the rivers, streams, irrigation ditches and water supply of villages between 9,000 and 14,000 feet. We’ll get these toxic materials out of the pristine waters and bring them down to a municipal organization that can dispose of them responsibly. We all live downstream of these waters, but for those who live in the villages nearby, the battery and plastics-laden streams need to be cleaned up as soon as possible.

Garden Glove Love was inspired by England’s Glove Love campaign, a nationwide movement to rescue single gloves and give them a new life on the hands of eager people wanting to help reduce our overall impact on the environment.

Start today with your efforts to reduce your own impact on our planet by doing some good with the stuff you already have in your life. Reduce, reuse, re-gift, repair, and rethink your material assets as you use our Trash Backwards web app and you’ll inevitably help others and our planet, too.

Zero Waste Shipping: Padded Envelopes & Mailers

Refuse & Reduce: We never buy anything for shipping, like envelopes, bubble-pack mailers, Tyvek pouches, padded envelopes and boxes because we receive so many of them. As a small production company, why buy new ones when plenty come in the door?

“Because they’ll look used and that won’t be professional if you reuse them,” you might say.

Since we’re all about reuse, there’s no problem gussying up a used envelope to resend to a client or partner, especially if we bring attention to the fact that we’ve given it a second life and ask them to reuse it, too. We have no problem reusing boxes for shipping, why not reuse padded envelopes? When I see a corporation reuse an envelope, I try to let them know how cool I think that is. A few weeks ago I received some of my hard drives back from WGBH/NOVA and it came in a box that was reused. It was probably the box I sent it in.

Simply sticking a new address label over the old one doesn’t take much thought. We often use a little piece of scrap paper and some glue or tape to cover over the old address and make a new label. Staples or tape can be used to reseal the mailer.

Share Your Excess Mailers: I save up my mailers so I can share them on my local Buy Nothing group. Neighbors are happy to come and get them, for reuse. Just before Christmas, I was able to offload a pile of padded envelopes to a neighbor who needed them for a company mailing. Using my old mailers definitely saved him some money. I included some blank mailing labels so he could cover up my address, but I often use a Sharpie to black-out the addresses and bar codes on previous mailers.

Don't Buy New! Reuse Your Padded Envelopes.

You can add a small heart to the envelope with the words “Reuse Me” in it to encourage the recipient of your envelope to reuse it, too.

Have Fun and Encourage Others to Reuse

If you are a company that regularly uses padded envelopes for shipping, ask for them in your Buy Nothing group and get the good word out to others that stockpiling them, for sharing, is a good idea, rather then throwing them away.

What about Tyvek plastic envelopes that have logos on them or come from FedEx, yet you want to use the USPS instead? I simply turn them inside out!

A plastic padded envelope can be used both inside and out.

Turn Your Padded Envelope Into Something Cool! Creme de la Craft has a great tutorial for transforming your padded envelope into an ipad case. Simple. Smart.

Recycle Tyvek Plastic Envelopes & Mailers: If you ever have too many to use and can’t offload them, did you know you can recycle Tyvek envelopes through Dupont? For small quantities (less than 25 envelopes/month), turn any Tyvek® envelope inside out, so the unprinted white surface shows on the outside. Stuff the inside-out Tyvek®envelope with other used Tyvek® envelopes for recycling. Address and mail the envelope to: Tyvek® Recycle Attn. Shirley B. Wright 8401 Fort Darling Road Richmond, VA 23237. Easy!

Make Your Own Mailers: If you’ve run out of mailers and no one has them for you on your Buy Nothing Group, make your own using cereal or cracker boxes. Adventures in Fluff has simple instructions on how to make your own paperboard envelope. You’ll wonder why you ever bought them in the first place after making one or 2. And they’re very cool because they send a message of reuse to your mail recipient.

Now your shipping is getting closer to zero waste!

If you’re looking for more ideas on how to make envelopes or reuse those you receive in the mail, please visit our Trash Backwards app where all items in your home and office can be reused, recycled and rethought.

20 Banana Peel Uses

The Miraculous Banana and Its Peel. Photo © Liesl Clark

The Miraculous Banana and Its Peel. Photo © Liesl Clark

The banana peel, like coffee grounds, tea leaves, and orange peels has a lot of beneficial qualities that’ll make you think twice the next time you toss it in the trash. We’ve gathered 20 of the best banana peel uses for you to try:

1) Shoe Polish: Did you know banana peels (on the inside) make a great shoe polish? Just rub it around your shoe and then buff it with a soft cloth.

2) Teeth Whitener: Rub the inside of your banana peel on your teeth to whiten them. Apparently, the manganese, magnesium and potassium helps whiten the enamel of your teeth.

3) Wart Cure: It only takes 1-2 weeks to remove a wart with a banana peel.

4) Itch Soother: Banana peels can help relieve bug bites and poison ivy. It won’t remove the oils that cause the itching but it’ll soothe the bite or rash altogether.

5) Monkey Party: Have a Curious George party and put 30 peels on your deck for the kids to slip around on! (Just kidding.)

6) Silverware Polish: Blend banana peel with water and use on your silver to take the tarnish off with a soft cloth.

7) Meat tenderizer: Some people add a banana peel to their roast and it’ll add just enough moisture to ensure that roast doesn’t get too dry.

8) Splinter Removal: Banana peels help ease splinters out of your skin. Place banana peel on a splinter with athletic tape for a while and then try to ease the splinter out.

9) Aphid Control: Aphids don’t like banana peels. If you bury some around your roses or other plants aphids love (like cauliflower), you’ll deter them from coming around.

10) Rose Food: Here are a few great recipes for feeding your roses with banana peels that are rich in calcium and magnesium, as well as many other trace minerals that your flowers love.

11) Bruise Patrol: Banana peels on the inside, if rubbed on a bruise, will aid in making it disappear.

12) Compost: Banana peels break down pretty quickly and add wonderful nutrients to your soil. Throw them in your compost!

13) Acne: Banana peels rubbed on your acne will help in the acne curing process.

14) Dry Skin Cure: If you have psoriasis, try rubbing the inside of a banana peel on your affected areas twice a day and you’ll see the dry scaly skin dissipate.

15) Banana Boat Campfire Dessert: This recipe will please all who are sitting around the campfire.

16) Hemorrhoid  Cure: Yup, you guessed it. As with acne, banana peels help cure hemorrhoids.

17) Banana Peel Message: Leave a message for your child on their banana peel by pricking out letters with a toothpick, the skin will bruise and there will be a dark brown message for your sweetie by lunchtime.

18) Tomato Plant Fertilizer: Wrap a banana peel around your tomato starts when you plant them in the garden and they’ll enjoy the nutrients from the peel as they grow throughout the summer.

19) Banana Peel Steamed Pork and Rice: Try this recipe out for size.

20) Anti Depressant: Researchers have found that drinking boiled banana peel water (or juicing the peel) can ease depression.

What are you doing with your banana peels?

Chicken Yard = World’s Best Composter

Our chicken yard serves 2 purposes: It’s the playground for our feathered friends but it’s also a great source of beautiful compost for our gardens. We don’t allow our girls to roam free because of the challenge of predators nearby like bald eagles, red tail hawks, raccoons, and mink. We’ve provided the chickens with enough space to run around, have dust baths, and roost. And since we can’t let them roam about the yard, we bring the yard to them!

If you can't free range your yard birds, bring the yard to them. Grass clippings and leaves line our chicken run. Photo © Liesl Clark

This little chicken farming trick is the best trash hack we’ve brought to our hen yard. Much like the practices of Joel Salatin’s Polyface Farm, mimicking natural patterns on a domestic scale, we believe our chickens should work for us in producing the best organic matter for our crops and vice versa.

Full circle: Garden waste --> chicken yard --> garden again. Photo © Liesl Clark

When we mow the lawn, the waste from that effort, the grass clippings, are dumped in there for the girls to munch. When we rake the fall leaves, the waste from that practice is thrown in by the wheelbarrowload. Even our garden clippings and weeds go in the hen run. It’s salad for them. The level of the hen yard, after a few months of this is raised significantly, but the endless scratching, pooping, and pecking breaks the organics down at a remarkably fast rate. And the end-product? After only a few weeks of being in the yard, we have the best compost I’ve ever seen. Waste to gold that’ll go on our veggie beds and back on the lawn to be put back to use again. It’s a truly closed loop practice and I revel in the circles I move in daily around the property, completing this life and food-giving cycle of the natural world.

Perfect chicken-generated compost from our coop yard. Photo © Liesl Clark

By the bucketful, we shovel compost out of the hen zone and into the garden, thankful for the girls’ help in turning our yard and garden back into gold. The little bugs and slugs on the backsides of leaves give them endless treats to find as they scratch for them around their yard. They’re just as excited about getting a load of leaves as they are a bucket of school lunch leftovers or algea from our pond. It reduces our chicken feed expenses, too.

Happy girls in their yard full of yard clippings. Photo © Liesl Clark


But probably the greatest benefit to bringing the free range to the hens is the quality of the eggs. Our yolks are a fiery orange, pretty similar to what you’d see on a chart for pastured hens, because we’re bringing the greens and proteins right into their yard. The slugs, bugs, snails, and larvae that come with the deep weedy greens we toss in there. Along with our non-GMO organic soy-free feed, these eggs are as healthy as we can get ’em.

Yet another benefit of this practice is that the rainy season chicken yard mud is offset by the mounds of leaves we throw in there. By providing new leaves on the floor of their yard, the mud-factor is reduced greatly and our eggs therefore don’t get soiled. Anyone in the Pacific Northwest will know what I’m talking about.

Happy feet. No mud in the mud season when you can throw grass and leaves in there. Photo © Liesl Clark

Last spring, our newly-transplanted rhubarb amidst daffodils were as glorious as ever, just popping out, thanks to the girls’ gold.

Compost from the composting chicken yard helping newly transplanted rhubarb. Photo © Liesl Clark

And our winter garden has produced greens for months due to the rich infusion they get from our chicken yard.

Homesteaders' dream garden in the middle of winter, thanks to our composting chick yard. Photo © Liesl Clark

What do you throw in your chicken yard? And do you then take the resulting “waste” out into your garden or compost? Please share in the comments below.

DIY Dishwasher Rinse Aid

What the heck is rinse aid and why do we need it? If you have hard water, you might want to get rid of the those residue spots left over by the drops of water on your glassware. A rinse aid has a surfactant in it that prevents your water from leaving droplets on your dishes. But you should know that many rinse aids have toxic ingredients that I doubt you’d want to have on any surface that holds your food and drink. I’ll quote Treehugger here to outline the ingredients in question:


  • Sodium tripolyphosphate: High concern for general ecotoxicity.
  • Methylchloroisothiazolinone: High concern. The US EPA reports the LC50 value is very toxic to aquatic life.
  • Antiredeposition agent: Moderate concern for cancer, respiratory effects, kidney and urinary effects, general systemic/organ effects; and some concern for chronic aquatic toxicity, skin irritation/allergies/damage.
  • Troclosene sodium, dihydrate: Moderate concern for chronic aquatic toxicity, acute aquatic toxicity, respiratory effects; some concern for general systemic/organ effects, developmental/endocrine/reproductive effects, cancer, kidney and urinary effects, nervous system effects, digestive system effects, skin irritation/allergies/damage, damage to vision.
  • Oxybenzone: Moderate concern for developmental/endocrine/reproductive effects.


It turns out, you might not even need rinse aid. If your water isn’t hard, the little droplets left over on your dishes won’t leave a residue on them. Test your water, or better yet, go without rinse aid for some time and see what happens. But first, if you have residue on your dishes and glassware, cut the amount of detergent you use by half. Chances are you’re using too much.

If you have hard water, I sympathize. Ours is, too. Want to save some money, still have spot-free dishes, and do the right thing for the environment at the same time? Try this secret ingredient in that little rinse aid spot near where the detergent goes:

White vinegar.

Distilled white vinegar as a rinse agent in your dishwasher will render your glassware shiny and streak-free. Photo © Liesl Clark

That’s all you need. Replace your rinse agent with vinegar and you’ll get the same if not better results. But a word of caution: if you have rubber parts in the slot where the rinse aid goes, don’t put the vinegar in there. Apparently, vinegar can corrode rubber. I know of some people who skip putting the vinegar in that special slot for the rinse aid and just put it in a small cup in the upper shelf so it can splash out over time. Either way, you’ll save a bundle, reduce your plastic footprint and keep chemicals off your plates and out of your gray water.

Distilled white vinegar to the rescue! Use this instead of expensive rinse agents. Photo © Liesl Clark

The interior of our dishwasher is metal and we’ve used vinegar now for over 3 years with no problems to the parts. I’m not sure how a plastic-interior dishwasher will take to vinegar in the reservoir and would love to hear from others who have used it.

We buy our white vinegar in bulk and then put the vinegar for our rinse aid in a plastic bottle that squirts.

Find a good squirt bottle to convert into your rinse aid dispenser. Photo © Liesl Clark

It’s stored under the sink right next to the dishwasher. You’ll likely find a good bottle in your own trash to reuse as your vinegar rinse aid dispenser, or simply reuse your rinse aid bottle.

Crystal clear dishes again. Photo © Liesl Clark