How To Reduce And Reuse Chip Bags

Potato chip bags are something we’ve all handled and then thrown into the trash.

If your conscience has you wondering if there are alternatives to sending that bag into the landfill, you’ve come to the right place.

If you simply want to try to reduce your chip bag footprint, just make your own easy microwave chips using Rock Farmer’s simple method. If you want an oil-free recipe with a few more steps, give this one from the Kitchn a try.

Reuse and Repurpose:

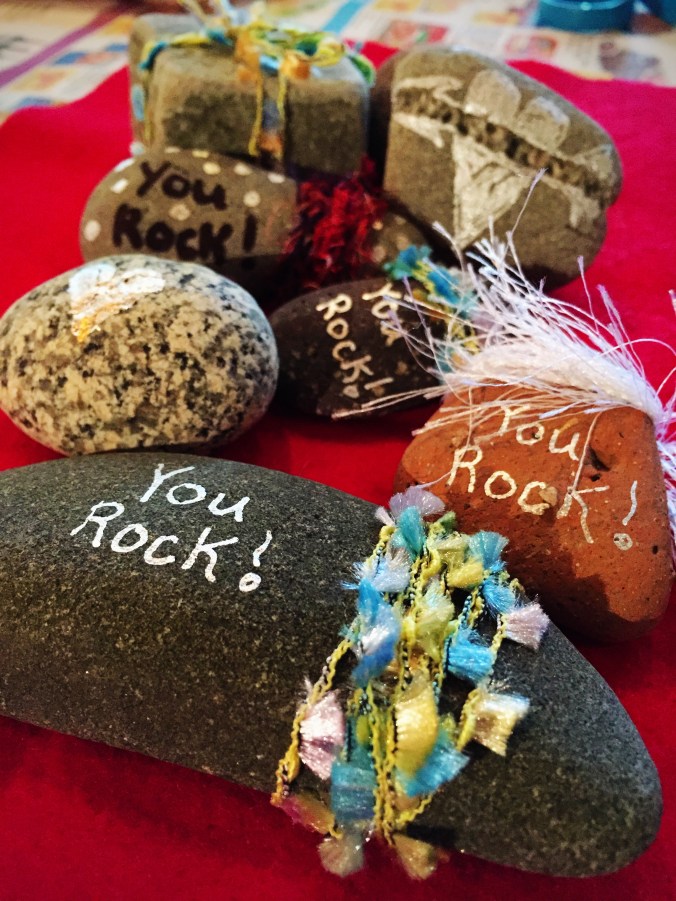
1) If you’re not able to resist purchasing snacks in crinkly bags, then use your bags as gift bags! It’s easy to do: Turn your chip bag inside out, wash it with dish soap to get rid of any grease. Dry it out. Then reuse the silvery or white side as a mylar-style gift bag. We do this all the time and reuse them over and over. We just attach some pretty ribbon like these pictured here which we found on the beach (no kidding) hanging beneath a deflated helium balloon all twisted up in seaweed. These ribbons last forever, they’re made of plastic, and look as good as new even after years of floating in the open sea. I’ve picked up so many of them on the beach, I’ve had occasion to give a bag of them away on my local Buy Nothing group, with the caveat that the person agrees to keep the ribbons on indoor gifts and not set them free with a helium balloon. When you’ve seen them wrapped around the necks of baby seals and sea turtles, you can’t help reconsider why we risk sending them into our seas via floating balloons in the first place. But I digress.

2) Make a shoulder bag. Some chip bags have a cool vintage look to them and could make a great shoulder bag.

3) Make a gum wrapper-style chain bracelet. Remember making paper chains from gum-wrappers? If you employ the same method with chip bags and candy wrappers, you can craft some amazing things. First step is making a bracelet.

4) And when you’ve mastered the gum wrapper-style bracelet, you’re ready to move on to the purse.

5) Craftbits has a tutorial for a nice clutch.

6) Make a potato chip bag mini scrap book. At making-mini-scrapbooks.com, you’ll learn how to make your own cool books that would also make excellent gifts for friends.

Mini Potato Chip Bag Scrapbook, Photo © making-mini-scrapbooks.com

7) Instructables has a tutorial for a chip bag wallet.

8) Craft a baby crinkly square to appeal to baby’s need for tactile and aural stimulation. We think a snack bag would make some good crinkly sounds for your little one.

Baby Crinkly Squares Can Be Made With Potato Chip Bags, Photo © Joy’sHope.com

Remember the Sunchip compostable bags and how loud they were (95 db)? Maybe stay away from those. They’ve been discontinued, apparently, but consumers certainly had fun with the deafening chip bags. Even a Facebook group was started, called SORRY, BUT I CAN’T HEAR YOU OVER THIS SUNCHIPS BAG. We were excited to see that compostable snack bags were being tested on the market, yet when we did our own compost test of the Sunchip bags in a commercial composter for a month, the bags, surprisingly, were still intact — no decomposition visible.

9) Make an adorable robot from the silvery side of your bag.

10) Yet another Instructable. This time it’s a pencil case. Who needs Terracycle when you can upcycle your own stuff?

11) Cover over an old bracelet with delightful snack bag colors to make a new one!

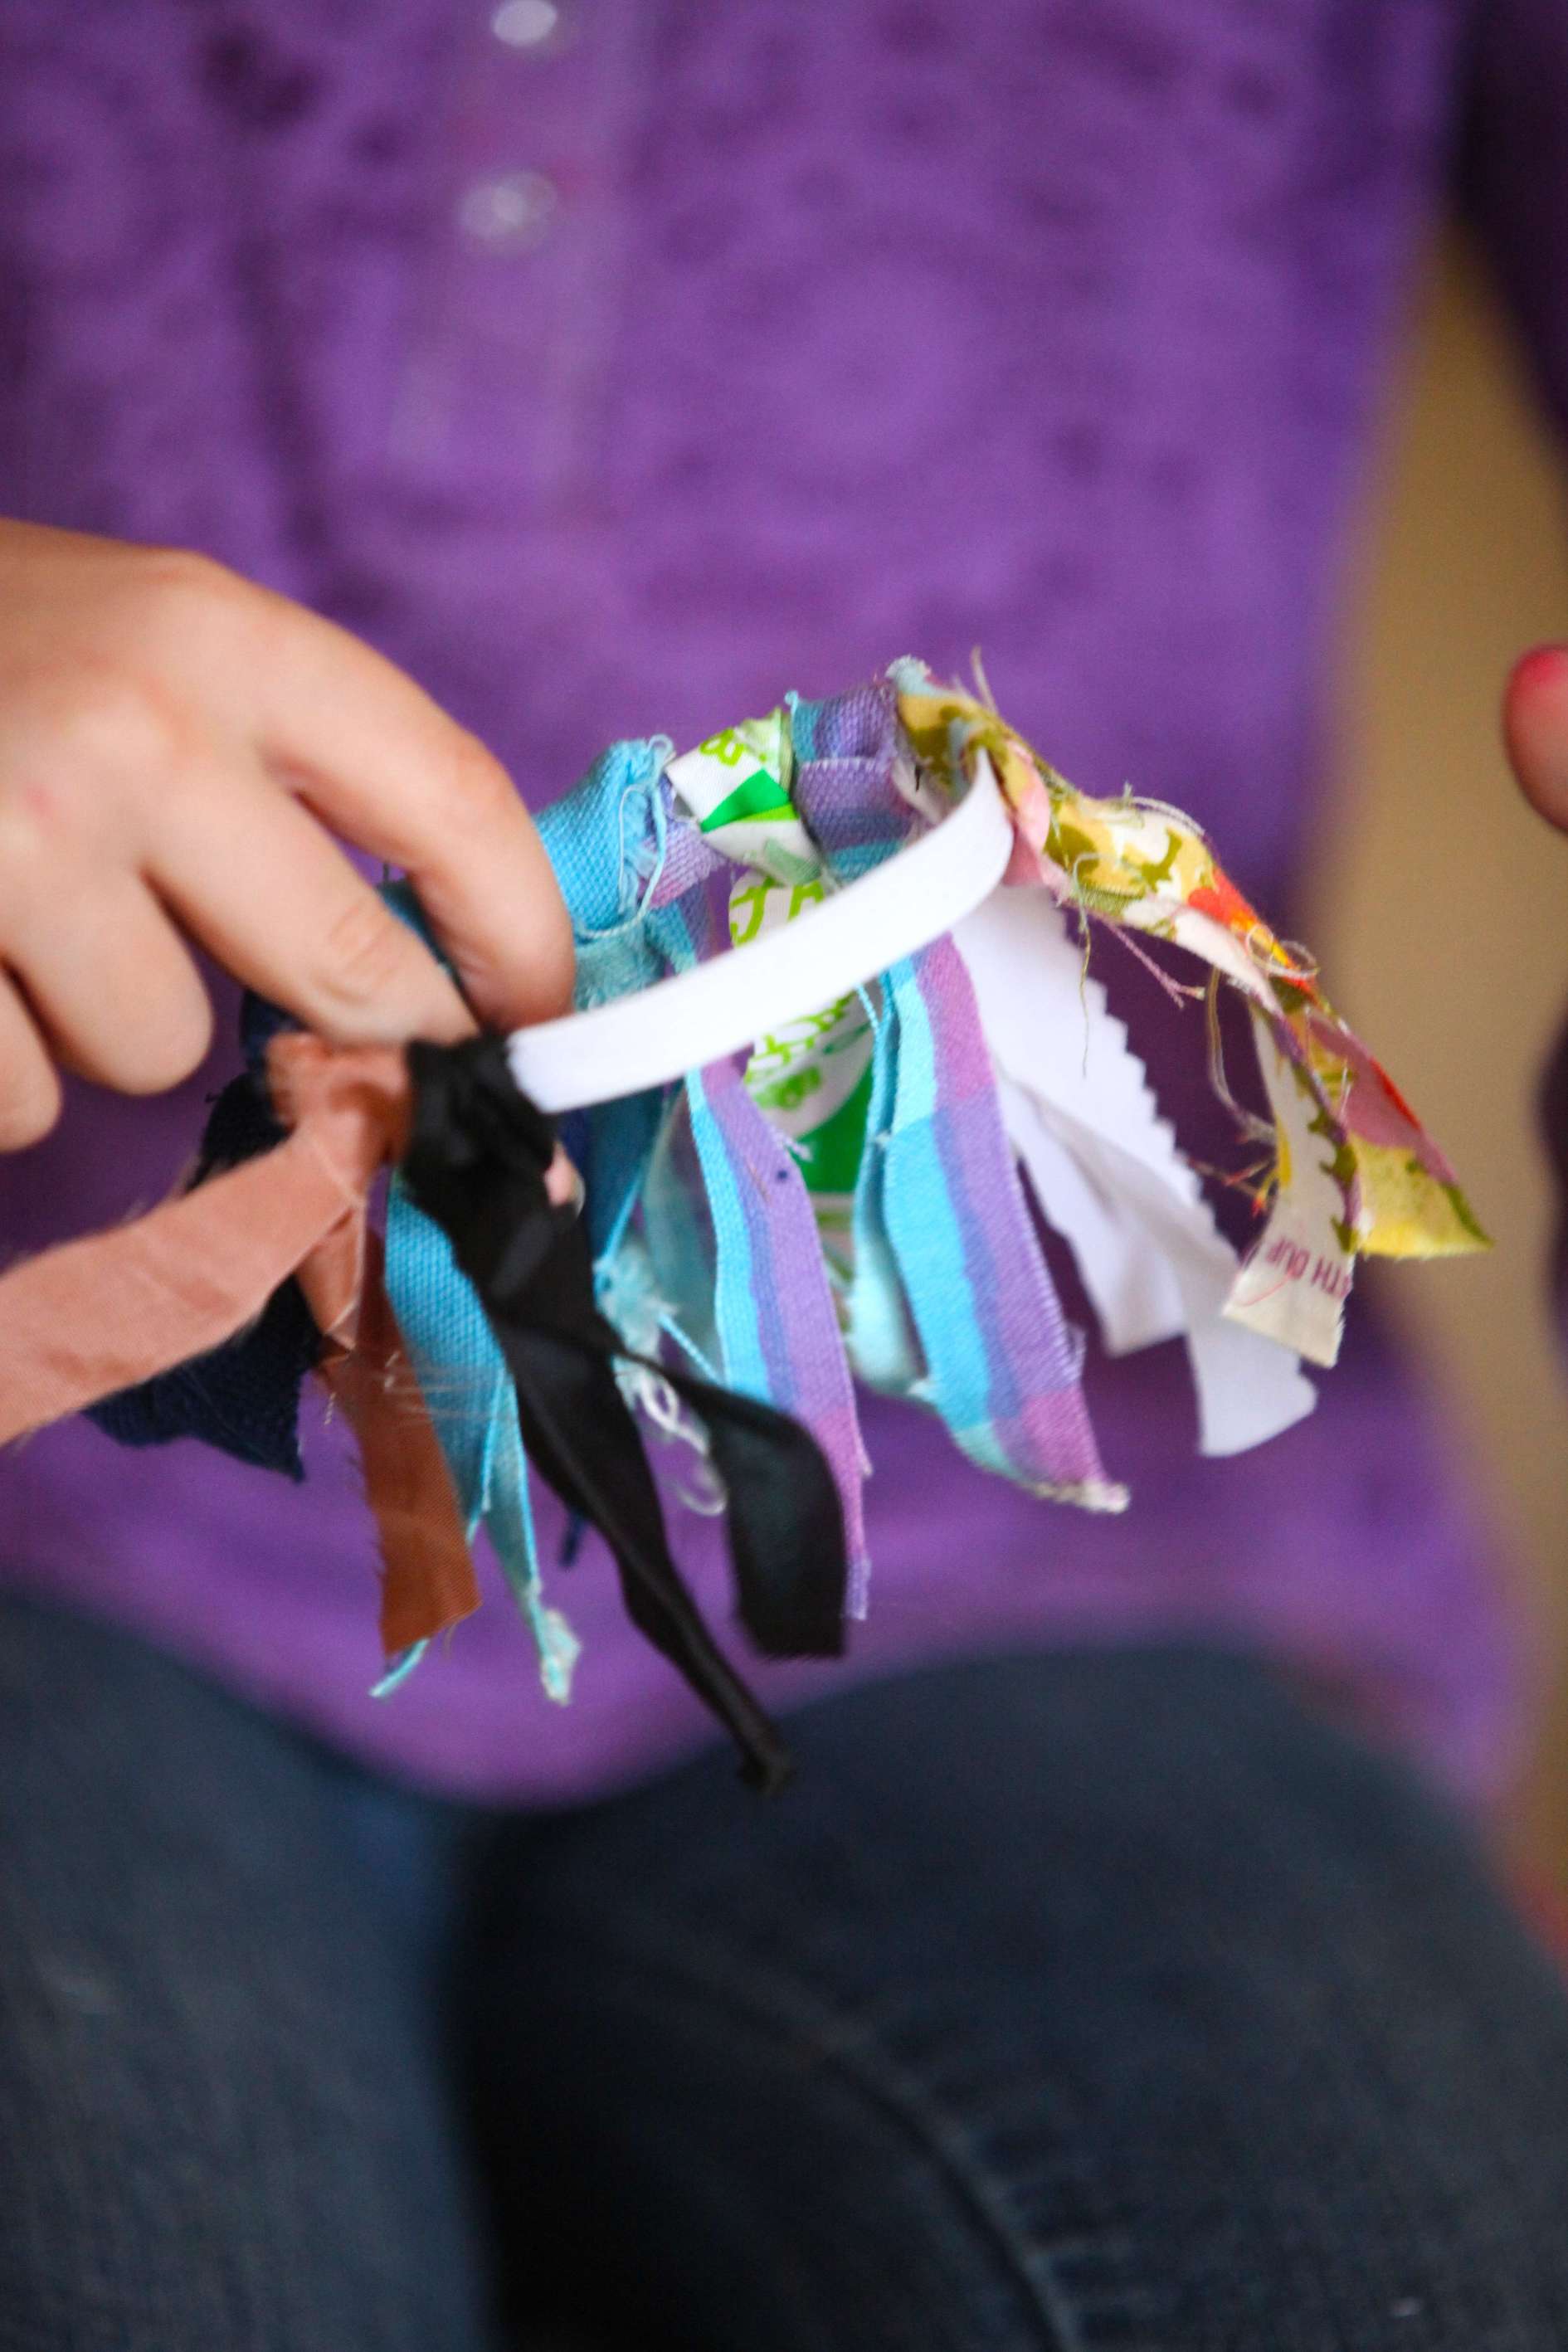
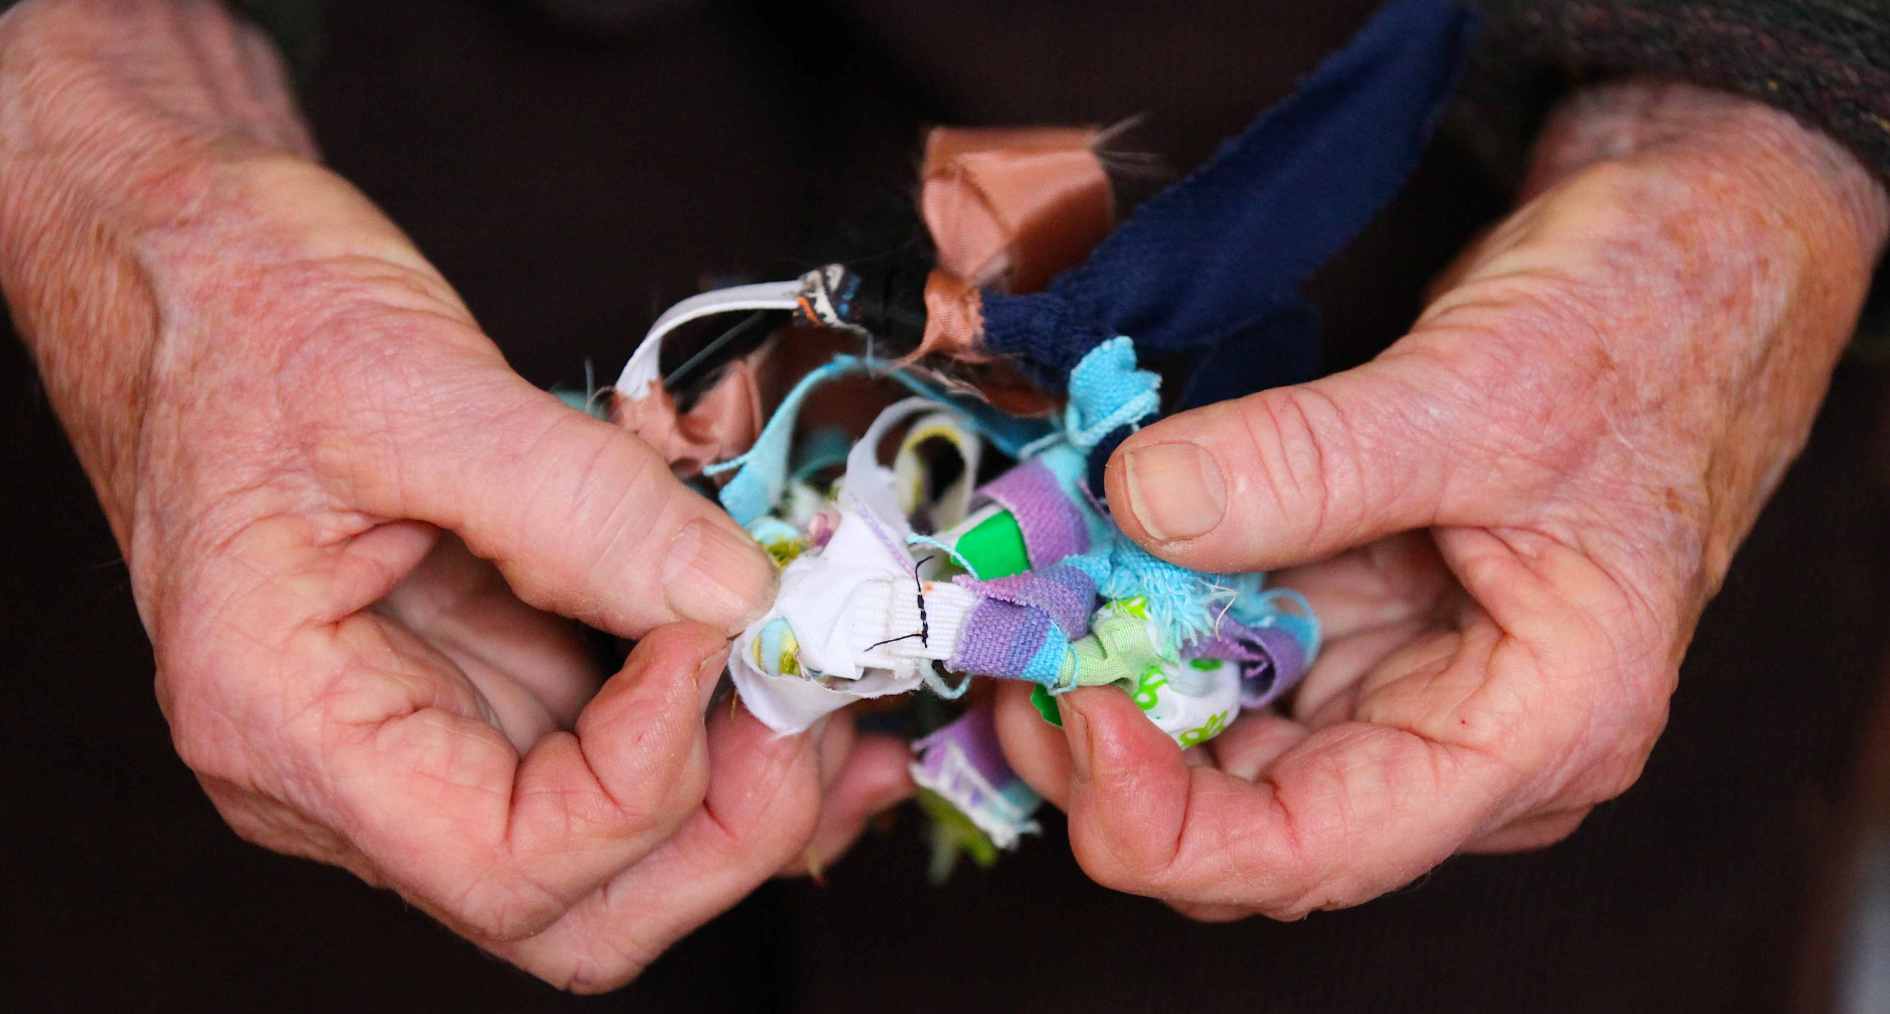
12) Make party tassels!

I figure that’s enough to keep you busy with your snack bags, but let’s face it, all of this will end up being tossed in the landfill eventually. Although my kids love to occasionally have a junk food fix of chips, we’re continuing to do our best to stop buying foods that come in unrecyclable bags. Until chips can be sold in something a little more sustainable, we’ll do our best to just say no, or make our own.

20 DIY Crafts Not Plastic

A Case For Exposing Your Children to Traditional Arts Using Natural Materials. Photo © Liesl Clark

When my children reached elementary school age and we enrolled them in programs that had art classes, we were amazed at how few natural materials were used for art supplies and just how much of it was plastic: glitter glue, colorful plastics for mosaics, acrylic-coated feathers, various items to be “recycled” through art like yogurt cups and plastic straws. The myriad cut-and-paste-style art projects they did were primarily made of art supply store plastics. All too often schools and art classes are cutting corners and can only afford cheaper plastic materials for art supplies.

Hand-crafted tiles or buttons, made by a young Nepali stone-carver. Photo © Liesl Clark

I would’ve preferred sticks, stones, leaves, sea glass, natural feathers and wood over the pre-fabricated plastic materials my son and daughter were exposed to. These plastics were simply mimicking what’s found readily in nature. I also believe the color palette children are exposed to in those early years, through day-glo style plastics, can affect their color choices later in life. Gone might be an appreciation for natural greens, browns, blues and purples found regularly in the environment. We started to opt out of the popular kinder art projects in preference to doing our own art, making an effort to learn from traditional artists who work with stone, wood, glass, wool, and ceramics. These experiences, for our children, were enriching as they learned quickly that they could create things of beauty from resources found in the natural world, as people have done for millennia.

A Young Nepali Artist Carving Prayers Onto a Mani Stone. Photo © Liesl Clark

A coupling of leaves, feathers, and flowers could become a miniature nest or fairy’s bed from a 7-year-old’s imagination.

A Fairy Bed, Made From Leaves, a Pod, Feathers and a Flower. Photo © Liesl Clark

Or a piece of wood might be whittled into a boat, a stone carved into a work of art. Exposing children to traditional folk art from around the world is a great way to teach them how natural materials that are readily available can be turned into works of beauty.

Azurite Is One of The Pigments Used in Traditional Himalayan Art. Photo © Liesl Clark

On a recent trip through South Korea while we were in transit, we took part in a program at the airport in Seoul that teaches traditional art forms. Every time we pass through this airport our children learn a new form of art made from a surprising material. They’ve worked with rice paper to make stone carving prints onto them, they’ve made paper lanterns, they’ve hand painted fans, and they made a tapestry necklace. This time, they learned the Na-Jeon art form, working with mother of pearl-colored shells and shellac from the lac tree.

Learning the Na-Jeon Art Form in Korea. Photo © Liesl Clark

This highly sophisticated ancient Korean craft utilizes iridescent abalone and conch shells in contrast to a lacquered black wood background, creating a sense of balance and harmony in this mariage of opposites.

A Hand Mirror Made in the Korean Na-Jeon Style © Liesl Clark

The children were given hand mirrors to decorate in the Na (which means “pearl”) Jeon (which means “decorate”) style. The focus and concentration the craft required was mesmerizing for us to watch. And the mirrors will be treasured for years to come in our family.

IMG_5929 © Liesl Clark

If you’re looking for some ideas for arts and crafts less plastic, we came up with a list of 20 traditional crafts from natural materials found in and around your home that are easy to try. Copy this list or share the link with your art teacher at school. No need for spending money on cheap plastic art supplies when there are supplies we can contribute from our own homes and backyards: scrap fabric, acorns, sticks, scrap paper, wool sweaters, leaves and sea shells are just a few. Incorporate information about the cultures that started the folk art form you’ll practice so your children appreciate the history behind their craft and how interconnected we all are through our art forms:

1) Doll-Making: Fabric Scrap Dolls have been made for the children of many cultures for centuries.

DIY Tiny Dolls Wear Fabric Scraps in Style

2) Vegetable Stamps: My favorite veggie to use for stamps is okra. But you can also carve stamps from a potato with excellent results. And the celery rose stamp is absolutely beautiful.

3) Fabric Scrap Mosaic: Reusing fabrics is an art unto itself and certainly has been passed down for generations. Try making a pretty mosaic from your leftover scraps.

4) Embroidery: Try your hand at embroidery. You can even embellish a tired old lampshade to create color in a room.

5) Twig Basket: Collect some long green twigs and make a freeform basket out of them.

6) Origami Tea Bag Folding: Learn the traditional art of origami paper folding using the paper the covers tea bags! If families saved up their tea bag covers, a school art program would have plenty of paper to work with and couldn’t complain about budget constraints.

7) Scrap Paper Flowers: Art classes should save all scrap paper to make these beautiful flowers. Or toilet paper rolls are all you need to make these flowers.


Toilet Paper Roll Flowers. Photo © Kelly Munson

8) Fallen Leaf Art: There are many beautiful artistic creations you can craft from leaves.

9) Scrap Paper Tree: This pretty craft utilizes tiny pieces of your favorite scrap paper as well as sticks collected from outdoors.

10) Seashell Arts: We’ve made mobiles from sea shells and endless mosaics. These seashell koalas would make any child happy.

11) Tin Topiary: Use pie tins to make these beautiful tin flowers.

12) Knitting: With some saved-up chopsticks, you can teach anyone how to knit.

Knit with Old Chopsticks photo © Rebecca Rockefeller

13) Felting: Learn how to felt your wool sweaters.

14) Rubbings: Make rubbings for things natural or extraordinary.

15) Weaving: DIY weaving is easy and a great craft to do with scrap yarn and fabric strips. You can even make your own loom.

16) Phone Book Paper Painting Meditation: Teach the kids meditation by doing phone book paper art.

17) Sock Crafting: If you’re in need of a stuffed animal, try making one from a sock.

Sock + Rubber Bands + Bits & Bobs = Sock Hippo. Photo © Liesl Clark

18) Hand-Made Valentines: Valentines are an original folk art scrap hack.

Handmade Paper Valentines, An Original Folk Art. Photo © Liesl Clark

19) Stencils: You can make stencils from food boxes and use beets as your ink dye.

20) Driftwood Sculptures: If you collect enough of a variety, driftwood lends itself to creative art from their smooth appealing shapes.

What crafts from materials readily-available can you add? We love to make things from what’s abundant around us!

33 Eggshell Reuses

33 Eggselent uses for your eggshells. Photo © Liesl Clark

In the heart of the summer, our chickens lay a dozen eggs for us a day. For a family of 4 with 14 hens, we go through a lot of eggs. Here are a few reuses for those hardy shells.

1) Garden Fertilizer/Compost: Throw your shells in your compost or yard waste bin if your municipal recyclers allow kitchen scraps in there. Try to crumble them as they’ll decompose more easily if you do. They add calcium and other minerals to your garden soil. I use a stone mortar and pestle by the composter to crush them. Some people even put them in the blender.

2) Worm Food: Our worm bin worms love egg shells. Truly. I find their eggs inside eggshell clusters.

3) Garden Pest Deterrent: Crush and spread them around your favorite plants. Some slugs, snails and cutworms just don’t like them so they won’t “cross the line.”

4) Pot Drainage: Crumble them up and add them to the bottom of potted plants that need drainage. Tomatoes and eggplants will love the added calcium to deter end rot.

5) Chicken Egg Hardener: If your chickens are laying eggs with soft shells feed them some…..eggshells. I know that sounds gross, but it helps give them a dose of calcium and the girls love it. Be sure to crush the shells. Chickens go on the shape of things for foraging so if they get used to eating egg-shaped goodies they’ll start eating their (gasp) own eggs.

6) Eggshell Candles: Yes! They’re beautiful and easy to make.

7) Homemade Space Geodes: These are really cool to make with the kids and they even glow in the dark.

8) Spring Flower Vase: These look quite beautiful with hyacinths held in an egg cup. I only have one chicken that lays white eggs, but seeing these makes me want to save all those white shells.

9) Organic Seedling Starter Pots: Just plant your seeds inside the shell (with potting soil too, of course you dummy), put the shell inside your cardboard egg carton, fill all the other egg carton cups up and you can plant the whole thing in your garden.

10) Egg Shell Succulent Planters: Make a lovely mini succulent garden using your egg shells and the carton, too.

11) Sidewalk Chalk: Big sticks of sidewalk chalk are easy to make and you can use a toilet paper tube roll as your mold and just peel it off.

12) Science Eggsperiments: Here are 10 cool science-y experiments for your child to try with eggs. Fun!

13) Calcium Supplement: Skip the pills and simply bake your shells at 350 degrees for 8 minutes. Let them cool and grind them to a fine powder. Add your supplement (a teaspoon or less) to your favorite smoothie or juice once a day.

14) Pet Calcium Supplement: Do the same as above but just add the powder to their food.

15) Egg Shell Mosaics: You can make beautiful mosaics with Easter egg shells or from ones you dye just for this project.

16) Drain Cleaner: Occasionally send a few crushed-up egg shells down the drain. They can help keep it unclogged by their abrasive action.

17) Egg Shell Decor: Getting in the Easter spirit? Try this idea of hanging your egg shells from a tree as a pretty accent.

18) Instant Bandaid: This one’s my favorite. Technically, you’re using the inner membrane of the shell. Tear a bandaid-size piece of it from your egg shell and place it over your ow-ie. By overlapping the 2 ends together, they stick and will stop the bleeding, too. Love it.

19) Vanilla Custard Pots: Serve up your vanilla custard in natural egg shells.

20) Egg Shell Frame: Make a cool modpodge picture frame with egg shells.

21) Christmas Ornaments: If you blow your eggs out you can turn the shells into pretty ornaments.

22) Abrasive Cleaner: Crush them to a coarse texture and use them to scrub down your pots.

23) De-Bitter Your Coffee: If your coffee is too bitter, add finely crushed egg shell powder to your coffee filter and your joe will taste smoother and sweeter.

24) Bird Food: Add some crushed shells to your bird seed mix. The birds need calcium, too.

25) Garbage Disposal Drain Cleaner: Feed some to your garbage disposal. They are an eggsellent cleaner and sharpener for it.

26) Soup Stock Booster: Add egg shells to your soup stock when boiling it. The nutrients can’t hurt.

27) Garden Walkway Addition: I add crushed shells to a garden path made of white gravel and sea shells. The egg shells just blend right in and hopefully deter the slugs, feed the birds, amend the soil, etc, etc. I guess I like walking on egg shells.

28) Stain Remover: According to Apartment Therapy crushed egg shells can help remove stains in your sink, on your tea pot and from other kitchen or household items.

29) Laundry Whitener: Some say that if you toss some shells in a mesh bag in your laundry, the gray tint to your whites will disappear.

30) Sensory Play: Egg shells make great sensory play items for your toddler.

31) Eggshell Toothpaste: That just about says it all — follow the directions in the link. My daughter and I are going to make some this weekend.

32) Cute Halloween Ghost Decoration: They hang like wind chimes but look like little ghosts on the breeze.

33) Try the Walking on Eggs Experiment: Want to make eggs into eggshells fast? Try this! No, seriously, this experiment conducted by a 6-year-old is a pictorial essay worth checking out.

Now that you’ve reused your egg shells so nicely, what to do with those egg cartons?!

Fabric Scrap Tiny Tents For Little Hands

Our daughter has been sewing avidly since she was 6. She loves to design and sew her own doll clothes and to make little spaces for her toy animals out of fabric scraps. Here’s a great project for small hands and a fun sewing project for 2, using up fabric scraps and old trousers, too!

Step 1: Trace a perfect circle onto a stiff fabric like felt, fleece, or corduroy (we used some old corduroy pants of mine). The circle will determine how tall your tent will be. We cut ours about 6″ wide.

Step 2: Cut that circle in half and then trace it onto a pretty fabric of your choice which will be the outer fabric of your tent.

Step 3: Cut the half circle out of your pretty fabric.

Step 4: Pin the rounded edges of the half circles together, stiff fabric facing in on one side and nice fabric facing in on other.

Step 5: Sew the pinned rounded edge of the 2 half circles together.

Step 6: Turn the half circle right-side-out so the sewn edge is hidden. Fold it in half and then sew the remaining straight edges together as shown in the photo.

Step 7: Turn this right side out and you have a cute closed tipi/tent for little animals or people to live in (or a pointed hat for a doll!)

Step 8: A variation on this tent/tipi is to add a door: Simply leave a couple of inches of “flap” left open on the last straight edge and sew the flaps back about 2-3 cm so you have a tipi opening opening.

Looking for more ideas to use up your fabric scraps? Please visit our Trash Backwards app that has reuses for everything in your home!

Click Through for Fabric Scrap Reuses at Trash Backwards.


Fabric Scrap Doll Tutu

Easy Fabric Scrap Tutu For a Child to Make, Photo © Liesl Clark

Visiting grandma means we get to dive into her boxes of fabric scraps. For 40 years, no fabrics have been wasted in her house. Just last month, she passed on several boxes to a local quilt-making organization, but luckily we found a few more up in her attic.

Grandma's Fabric Scraps, Photo © Liesl Clark

We looked in the Trash Backwards app for some good fabric scrap reuse ideas for small hands and landed upon a fun tutu tutorial for a little girl. My daughter decided she wanted to make it for her stuffed panda. So, we took our lead from the tutorial at Home Sweet Home and made a mini version for a doll or stuffed animal.

Strips of Fabric Scraps, Photo © Liesl Clark

1) First, cut your fabrics into 1/2 inch to 1 inch wide strips. We made ours approximately 6-8 inches long.

2) Find an elastic waistband, about 8-12 inches-worth and sew 2 ends together so you have it in a loop.

Sew Your Waistband Into a Loop, Photo © Liesl Clark

3) Fold your strips in half length-wise and place them underneath the waistband with the loop sticking out of the top and thread the ends of the fabric scrap through your loop, tying half of a square knot. This is how you tie on your skirt scrap pieces.

Adding Fabric Scraps to The Waistband, Photo © Liesl Clark

4) Tie your scraps on one after the other and gather them together tightly.

Tying One On, Photo © Liesl Clark

5) We wanted to be sure that the waistband was sewn together well, so grandma reinforced it with some hand-sewing.

Reinforce Your Waistband Ends, Photo © Liesl Clark

You’re Done! Spread around your strips so they even-out your skirt and you can add on more strips of color wherever they’re needed.

A Tutu For a Doll or Stuffed Friend, Photo © Liesl Clark

Panda Loves Her Tutu, Photo © Liesl Clark

Dancing With Her Tutu, Photo © Liesl Clark


Fabric Scrap Tutu, Photo © Liesl Clark

8 Reuses For Unmatched Socks

Sock Singles Party on Our Floor. Photo © Liesl Clark

We all know about sock-hungry dryers. Well, I believe drawers are sock-eaters, too. Somehow socks go into dresser drawers in pairs but come out as singles, forever abandoning the sacred union. We started a special box of single socks a few months ago and decided it was high time we searched the house for all socks to take a full tally of the situation.

Sorting Socks is Sorta Fun. Photo © Liesl Clark

Sorting Socks is Sorta Fun. Photo © Liesl Clark

It was the perfect task for a 7 year old, searching through every drawer in the house and coming up with nearly 100 single socks! The laundry room coughed up a few more. Then, we got to work with our matching game. Thirty pair were reunited! But sadly, about 40 odd socks now have no mate. What to do?

Reunited Socks After Nearly a Year. Photo © Liesl Clark

I’m vowing to have a moratorium on sock-buying for at least a year, or until our dryer and drawers have consumed them all. This family has way too many socks. In the meantime here’s a list of what we’re doing with our 40 odd socks:

1) A few special unions have been created, and we look forward to showing them off at school as soon as possible.

Do you approve of this union. Speak now or forever hold your peace. Hey, mismatched socks are in! Photo © Liesl Clark

2) I put one in the freezer to use over our ice pack. It’ll protect a child’s skin against that cold pack.

Single sock turned ice pack cover. This penguin motif seemed appropriate. Photo © Liesl Clark

3) The 7-year-old, has her sights set on a few sock creatures, like this adorable sock hippo named “Emma” that she made the other day.

Sock + Rubber Bands + Bits & Bobs = Sock Hippo. Photo © Liesl Clark

4) I invented a new type of yarn, like T-shirt yarn, but it’s….Sock Yarn! This stuff is easy and kinda cool to make.

My new favorite "ribbon." Sock Yarn. Photo © Liesl Clark

First, find a single sock and cut strips into it without fully reaching the edge. A great photo that explains it in a tutorial for T-shirt yarn is here. You’ll then cut diagonally, linking the strips together in a spiral cut. It’s easy!

Cut strips into your sock but not all the way to the edge. Photo © Liesl Clark

Then stretch your sock yarn out so it curls in on itself:

Stretch Your Sock Yarn to Let It Curl. Photo © Liesl Clark

You might attract a feline in the process. Sock yarn makes an excellent cat play toy.

Kitties live for soft sock yarn. Photo © Liesl Clark

Willa. Ready to Wear Her Sock Yarn. Photo © Liesl Clark

Roll your yarn into a ball and you’re done!

Sock Yarn. Try It. Photo © Liesl Clark

Sock Yarn. Try It. Photo © Liesl Clark

5) A travel utensil holder is a sock reuse I’ve been meaning to do. Now it’s done.

Sock Travel Utensil Holder. Photo © Liesl Clark

Just use a piece of your sock yarn to tie it shut.

Sock Ribbon to Tie Up Your Sock Utensil Holder. Photo © Liesl Clark

Socks make excellent pencil holders too, just use an extra thick sock.

6) I saved a few socks for our rag basket, for dusting and other fine-rubbing I might need to do on furniture or countertops.

7) Cut the toe section out and use your sock tube as a travel coffee mug cozy.

sockcozy

My Favorite Sock Reuse: Travel Coffee Mug Cozy © Liesl Clark

8) The rest went back into the super duper sock box under the bed in waiting for sock sorting day next year when I vow yet again to never buy new socks and then learn how to darn the odd ones that remain. Actually, each week on laundry day we take the single socks and open up the box to see if the missing mates are inside. I have the box sorted by color, darks to lights, so the task goes quickly:

IMG_1750

Can you believe how many unmatched socks we have?

Do you combine unmatched socks, in an effort to stave off buying yet another pair? Or is there a special reuse you’d love to share? We have a few hundred more you might want to check out at our Trash Backwards app.

Click Through for Sock Reuses at Trash Backwards.

Rockin’ Valentines

IMG_1729

Gratitude to all of you who venture here to read about our trials and jubilations as we journey toward a lower impact life. These little rocks were gathered down at our nearby beach and turned into missives of love and positive affirmation by my daughter for her classmates and friends.

IMG_1730

A few stones and some scrap yarn brought smiles to 26 fourth grade students, proof that the simple things in life can still be perceived as beautiful and grounding. We wish you a happy Valentines Day, a day of love and kindness, and a break from it all.

IMG_1731

Love and gratitude,

Liesl, Pete, Finn & Cleo

Easiest Prettiest Ornament You’ll Ever Make

As we’re just two days to Christmas, I’ll keep this brief. But suffice it to say, this is a great children’s activity in the days before Christmas.

Items Needed:

1 Plastic Lid

Non-stick cooking oil or spray

Glue

Leftover beads, sequins, glitter, sparkly stuff

We even used some beach glass and small shells from the beach

Piece of ribbon or yarn

All you need is to pull a plastic dairy tub lid out of the recycle bin, like a large yogurt container lid. The 4″ wide version works well but you can use a small one, too, for a smaller ornament. Spray or lightly oil with non-stick cooking oil. Then pour glue into the lid. Start placing your items in the glue spaced nicely around and don’t be shy just throw it all in there. Be sure to also stick a loop of yarn or ribbon at the top to act as your hanging ribbon. Wait for a couple of days for the glue to dry. If you place your lids in the sun or in a warm place the drying time goes faster. When it’s dry, just flex the lid around a bit and the ornament will come off easily! You end up with a pretty ornament that glows and sparkles with Christmas lights behind it. Easy!

Easy Peasy Pretty Ornament From a Plastic Lid Mold

Easy Peasy Pretty Ornament From a Plastic Lid Mold

Handmade Candles, Sharing Economy Style

Handmade Marbled Wax Scrap Candle

Handmade Marbled Wax Scrap Candle

I love making something from nothing, or at least something that costs us nothing. Our friends are kind enough to endure our yearly candlemaking and candlegiving tradition, and we boast about the fact that these candles are all made from the wax scraps friends and neighbors share with us.

Here’s how it’s done:

  1. We take old candles, or the lumps of wax left over after you’ve burned yours out, and turn them into new candles, recycling the wicks and all.
Scrap Wax From Gifted Scrap Candles © Liesl Clark

Scrap Wax From Gifted Scrap Candles © Liesl Clark

2) Using a hammer on a wooden board is our preferred method for chunking out candle wax, but we also create our own colors of melted wax, pour it into a brownie pan, let it dry and then hammer the 1-2 inch wax into pieces.

Hammering Out Wax Chunks From Used Candles © Liesl Clark

Hammering Out Wax Chunks From Used Candles © Liesl Clark

3) We have candle moulds in many shapes and fill them with chunks we create out of the used candles. Be sure to remove the wicks from the old candles and any burned parts.

Place your scrap wax inside your candle moulds.

Place your scrap wax inside your candle moulds.

4) We use wicks from old candles that we melt down and recycle them as wicks for our new candles and string the wicks into our moulds.

5) We then melt down a contrasting color of wax from saved old candles to pour into the moulds around the colored chunks. A drop or two of an essential oil can provide some aromatherapy for those in the room when your burn your new candle.

Pour Your Melted Wax Over the Chunk-Stuffed Mould. © Liesl Clark

Pour Your Melted Wax Over the Chunk-Stuffed Mould. © Liesl Clark

6) Let your mould sit overnight to solidify and cool. In the morning, pull your candle free from the mould.

IMG_0676 copy 2

Enjoy!

© Liesl Clark

© Liesl Clark

Doll Ornaments

Most of our ornaments are handmade or free finds we’ve rescued from the landfill. That’s not to say our tree looks like it’s decorated with junk. Quite the contrary. Each little piece has a story to it: where was it ‘recovered’ or who created it.

We love to find small dolls the children are finished playing with and turn them into ornaments. This one’s so easy it takes all of 30 seconds to make…er…once your glue gun is heated up.

Doll Ornaments, Photo © Liesl Clark

Doll Ornaments Look Like Angels, Photo © Liesl Clark

All you’ll need is:

An assortment of dolls

A glue gun

Scissors

Ribbon

All you need to make your dolly-ments, Photo © Liesl Clark

All you need to make your dolly-ments, Photo © Liesl Clark

Glue the ribbon together into a loop. Then glue the loop to the back of your doll. Ours have hats which make the gluing really easy. Now hang your dolly-ments onto the tree! Other toys lend themselves to ornamentdom if you’re so inclined. We’ve made lego ornaments, matchbox carnaments — you get the picture.