5 Planters Made From Everyday Objects

Large plastic containers make great container gardens. Think twice before you throw plastic receptacles away as someone might like to reuse it.

Planters are easy to come by. Whether you have little growing space outdoors, or want to beautify a patio or rooftop, pull your nearest receptacle or container from your trash and turn it into a planter. The more innovative, the more interesting and discussion-worthy for your friends and neighbors. Here are a few unusual planters we’ve come across in our travels in the Himalaya:

1)    Thermos Planter

The planter on the right is an old broken thermos. They also make great modified bird feeders.

2)    Styrofoam Cooler Planter

Herb planters in styrofoam. The village of Kalopani doesn't have styrofoam recycling. But this family found a way to reuse theirs to plant herbs for their restaurant.

3)    Paint Can and Bucket Planters

Paint Cans and Buckets Make Perfect Succulent Planters, Photo: Liesl Clark

4)    Gerry Can Planter

When this plastic water or fuel container broke, it was turned into a large planter.

5)    Barrel Planter

These barrels make great containers for donkey or yak loads when we go on expedition. When they break, they can make a great container garden.

These are all utilitarian planters, used in a place where there are no garden stores to simply go and buy yourself a clay pot. They’re also used in high Himalayan villages that have short growing seasons. Placed along a south-facing wall, these planters extend the growing season by a couple months.

What innovative planters have you grown your food in?

8 Uses For Garlic Skins

Garlic Skins Have Some Use Beyond the Compost Bin

In my ongoing fascination with the things I typically throw away, even in the compost pile, I thought I’d look up some of the most interesting ways to reuse garlic skins. Some, I already do, but there are a few new uses in this list I thought you might want to try.

Don’t toss those papery white skins!

1) Save them in your freezer and use for your vegetable or chicken stock. I also throw them in my slow-cooked beans to add more flavor.

2) Compost them.

3) Keep the skins on your garlic when you roast it and the protective skin layer keeps your garlic soft on the inside.

4) Eat it! According to the Daily Mail, the skin on fruits and veggies shouldn’t be discarded. As for garlic: “Peeling garlic cloves removes the ­phenylpropanoid antioxidants which help fight the ageing ­process and protect the heart.”

5) Make a paper rose out of your garlic skins.

6) Turns out garlic skin is a major antioxidant. Plan on seeing it in all sorts of health products in the near future.

7) Add them to your handmade paper recipe. They add a lovely texture.

8) Dye your hair with them using a natural ayurvedic technique.

My Pet Peeve About Pet Poop

Warning: The contents of this blog post might be disturbing, if you don’t like thinking about, or looking at, s**t.

Imagine hiking along a pristine trail in the Pacific Northwest with your dog. It’s a perfect spot with majestic trees, spring birds singing their first songs of spring. But your eye is caught by not one, but four or five little wads of plastic bags, placed carefully along the trail, loaded with a hiker’s canine crap. The numbers of plastic bags filled these days with dog waste on the trail can be quite shocking. Are pet owners intending to leave these plastic methane bombs there for me to pick up? Or, are they planning to come back one day to gather up the not-so-hermetically-sealed pathogen-filled goodies?  I believe they think they’re doing the environment a favor by just bagging them up in plastic, assuming they’ve done their service to the planet, thinking, “No methane escaping today!”

IMG_1425

Which is worse? This plastic bag or what’s inside? Well, now both are there to stay, on the trail. And the methane’s out of the bag. Sailor doesn’t know what to make of it.

I’m not going to get into the reasons why dog owners are bagging Fido’s fecal stuff. Suffice it to say, tail-wagger’s turds are one of the biggest contributors to water pollution in urban and suburban settings. We live on an island where we’re surrounded by Puget Sound. Everything ends up in our waters, given our torrential rains. So, doggie’s doodoo left in the rain can be considered the next nutrient to enter the Sound. But there’s definitely nothing nutritious about the stuff.

IMG_1441

This isn’t Sailor’s poop. Just another example of what’s found trailside on our island paths. Trowel anyone? This might be the most environmentally-sound means of pet waste disposal.

We use a Bokashi Pet Waste Composter for our cat’s waste, and since our dog mostly poops in one spot on our property, we’re doing our best to bring it inside and flush it down the toilet. He eats no meat, mostly our veggie meals, and a few bites of the cat’s dry food each day. The EPA says flushing is the most environmentally-sound thing we can do with Rover’s #2, considering we live just feet from Puget Sound. But putting your dog’s fecal matter into a plastic bag and leaving it on the trail to stay forever is, by my calculations, two counts of littering.

IMG_1416

One of my favorite authors, Susan Freikel, who wrote Plastic: A Toxic Love Story, summarizes the situation perfectly in a recent article for LiveScience:

Dogs can harbor lots of viruses, bacteria and parasites — including harmful pathogens like e coli, giardia and salmonella. (A single gram contains an estimated 23 million bacteria.) Studies have traced 20 to 30 percent of the bacteria in water samples from urban watersheds to dog waste. Just two to three days of waste from 100 dogs can contribute enough bacteria, nitrogenand phosphorous to close 20 miles of a bay-watershed to swimmingand shellfishing, according to the U.S. Environmental Protection Agency.It also can get into the air we breathe: a recent study of air samples in Cleveland, Ohio, and Detroit, Mich., found that 10 to 50 percent of the bacteria came from dog poop.

I understand the reasoning behind bagging your pet’s waste. But (wait for it) I’ve seen hundreds of pet waste bags, still filled with said waste, washed up on beaches along our shorelines. These floaters stay extra-buoyant in their plastic packaging. It’s one kind of plastic waste we’ve had to leave out there on the beaches as we can’t bring ourselves to pick it up. I have visions of whales and sea lions ingesting the knotted bags of eco-dog-love left behind by doo-gooders of Puget Sound.

Is there a more environmentally friendly way to dispose of our pet’s waste? According to this Huffington Post article, Paul Canella’s Poop Bags are biodegradable. But, those presumably will just go into the landfill, with the same toxins and microbes deemed unhealthy to humans leaching into our watersheds. Some scientists suggest that burying your dog’s waste, as you would your own, might be the best method for disposal along the trail. One foot deep, below the runoff zone, is safe. Are you willing to start digging in your public park? Probably not.

We have a bit of a merde mess in our over-poopulated urban settings, but in a few places, like Portland and Boulder, enterprising people have developed pet waste processing companies that compost your four-legged friend’s feces. It turns out hot commercial composters could actually use Fido’s fuel. One dog-friendly park, in Gilbert, AZ, lets you toss your turds into a bin that turns it into a flame for a lantern in the park while you let your dog have some off-leash fun.

IMG_1782

Yet another plastic-encapsulated trailside turd.

The plastic bagging of dog droppings just isn’t cutting it. We’re making a bigger mess of things in our wild places, watersheds, and maritime environments. There are now flushable bags made for caca collection, and this might be one of the easiest and eco-aware options out there.

IMG_1445

Vegetarian waste left behind by horses is of no concern.

Until we have anaerobic pet waste composters in each city, we’ll have to settle for the lesser evils available to us for disposing of it. And the next time I come across plastic-sealed scat, I have a pocketful of hand-written notes that I plan to leave behind, scribbled on paper, to accompany the abandoned excrement: “Did you forget this? This PPOO (plastic poo) needs a PPU (prompt pickup) by you.”


Hang Children’s Art From a Stick

How to simply display your children's art. Photo © Liesl Clark

Children’s art is precious. Do you have a good way to display it? We frame some of our favorites, but wall space is a premium in this house and the refrigerator can only hold a few masterpieces. Inspired by Suburban Pioneers’ use of a stick to display photos, I decided to try my hand at creating a stick art hanging system for our home office wall suited for enjoying children’s artistic creations.

Art on a Stick. Our New and Easy Hanging System. Photo © Liesl Clark

We have no lack of sticks out here under the canopy of trees in the Northwest, so my daughter and I tiptoed out to the forest and found ourselves a very long thin branch with some moss and lichen on it.

Three long nails, a stick, some wire, and some clothes pins or large clips is all you need. Photo © Liesl Clark

I hammered three nails into the wall to hold it in place, and wrapped some wire around the branch and nails to secure it. Then I used the same scrap wire to attach some clothes pins and large clips to the branch for holding the artwork.

Leave the moss intact and use a wire to afix your clothes pins and clips to your stick. Photo © Liesl Clark

Voila! A stick-centered art display.

Branch Out With Your Children's Art. Photo © Liesl Clark

How do you display your children’s art?

Zero Waste Vacuum Cleaning

By Liesl Clark

Using a vacuum cleaner in a (trying to get close to) zero waste home can be challenging, if you don’t have a bagless vacuum. Here’s what I’ve discovered over the years about reducing vacuum cleaning waste from my household:

Skip the Vacuum Cleaner Altogether? Now wait! Don’t stop reading because you think I’ve gone too far here. I can attest to the fact that in places where vacuum cleaners don’t exist, brooms can definitely do the trick! You just need a really great stiff broom for picking up the dirt. And, there’s no method better than taking your carpet outside and shaking it or beating it with a broom. If you have wall-to-wall carpet, I guess you’re out of luck, but a good stiff broom can do wonders.

I’ve had a few house cleaners help me in my day, and I’m always amazed to see how many of them choose to use the vacuum cleaner without first sweeping up the wooden floor. Broom and dustpan are the fastest route to frugal and zero waste floor-cleaning. I even have a cool collection of brooms I’ve gathered from all over the planet. In my travels to homes far from the conveniences of electricity and vacuums, I’ve witnessed the cleaning of rugs and carpets the old-fashioned-and-often-much-cleaner-way. Soft brooms sweep the often dirt floors, and stiff brooms are used to sweep the carpets. I’m amazed at how efficient they are so we use a broom on our carpets much of the time.

My Favorite Broom, Natural & Sustainable, Great for Wood Floors, Photo © Liesl Clark

Outside, we have a game of trying to shake a carpet with a partner on the other end and see who gets shaken-off first.

Empty the Bag! We used to have a vacuum we loved, but it came with bags that fill up and must be thrown out….or do they? After accumulating a few full bags, tossing ’em, and buying more (they’re expensive!) I discovered it was almost as easy to empty them into our brush pile outside and reuse them! We’d reuse our bags at least 30 times. Emptying the vacuum cleaner bags is an opportunity my children fight over. It’s fun. Really. Especially when we find a long-lost (and favorite) plastic baby goat in there. Those little baubles that get sucked up by the vacuum are given a second life.

See How Fun It Is? Photo © Liesl Clark

Now, a very ecologically-sound friend of mine says, “No, No! don’t empty those vacuum-cleaner bags because the dust and dirt in your home is toxic from the detritus that comes from your asbestos-bearing furniture or PVC and BPA-laden rugs.” I do respect her point, but I have to argue that our own dirt off our shoes is likely from the garden, our furniture is almost all made of natural materials, our home is recycled old timbers, and our carpets are antique natural-fiber carpets from Tibet and Egypt that we’ve bought from people we know, colored with vegetable dyes. I think we’re pretty safe. But this is not to say that everyone is safe to dump out their vacuumed dust into the environment. But aren’t our landfills part of our environment?

My Full Vacuum Cleaner Bag, Photo © Liesl Clark

I often empty our vacuum cleaner dust into our compost bin, except we find myriad little plastic bits from art projects that I try to take out by hand and throw back into the art bin (truly.) If you think your home and furniture (including mattresses) are mostly plastic-free, the dump-out-your-vacuum-bag-contents method of frugal vacuuming might be for you.

Dusting the Compost & Pulling the Plastic Out Later, Photo © Liesl Clark

Otherwise, there are bagless vacuums on the market these days. We’ve just acquired one, so our days of bag saving are over and we just dump our floor dust right into the compost. These days, it’s mostly dog and cat hair. I’d love to hear what you do with the dust and dirt from your home?

Fun with vacuum cleaner bags, Photo © Liesl Clark

Please note: If you have allergies or a particular sensitivity to dust, wearing a handkerchief or just mask around your mouth and nose is advised. Another friend empties her vacuum particulates into a plastic bag first, and then dumps it into her compost, to prevent the dust particles from escaping into the air. Shaking  out your vacuum cleaner bag is fun, especially when you know you’re defying the marketing department of your vacuum cleaner company. And, hey, you might find your lost wedding ring or favorite bauble for the effort.


Fun Emptying Vacuum Cleaner Bags, Photo © Liesl Clark

Swiss Chard Is Two Veggies In One

Don’t throw those swiss chard stalks out! We’ve discovered a delicious thing or 3 to do with them.

Swiss Chard Stalks are Pretty and Delicious. Photo © Liesl Clark

I’m ashamed to say our swiss chard has been languishing in the garden because our family just hadn’t taken to these easy-to-grow greens, until now…

Swiss Chard From the Winter Garden Being Washed in the Farm Sink. Photo © Liesl Clark

First, separate your chard leaves from the stalks and cut your stalks into 4″ long pieces. Save them in  a bowl. Aren’t they pretty?

Chard Stalks in a Bowl Awaiting Further Instructions. Photo © Liesl Clark

Spicy Swiss Chard Chips:

We all know what kale chips are. Well, try making chips with your swiss chard, too. They’re a delicious and nutritious substitute for potato chips. By adding a little garlic powder, salt, and some chili powder, you won’t be able to eat just one.

Turn your oven to 275 degrees. Place your chard pieces on a baking sheet or glass baking pan. Add a tablespoon of olive oil per baking pan and toss the chard leaves with equal amounts of sea salt and garlic powder and chili powder. That’s it! Add your spice to taste and be sure to not make it too salty.

Bake for 20 minutes and then turn the leaves over and bake another 10 minutes if needed. Your bake time depends on your baking dish.

Spicy Swiss Chard Chips Disappear Quickly. Photo © Liesl Clark

Enjoy!

Chard Stalk Pickles:

Now take your stalks and if you have a bottle of Claussen pickle juice waiting for something delicious to throw in, just stuff a few of your raw stalks in the bottle and within a few hours you’ll have delicious chard stalk pickles. My kids love them.

Raw Claussen Swiss Chard Stalk Pickles. Photo © Liesl Clark

I found another recipe for delicious pickled swish chard stalks at Cookistry. But if you want to read my entertaining version with home-grown photography, here we go:

Blanch your stalks in boiling salted water for about 3-4 minutes. You want them to stay crunchy so be sure to not overcook them. Drain the stalks and try a few at this stage. Aren’t they delicious? We loved the slightly salted cooked stalks so much we saved a few and had them as a side dish with dinner.

Find a mason jar or 2 and put your stalks in them.

Then, bring the following ingredients to a boil and make sure everything is completely dissolved:

2 cups water
3/4 cup white vinegar
1  1/2 teaspoons salt
2  1/2 teaspoons sugar

Pour your water into your mason jars with chard stalks in them and screw the tops on. Put them in the refrigerator when they’ve cooled and you can enjoy these pickles for a few weeks.

Pickled Chard Stalks. Photo © Liesl Clark

Do you have a favorite chard stalk recipe? I was so excited to find a way to save them from the compost bin or chicken yard I’d love to learn of other chard stalk rescue recipes.

Force Winter Twigs For Indoor Spring Color

IMG_1688

Yesterday, while the birds were gossiping with spring chatter on one of our first days above 50 degrees in weeks, I noticed some pruned wisteria sticks were still in our perennial garden, left over from when my husband had pruned the flowering wisteria last fall. It’s been an extremely wet winter, and I was surprised to find that the wisteria sticks had buds on them. The moisture of the winter rains sustained the cuttings, so they were still alive!

Inspired by Cathy’s “In a Vase on Monday” series, where she puts whatever might be green, even in the dead of winter, into a vase and writes about it, I looked at those wisteria sticks and thought perhaps I could force them for early blooms. And then this post, at Frogend Dweller’s Blog, rocked my Monday, with the reminder that we can collect many different flowering twigs, place them in a vase filled with water, and watch them open over the course of late winter and early spring. I promptly walked around our property and found that there were plenty of twigs barely hanging onto some of our flowering shrubs and trees, having been blown down by winter winds. I grabbed my sharpest pruning shears and gathered what I could:

IMG_1686

The varying colors of the stems are stunning in the mid-winter light. From left to right my budding twig offerings are as follows:

Hydrangea

Asian Plum

A Rose of Some Sort (Oh gosh! I just don’t know what kind it is!)

Wisteria

Alder (yes?)

And…um…well….er…I just don’t know what the last one is on the right. Another variety of alder?

Ok, so I don’t know all of my trees and shrubs, but 50% isn’t bad. And then Willa caught wind of the spring fever and wanted to pretend she was one of the sticks, too.

IMG_1689

I love how the plum branches have a little moss on them. Did I mention how wet our winters are here?

IMG_1687

The twigs were arranged in the nearest watering pot and placed in one of our favorite windows, under the grape pergola with the twists of vine shadows playing with the mid-day light that floods our dining area.

IMG_1691

The children and I can’t wait to see what blooms we’ll get from our forced twigs. Be sure to get outside, in the upcoming days, to clip a few flowering twigs of your own to bring some spring leaves and blossoms indoors while you wait out the chills of winter to come.

IMG_1692

Special thanks to Frogend Dwellers Blog and Rambling in the Garden for your inspiration. You’ve taken the bite out of winter. I’ve been enjoying your writings immensely.

Oh, and if anyone can help me identify the 3 varietals of twigs I missed, please comment below!

Yarn Scraps Are For The Birds

Spring is in the air! Save some scraps and bits to offer to your songbirds for spring nest-building. An old suet feeder will do the trick. At this time of year our feathered friends need all the help they can get.

Here are some great items that you can include:

Natural fiber yarn

String

Horsetail Hair

Shredded Paper

Feathers

Hay

Straw

Wool

Small Fabric Scraps

Cotton Balls

Cotton Wadding from Aspirin Bottles

Dried Moss

Twigs

Leaf Stems

Dog Hair

Cat Hair

So, don’t throw your yarn scraps and other bits away. Save them for the birds! In Paonia, Colorado, one spring, my son found the most unique birds nest, made entirely of yarns, hay, polyfibers, human hair, horsetail, and string.

IMG_4213 Photo © Liesl Clark

DIY Bamboo or Stick Fence

Bamboo + Electrical Wire = Pretty Garden Fence.

This bamboo fence, in Kalopani, Nepal, is one of my favorite garden fences I’ve come across while traveling. It’s a simple construction of bamboo sticks and woven electrical cord to hold the whole structure together. Here, people use what they have at hand to create beauty in an unforgiving alpine environment at 7,500 feet.

The electrical wire serves to hold the fence together.

Several 1-foot-high sticks are placed vertically in the ground about 5 inches apart and a long bamboo stick is split down the middle and placed horizontally across the vertical sticks, all woven together by an old electrical cord tied and knotted at the corner of the fence.

The horizontal piece is split in half.

It’s a simple construction and quite attractive for a high altitude flower garden at the base of Dhaulagiri, the world’s 7th highest mountain.

IMG_6524 © Liesl Clark

If you’re looking for some more interesting ideas for fencing materials, we might have what you’re looking for in our Trash Backwards app.

What have you used for fencing?

Garden Glove Love


Roadside Garden Glove. Photo © Finn Clark

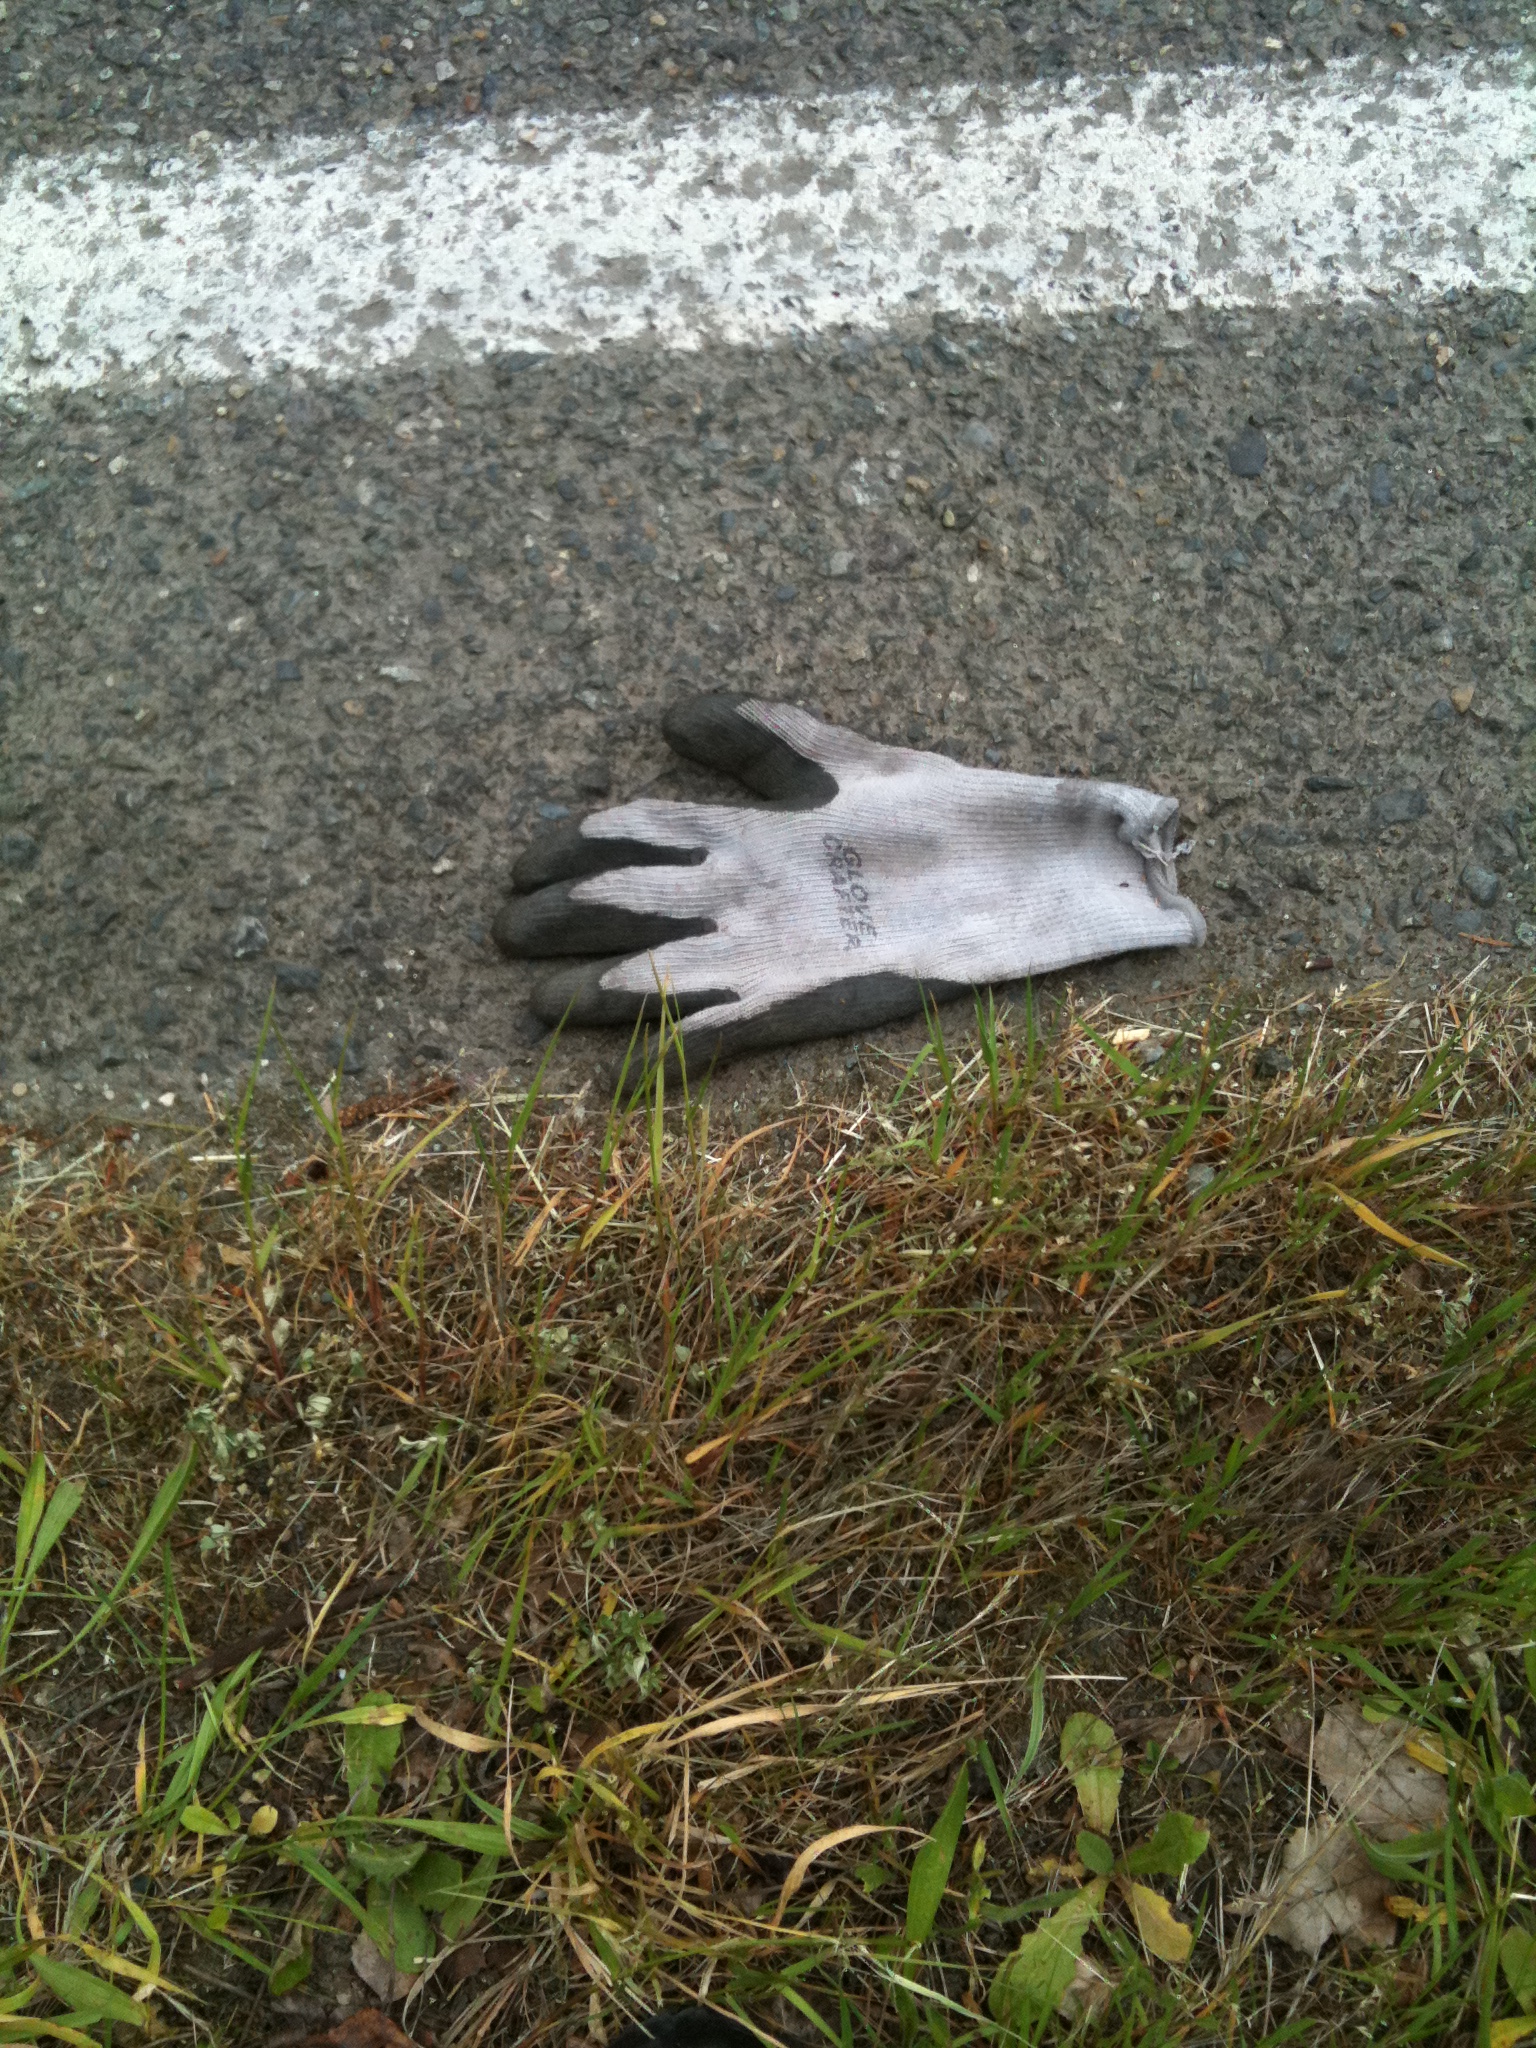
It all started on a bike ride. We kept seeing garden gloves along the side of the road. In fact, we had seen the gloves lying there for weeks and finally decided to pick them up. One by one, over the course of about 2 weeks, we had managed to collect 20 pairs!

I Have Good Garden Glove Karma. Photo © Liesl Clark

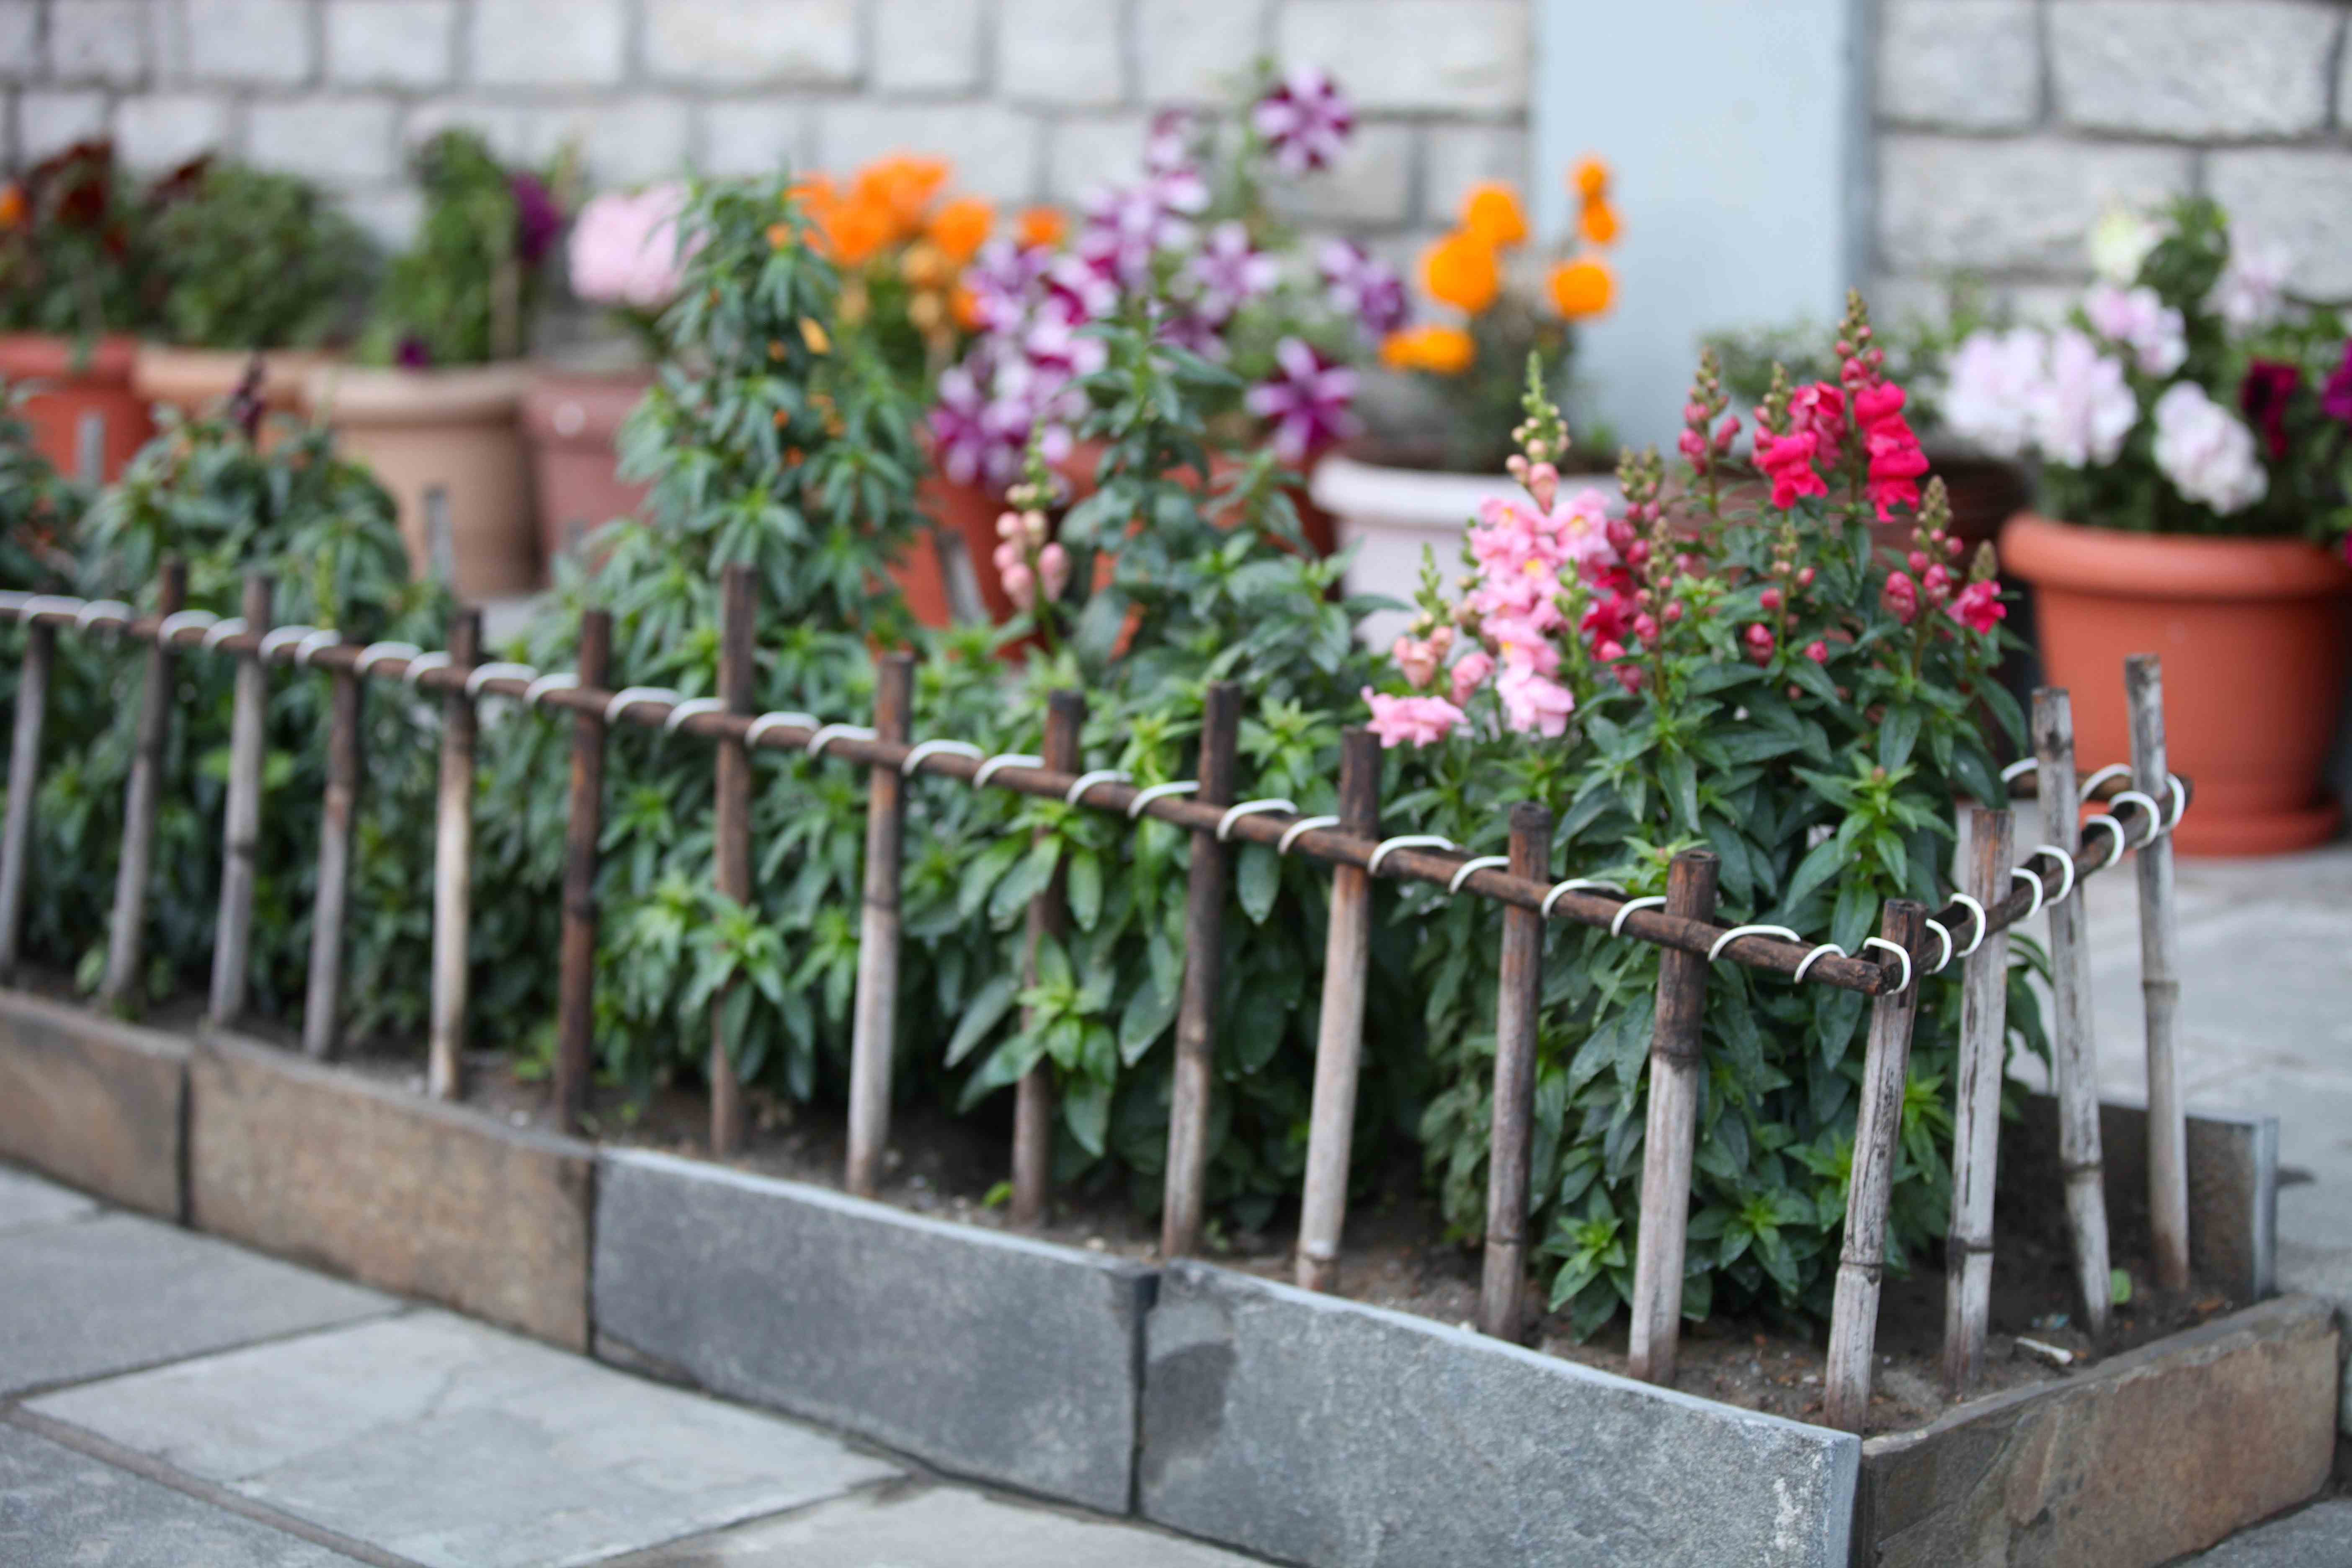
We’re an island of avid gardeners, farmers, and a world-famous garden tour called “Bainbridge in Bloom.” Twelve months of gardening weather here on Puget Sound has afforded us 4 seasons of dirt digging. The problem is that the gardeners’ (or perhaps it’s the hired landscapers’) gloves too often end up along the sides of the roads, having fallen from the backs of landscaper’s trucks, farmers’ tractors, or islander’s cars. Being a food-grower myself, I couldn’t just let those gloves rot in the ditches.

Garden Gloves Rain or Shine. Photo © Finn Clark

My children and I have been collecting them: pulling to the side of the road, jumping out of the car, jumping back in, celebrating, for a year now and have 45 pairs plus about 50 singles ready for a mate. Do you have a single garden or work glove awaiting a partner? Don’t throw it out! Send it to us so we can marry it to one we have here because their next life is going to be GOOD.

We have gloves in every color. Photo © Liesl Clark

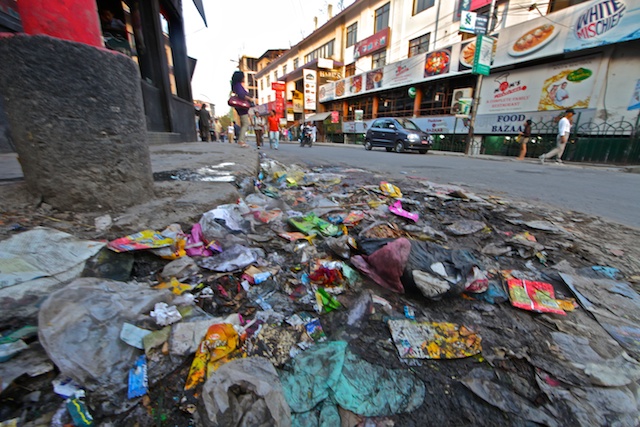
All pairs of gloves we reunite will go to Kathmandu to protect the hands of the rag pickers there. Life as a rag picker is tough, really tough, and many are children in their pre-teens. These kids, and plenty of adults, make a living picking through other people’s trash to compile enough polyethylene plastic or PET plastic bottles to send to India for recycling. It’s a decent living, but the conditions are among the worst on the planet.  We want to help by giving them the garden gloves we’ve found on our streets and in your garden sheds.

Give Garden Gloves or Help in Other Ways to Improve Conditions for the Rag Pickers of Kathmandu. Photo © Liesl Clark

My children and I made a movie about the rag pickers in Kathmandu. If you have a few minutes, this film short will give you a brief look into the work they do:

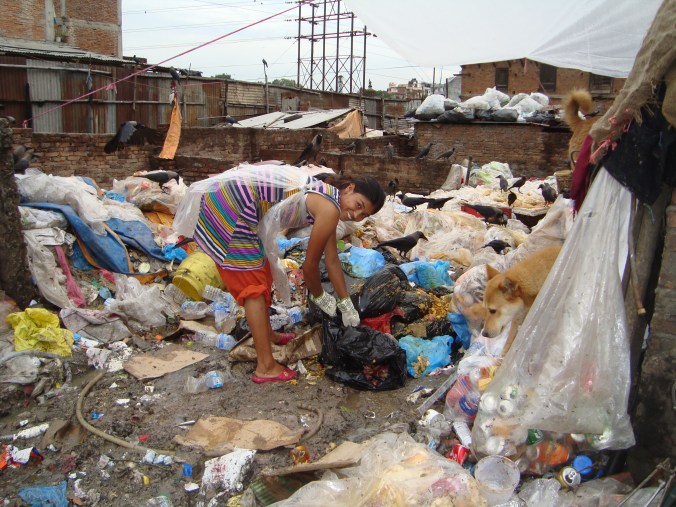
Most rag pickers have no gloves at all. They pick bare-handed through broken glass and human excrement to find their quarry, and the best protection they can have, in my humble estimation, is for their hands (of course it doesn’t hurt to have a face mask, too.) We’ve seen some rag pickers with just one glove, as that’s all they have.

Packed to the Gills, Ready for Zero Waste Travel

In August, we’ll be headed to Nepal again, to give gloves to Kathmandu’s rag pickers to aid in protecting them from the unsanitary conditions in which they work daily. Over two hundred rag pickers work at the city’s dump some 50 miles from Kathmandu. But countless children pick plastics from the Bagmati River as well as the streets of Kathmandu, and having a glove or two could save a child from infection, disease, and dysentery which comes with the territory.

Trash Day Curbside Pile in Kathmandu, Flattened by Rush-Hour Traffic

Want to help us protect the rag pickers, those moving Kathmandu’s trash backwards into new goods, to help reduce the mountains of garbage in the foothills of the Himalaya? There are 3 things you can do to help:

1) Use our Trash Backwards app and indicate when you’ve done something good. By clicking the “I Did It” button on any individual solution, you show us that you’ve changed your behavior to help reduce waste. These simple clicks that show what you’ve done to reduce, reuse, and recycle provide us with data to indicate whether a social movement like ours that educates through social media can make a difference. Every “I Did It” click means we can do some good, too. It’s a one-for-one correlation between your action at home/in the office and our action worldwide. For every “I Did It” click in our app, we’ll do our own good: We’ll hand out a pair of gloves to a rag picker, we’ll remove batteries from a water source in a village, we’ll collect plastics from rivers and shorelines, we’ll conduct a village waste audit. Every action you do enables us to do our greater good and ultimately find the support to do even more! So, please visit us at TrashBackwards.com and find some solutions to our global waste that you can undo in your own small scale, then hit the “I Did It” button and we’ll do the same. The more you do, the more we’ll do in return.

2) Send us your odd (or pairs of) garden gloves. We’ll likely have a match and can then get them into the hands of someone in need. Please know that the conditions are deplorable for a rag picker. Gloves could save someone from infection and truly make a difference. Does one glove have a hole in the thumb but the other is fine? Send us the good one!

Garden Glove Love

6027 NE Baker Hill Road

Bainbridge Island, WA 98110

3) Simply help fund our efforts to improve the lives of Kathmandu’s rag pickers and kids in higher villages. You can do so by donating much needed funds to the Alex Lowe Charitable Foundation so we can get our duffel bags of gloves (we donate shoes and books too) over to Nepal and remove toxic waste from the highest watersheds in the world while also helping to increase literacy in local villages. As little as $20 can go such a long way in Nepal. We’ve been bringing children’s books by porter, yak, horse, and donkey up to the highest villages in the Himalaya for 7 years now, and have opened 7 children’s libraries called The Magic Yeti Libraries. We bring books up and toxics down. Our target this summer is to remove batteries, CFL light bulbs, and plastics from the rivers, streams, irrigation ditches and water supply of villages between 9,000 and 14,000 feet. We’ll get these toxic materials out of the pristine waters and bring them down to a municipal organization that can dispose of them responsibly. We all live downstream of these waters, but for those who live in the villages nearby, the battery and plastics-laden streams need to be cleaned up as soon as possible.

Garden Glove Love was inspired by England’s Glove Love campaign, a nationwide movement to rescue single gloves and give them a new life on the hands of eager people wanting to help reduce our overall impact on the environment.

Start today with your efforts to reduce your own impact on our planet by doing some good with the stuff you already have in your life. Reduce, reuse, re-gift, repair, and rethink your material assets as you use our Trash Backwards web app and you’ll inevitably help others and our planet, too.