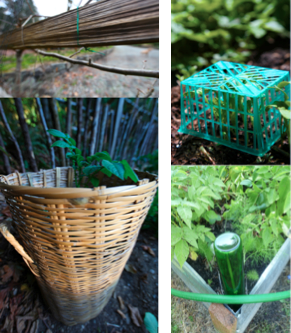
Chickens Love A Wood Ash Dust Bath

We burn wood for heat in our house, mostly wood that we collect from our property. High winds bring down a lot of limbs from the trees so we cut them up and use them for heat, as well as bring down any “standing dead” trees in the forest. A weekly by-product of our wood heat is wood ash and when we don’t place it around the base of our fir trees for soil amendment, we occasionally place some in our hen yard for the girls to use for dust baths. In the winter and spring months, here in the Pacific Northwest, it’s mud season, so chickens are in need of some dry dirt for dust bathing, as a pest repellant to rid of mites and bothersome bugs that harbor in their feathers and on their skin, which must be itchy as heck. It also gives them a little added magnesium and calcium.

IMG_6051 2

Our hens love their wood ash baths. They fight over them, in fact!

Here’s how we help our hens use wood ash to rid of their unwanted pests: We find a small “hen bowl” that they’ve dug in the yard, for bathing, and pour in the wood ash. Within minutes, they’ll scratch it around, mixing in the surrounding dirt, and then lay down in it to dust themselves up! A pop-up hen spa!


Apparently dried lavender and dried lemon balm are also great pest deterrents so sprinkling some into your wood ash bath could be an excellent potpourri addition for your chooks. We do love pampering our girls! After Valentines Day, our leftover dried roses were turned into rose petal chicken bedding for their coop, along with some blue paper hamster bedding a neighbor give us from our Buy Nothing group to line the chicken coop floor. Pretty!!

EAFEC7D3-344D-4262-9130-E5E2D45C3423

Rose petal and blue paper hamster bedding make for a fun late-winter coop bedding.

What spa treatments do you give your hens?

I Wrote A Book

From a young age, I’ve dreamed of writing a book. I think I had a small inkling of what that book would be about, so my internal voice has been slowly writing it since I was about 7. I recall wishing I could start a movement where people didn’t have to spend their hard-earned money on the things they needed to live. I wanted to start an everything store where all things were available for free, like cinnamon bread and my own book that I wrote that might help solve people’s problems with money. It was early idealism during a time when I first came to understand there were “haves” and “have-nots” in the world, painful inequities that touched people deeply. But I never truly believed that one day I’d be given the opportunity to write a book, bound together as an offering of ideas lived, and made final. Now that I have a book coming out in a matter of days, one co-written with by my friend, Rebecca Rockefeller, the launching of it is, admittedly, bittersweet. Somehow, we’ve written a book that’s near-impossible to sell

The Buy Nothing, Get Everything Plan, with its oxymoron of a title, is an intentional book, a challenge to buy less and share the bounty around us, seeking to further spark a movement Rebecca and I started with the Buy Nothing Project network of local gift economies. Over 6,000 of them have sprung up all over the world with nearly 1.5 million participants. We want to show people how our reliance upon buying things can be turned upside-down if we rely more upon our neighbors, our own ingenuity, and the abundance of our own goods and services we can share in our communities instead. There are ways to Buy Nothing while getting just about everything you want and need.

Our book is due out in bookstores on April 14, 2020, and ironically most bookstores are now shuttered due to orders from our governors and the much-needed imperative to stay home due to COVID-19. The in-person book tour we set up with 9 booksellers along the US West Coast including Seattle, Tacoma, Portland, Oakland, San Francisco, Los Angeles, and San Diego has been cancelled, with the hope that these independent booksellers will host us in the future. Nothing is more important than stopping this virus from spreading further and that means staying at home.

We may call it “social distancing” but what we’re all actually doing is physical distancing while social connecting, weaving our inter-personal connections even tighter, tying people all across the globe together through our simple humanity. By way of virtual creativity, people are now sharing their expertise for free, through videos shared online, via Zoom gatherings, on their Facebook feeds, over YouTube, through emailed newsletters, every way they can. From free therapy sessions, workouts, yoga classes, cooking classes, and how to-fix-it tutorials, we’re creating a worldwide shareocracy that’s non-commercialized and offered freely from the heart. Our book is literally about this, a blueprint for sharing of ourselves in times of peace so we can be prepared for times of chaos.

We had no idea the chaos would come so soon. The more we establish these systems of connection with one another, the more we’re capable of achieving en mass, for the common good, in honor of our community, ourselves, and also the environment. But now it’s imperative we take these steps for our very survival. The less we go to the store, the safer we are. The more we can make-do with what we have at home, the more we can reuse, repair, and repurpose, the less we have to run to the store. Stretching what we already have in our homes to meet our needs is not an act of austerity, it’s one of resilience, and we believe that resilience can be had without suffering.

Much of my blogging here, and the conversations we’ve had in the comments and through email, has inspired this book, coming from a desire to simplify and reuse what we already have in abundance surrounding us, rather than going out and buying new. I do hope, ironically, that you’ll – yes – buy the book and read it – feel free to share it – and participate in our call to action to find daily ways for us each to share more and live generously.

Avocado Pit Turned Fake Egg

It was a dark and stormy winter….and my hens were bored. Here in the Pacific Northwest, our hen yards can get pretty mucky and the chickens tend to turn to deviant eating behaviors, like, well, eating their own eggs. There, I said it. Gross! That’s like….oh, never mind. We can’t allow this to happen, because the purpose of backyard chickens is their yummy eggs, a critical part of our family’s mostly vegetarian diet. (Our hens do produce other products for us, like amazing compost.) But no, we won’t be allowin’ them hens to eat their eggers.

I found a great solution to deter an egg-eater, right in my compost bucket: An avocado pit!

IMG_9813

An avocado pit works beautifully as a dummy egg. © Liesl Clark

For years, I’ve used dummy wooden eggs, plastic easter eggs, egg-shaped stones, golf balls and pingpong balls as dummy eggs, to deter the little peckers (egg-eaters) from pecking apart their eggs. Dummy eggs are just that, fake eggs that chickens think are real (think, bird brain.) They peck ’em and realize they can’t break ’em and therefore we stop the deviant eating  disorder in its tracks. Problem solved.

IMG_8245

One of these things is not like the other. © Liesl Clark

So, don’t go and buy fake eggs. Please. Just use an avocado pit in your nest box. Deploy 5 of them if you’d like, and your egg-eater will get frustrated when the avocado pits won’t crack and produce an egg-licious mess in your laying box.

IMG_6870

© Liesl Clark

Enjoy your guacamole knowing your avocado pits can be put to use!

IMG_9812

New use for an avocado pit. © Liesl Clark

Save Your String

We salvage string. Don’t you? When I see rolls of string sold in the hardware store, I wonder who buys it? String is freely available if you just know where to look for it.

IMG_4364

The feed we buy for our chickens comes in large paper feed bags laced up with string. When we pull the string to open the bags, it comes out freely and we have plenty to last us throughout the year. We roll it onto a small roll of paper and it goes into the string box.

IMG_4357

I found an old wooden box that was covered with Christmas wrapping paper a few years ago. This box has been salvaged for the use of storing our saved string. So, shoelaces are salvaged and washed, bungee cord gets thrown in there, craft string, a few pieces of yarn, homemade “plarn,” cordage, twine, even pieces of candle wicking that hasn’t been put in wax go in there. Whenever something has reached the end of its life and we need to throw it away, any string on it gets salvaged and thrown into the string box.

IMG_4361

String is a staple for my gardening, as I use it to create pea ladders between woven sticks for my growing pea shoots, or to hold the hellebore up when the heavy blossoms weigh down the large plants.

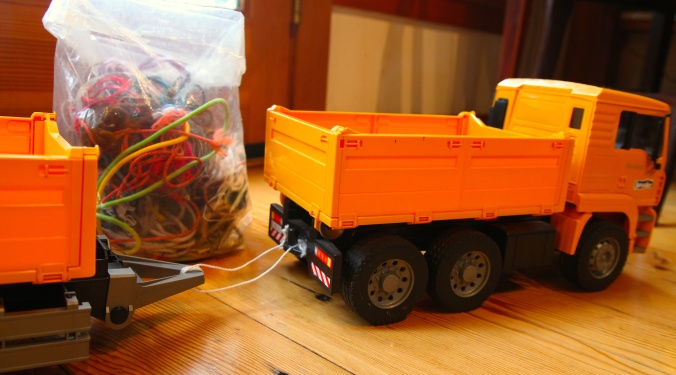
The whole family knows where to go when they need a piece of string or shoe lacing to make a repair and tie together a few things. When my son was 5, he connected his favorite truck to its trailer with string when the hitch broke.

bag-o-string.jpg

String is the stuff of life, affording us everyday repairs to sew-up, tie together, wrap around, hold up, and weave anew.

Save your string, all forms of it. Don’t throw it away. And find a pretty container to hold it, for all to access for the projects that will come.

Banana Peel Shoe Polish

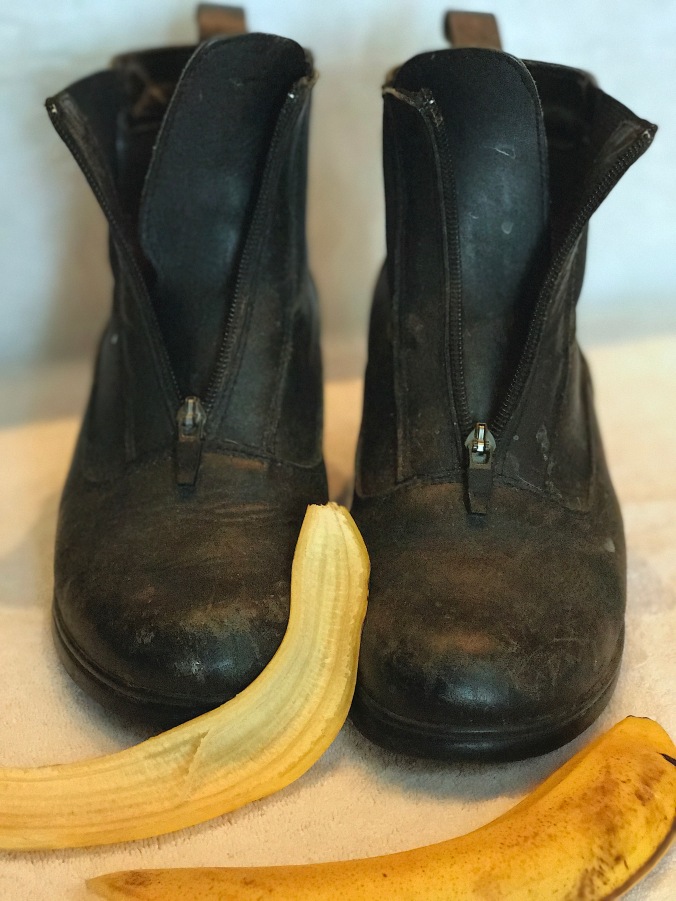
You heard that right! I used a banana peel to shine my shoes.

IMG_4072

Before

IMG_4091

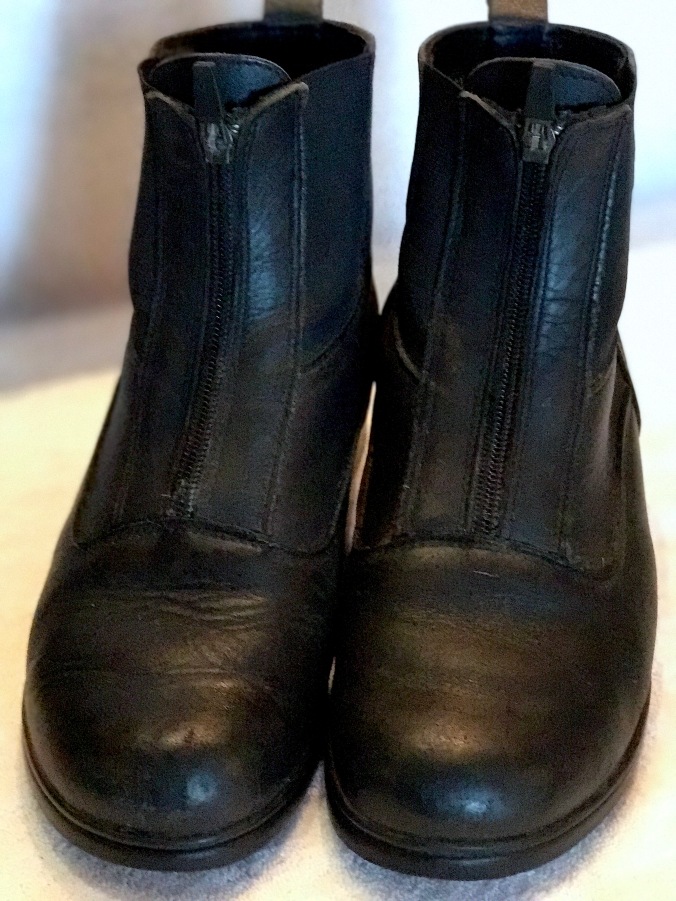
After

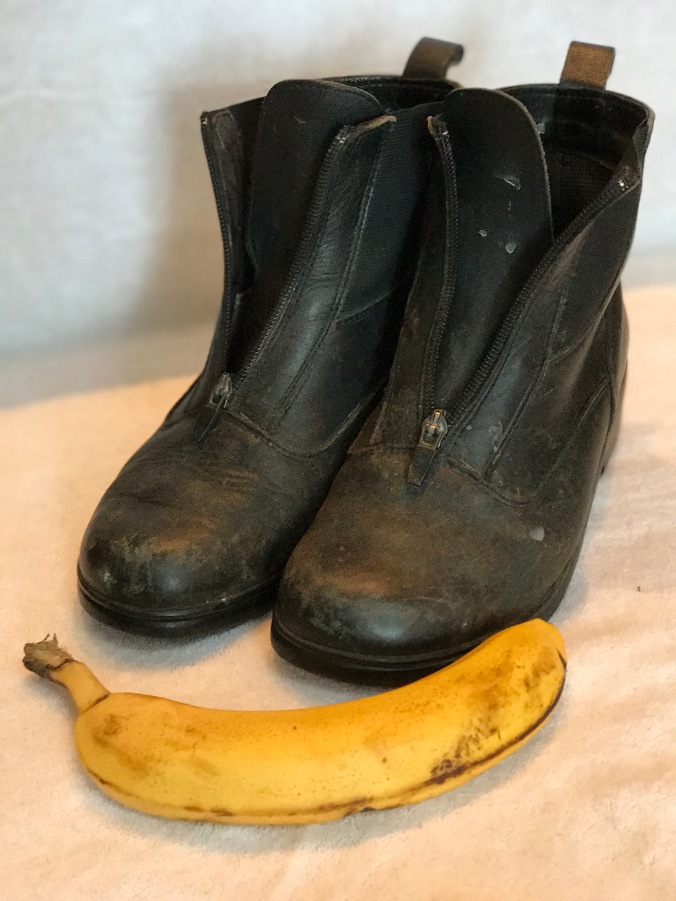
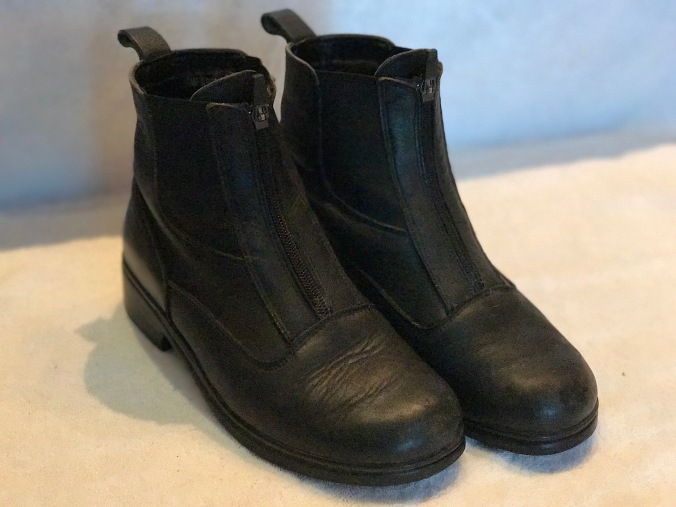
My boots were looking pretty bad, having made a few trips to the hen house surrounded by mud. They’ve also been scraped and battered over the years, and I never seem to have the time to shine ’em up. We don’t have any shoe polish here in the house and I didn’t want to go out and buy some, knowing it’s likely not made with the most environmentally-friendly ingredients. I had also done some research a year or so ago about 20 incredibly versatile things a banana peel can be used for. Shining your shoes with a peel was on the list. I figured it was time to give it a try.

So here’s all you need:

Your scuffed up shoes, made of leather or a facsimile thereof

A Banana Peel

Soft Cloth

IMG_4078

These seriously needed some help.

The Method: Rub the inside of the banana peel all over your shoes. Spread that shiny gook all over and rub some of it in as you swipe peel over leather. Then, grab your soft cloth and buff, just as you would if you were polishing your shoes with that black or brown stuff you see at the airport shoeshine spot. Rub and then buff. Apply a second coat of banana peel goodness and rub and buff again. Do it a third time, and you’re done! They’re not sticky at all. The oil from the inside peel of the banana did its magic and my boots are good to go for a few hundred more miles.

IMG_4081

Maybe not perfect, but so much better! Try it, this banana stuff works.

Paper Bag Cast Iron Skillet Cleaner

We stopped buying paper towels years ago. Never really needed them.

And since we were eating mostly vegetarian meals, we rarely had the dilemma of what to do with a greasy cast iron skillet. Now that we eat bacon occasionally, because we’ve reintroduced a little locally-produced organic meat now and then, we have to contend with the leftover grease. We’ve used a few rags on the grease and just wash the rags, but that isn’t the best use for the rag.

And then, one day a week or so ago, I posted a dozen lunch-bag size bags to give away in my local Buy Nothing group. (I save these little bags whenever they somehow make their way into our house, and the kids use them when they go on school field trips.) A member immediately posted a comment explaining that he uses those thin lunch bags to sop up his bacon grease. It was an “aha” moment for me.

IMG_3974

Here’s what he wrote:

“If you have a new, or not-so-well-seasoned pan, a thicker bag will leave little micro fragments of paper. So generally, the smoother the pan and the finer quality of the bag, the better it works. Newspaper is completely unworkable because it’s such lo’grade.”

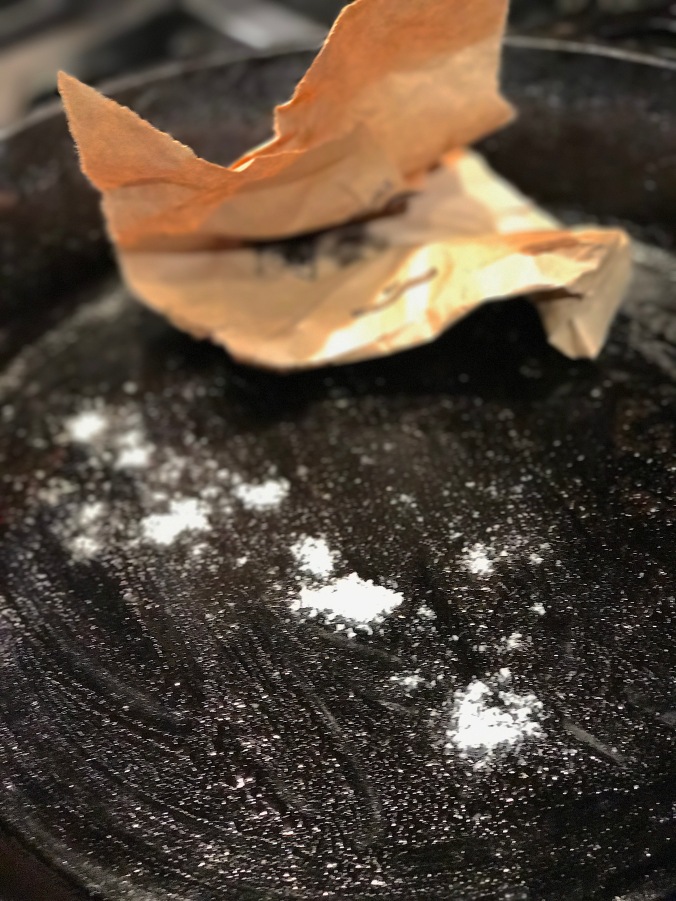
I decided to keep the bags, and now I have a small stash of little brown bags I can use to clean out my cast iron skillet when it gets a little too greasy. The thin bag is pretty darn absorbent.

IMG_3984

I throw in a little Celtic sea salt to scrub the bottom of the pan with the crumpled up bag, and the salt acts as a perfect scrubbing agent.

IMG_3986

No need to run soap and water over the well-seasoned skillet. And the pan is ready for its next job.

IMG_4001

The greasy bag goes into our next fire as fire-starter or we just toss it in our compost.

IMG_3996

Save those little bags for jobs like this!

How To Reduce And Reuse Chip Bags

Potato chip bags are something we’ve all handled and then thrown into the trash.

If your conscience has you wondering if there are alternatives to sending that bag into the landfill, you’ve come to the right place.

If you simply want to try to reduce your chip bag footprint, just make your own easy microwave chips using Rock Farmer’s simple method. If you want an oil-free recipe with a few more steps, give this one from the Kitchn a try.

Reuse and Repurpose:

1) If you’re not able to resist purchasing snacks in crinkly bags, then use your bags as gift bags! It’s easy to do: Turn your chip bag inside out, wash it with dish soap to get rid of any grease. Dry it out. Then reuse the silvery or white side as a mylar-style gift bag. We do this all the time and reuse them over and over. We just attach some pretty ribbon like these pictured here which we found on the beach (no kidding) hanging beneath a deflated helium balloon all twisted up in seaweed. These ribbons last forever, they’re made of plastic, and look as good as new even after years of floating in the open sea. I’ve picked up so many of them on the beach, I’ve had occasion to give a bag of them away on my local Buy Nothing group, with the caveat that the person agrees to keep the ribbons on indoor gifts and not set them free with a helium balloon. When you’ve seen them wrapped around the necks of baby seals and sea turtles, you can’t help reconsider why we risk sending them into our seas via floating balloons in the first place. But I digress.

2) Make a shoulder bag. Some chip bags have a cool vintage look to them and could make a great shoulder bag.

3) Make a gum wrapper-style chain bracelet. Remember making paper chains from gum-wrappers? If you employ the same method with chip bags and candy wrappers, you can craft some amazing things. First step is making a bracelet.

4) And when you’ve mastered the gum wrapper-style bracelet, you’re ready to move on to the purse.

5) Craftbits has a tutorial for a nice clutch.

6) Make a potato chip bag mini scrap book. At making-mini-scrapbooks.com, you’ll learn how to make your own cool books that would also make excellent gifts for friends.

Mini Potato Chip Bag Scrapbook, Photo © making-mini-scrapbooks.com

7) Instructables has a tutorial for a chip bag wallet.

8) Craft a baby crinkly square to appeal to baby’s need for tactile and aural stimulation. We think a snack bag would make some good crinkly sounds for your little one.

Baby Crinkly Squares Can Be Made With Potato Chip Bags, Photo © Joy’sHope.com

Remember the Sunchip compostable bags and how loud they were (95 db)? Maybe stay away from those. They’ve been discontinued, apparently, but consumers certainly had fun with the deafening chip bags. Even a Facebook group was started, called SORRY, BUT I CAN’T HEAR YOU OVER THIS SUNCHIPS BAG. We were excited to see that compostable snack bags were being tested on the market, yet when we did our own compost test of the Sunchip bags in a commercial composter for a month, the bags, surprisingly, were still intact — no decomposition visible.

9) Make an adorable robot from the silvery side of your bag.

10) Yet another Instructable. This time it’s a pencil case. Who needs Terracycle when you can upcycle your own stuff?

11) Cover over an old bracelet with delightful snack bag colors to make a new one!

12) Make party tassels!

I figure that’s enough to keep you busy with your snack bags, but let’s face it, all of this will end up being tossed in the landfill eventually. Although my kids love to occasionally have a junk food fix of chips, we’re continuing to do our best to stop buying foods that come in unrecyclable bags. Until chips can be sold in something a little more sustainable, we’ll do our best to just say no, or make our own.

How Toxic Is Your Garden Hose?

Think Twice About Your Garden Hoses And How Toxic They Might Be. Photo © Liesl Clark

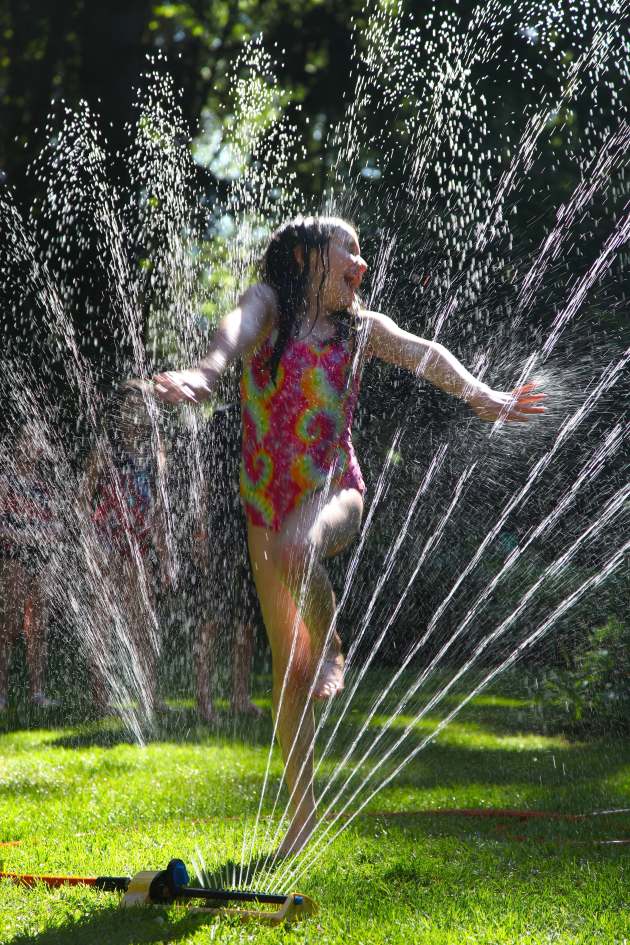
One of the cheapest, happiest forms of warm weather play for children is a garden hose with a sprinkler hooked up to it. For our children, it means hours of joyous play.

Sprinkler Fun. Photo © Liesl Clark

The challenge for us is the knowledge that most hoses are made of toxic chemicals and hence are full of pthalates and Bisphenol A. Both are known endocrine disruptors and if children drink from a hose their BPA levels will rise significantly.

Be Sure to Play in a BPA-Free Garden Hose Spray. Photo © Liesl Clark

Lead has also been detected in most garden hoses. It’s unknown what the effects are to the soil and plants, but what’s clear is that the next time we buy a hose we should be aware of studies on the chemicals hoses can leach and which hoses are safest. Here’s a 2016 study on the toxicity of hoses done by the Ecology Center.

Photo © Liesl Clark

We do have one PVC-free hose and that’s the one we use for kid water-play. In fact, we use it as often as possible, as we phase out our other old hoses. An irrigation project we’re longing to do is a hose-free drain system from our pond to the vegetable garden so we can skip the hose quotient altogether. No wonder our waters are full of estrogen-mimicking chemicals that are affecting indicator species like fish.

Photo © Liesl Clark

If you’re interested in phasing out your old hoses or reusing one that’s broken, we’ve seen them sliced lengthwise in small sections to be used as blade protectors for hand-saws, or used on the side of a garden shed for wall-art, or woven on an old chair to create some cool outdoor furniture.

But, for the purposes of watering our garden or for kid-play, from now on we’ll be seeking out BPA and lead-free hoses.

8 Plastic Kiddie Pool Reuses

After years of summer aquatic fun in 6 inches of baby pool magic with toddlers, my conscience took over and had issues with the unsustainable reality of the kiddie pool: Most inflatables get holes in them and whether they’re air-filled or hard plastic they’re made of PVC and laden with Bisphenol A, a toxic cocktail for earthlings just starting out on the planet.

We recently found a kiddie pool under our guesthouse deck, left behind by our renter, a mass of vinyl, pine needles, and hidden slugs. We cleaned it up with some high powered squirts from the garden hose and some serious scrubbing. I started inflating the thing by mouth in that way that Moms, Dads, and loved ones dedicated to preserving summer bliss can do, only to find that there was a small leak. Summer bliss had hit a road block.

Repairing inflatables is as simple as fixing a bike tire tube or Thermarest for camping. We got out the tube repair kit and made a quick patch and the inflating resumed. But it got me thinking. How many plastic kiddie pools are thrown out in our community each year? Likely hundreds. All that vinyl, headed to the landfill because someone didn’t have a patch kit or couldn’t deal with the gross slug slime-n-pine grime.


When you’re done with your pool, hopefully it’s still in working order for you to pass your pool on to another family that will frolic freely in their BuyNothing-ed frog pool. Or, if you have a hard plastic kid pool, donate it to your nearest animal rescue center for use by aquatic birds, fowl, and domestic animals escaping summer heat.

You might want to hang on to it, however, when you discover some of the upcycle options for that prized pool.

Hard Plastic Kiddie Pools:

1) Turn your pool and a few others into a raised bed garden. Wandering Chopsticks has a simple tutorial for you to follow for adding some green (and veggies) to your backyard.

Wandering Chopsticks’ Kiddie Pool Raised Bed Garden, Photo by Wandering Chopsticks.

2) If you have a party coming up and need to keep a lot of food cold while serving, Thrifty Fun’s wading pool cool food server might be just what you’re looking for.

3-6) Here are 4 more great ways to reuse your hard plastic kiddie pool, presented by Hint Mama. Among them are a ball pit, a beach playpen, and a toy bin.

Inflatable Kiddie Pools:


7) Turn your deflated pool into a slippy slide! Just turn it upside down on a little slope and add a trickle of water.

8) Then add a few drops of environmentally-safe liquid soap and watch the fun and bubbles explode!

Our kids are now older and I can proudly say that we never had to take a kiddie pool to the landfill. The reuses were too good and then the pools were passed on to others. Do you have a reuse we haven’t mentioned here?

50 Garden Hacks From Your Trash

screen-shot-2013-03-12-at-1-21-45-am

There may be items in your trash that could help you with your gardening. Check out this list and see if any of these great ideas resonate with you, helping you pull a couple things out of your trash and, well, into your garden to green up your world. If you don’t have these items in your trash, ask for them on your local Buy Nothing group. I’ve categorized the ideas by item, and each one links to a unique reuse. Enjoy!

Plastic Bottles:

1) Plastic Bottle Mosquito Trap: This one is a trick using yeast and a cut bottle glued together. Read on and try it.

2) Plastic Bottle Cloche: It’s as easy as cutting a plastic bottle in half and sticking it upside down over your seedling or plant.

3) Plastic Bottle Self-Watering Seed Starters: These plastic bottles, cut in half and one inverted inside the other have a wicking system worth checking out.

4) Plastic Bottle Drip Irrigation System: 4 small holes in your 2-liter bottle that’s buried in the ground provide excellent watering for your plants.

5) Plastic Bottle Greenhouse: A greenhouse like this is a true inspiration.

Milk Jugs:

6) Milk Jug Scoop: Milk or OJ jugs make easy scoops.

7) Milk Jug Cloches: Use Milk Jugs to protect your larger plants. Just cut the bottom out of the milk jug, turn it upside down and it’ll protect your plants.

8) Milk Jug Mini Greenhouses: These mini greenhouses in gallon jugs can prove useful.

Clear Plastic Containers:

9) Plastic Container Mini Greenhouse: Just turn it upside down and you have a mini cloche/greenhouse.
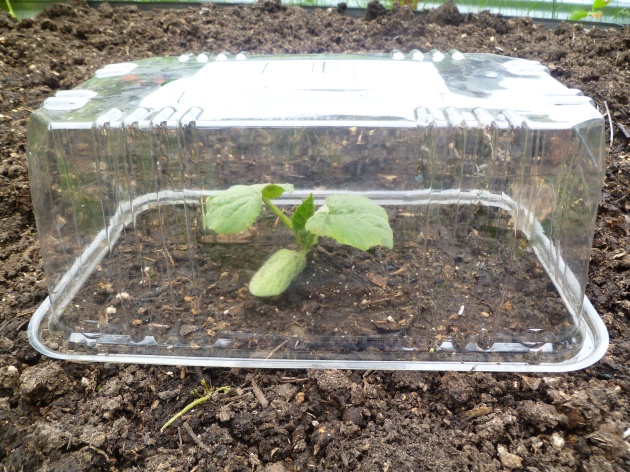
Winter Squash Seedling Basking in the Heat of a Lettuce Box, photo by Rebecca Rockefeller

Cereal Boxes & Cracker Boxes:

10) Cardboard Weed Block: Take your cereal boxes and cracker boxes to the garden and use them as weed blocking.

Bike Wheels:

11) Bike Wheel Trellis: Bike wheel trellises are beautiful.

DVDs/CDs:

12) DVD/CD Bird Scaring Trick: Birds don’t like reflective stuff. It scares them off. Put a few around your berries and you’ll keep those peckers away.

Mailboxes:

13) Mailbox Garden Tool Cache: Post an old mailbox up in your garden, and you have a water-proof place to store hand tools, planter markers, and your notes.

Make a garden tool cache out of an old mailbox. Photo © Liesl Clark

Drawers:

14) Drawer Seedling Starter: This one’s easy. Just use an old drawer as a seedling planter box.

OJ Cans:

15) OJ Can Plant Labels: The can tops make pretty labels for marking your rows.

Rain Boots:

16) Rain Boot Planters: Save a few pairs of the kids cute rain boots for whimsical planters.

Plastic Plant Pots:

17) Plastic Plant Pot Flowers: Add a little flair to your outdoor space with these plant pot flowers.

Trash Cans:

18) Trash Can Root Cellar: I’m interested in trying this for storing our potatoes, carrots, daikon radish, turnips and cabbages next year. It simply requires digging a deep hole.

Tupperware Tubs:

19) Tupperware Worm Farm: Make a few holes in your old Tupperware bins, order a few hundred red worms, follow the instructions here and you’ll have a worm farm.

Plastic Bottle Caps:

20) Plastic Bottle Cap Lawn Flowers: Michele Stitzlein creates beautiful blooms from plastic caps. She’s published a couple of books on plastic cap art, too.

Glassware:

21) Glassware Flowers: These bowls and dishes are all the rage.

Garden Hoses:

22) Garden Hose Flowers: If you have space on a wall, you could create flowery art from your old hoses.

Twist Ties:

23) Twist Tie Plant Trainers: Save your twist ties to use for training plants to fences and stakes.

We reuse twist ties for training our espalier fruit trees. Photo © Liesl Clark

Soda Cans:

24) Soda Can Planters: In a pinch, soda cans can be used as planters and seed starters.

25) Pop Can Plant Markers: With a little effort, you can make some pretty markers for your garden.

Styrofoam:

26) Styrofoam Planter Filler: Fill the bottom of your large plant pots with styrofoam so they don’t get too heavy.

Styrofoam Planter Filler, Photo: Liesl Clark

PVC

27) PVC Garden Tower: Drill holes in a PVC tube and you have a strawberry planter

Coaxial Cables:

28) Coaxial Cable Fence: Who knew that a coaxial cable could look so pretty with bamboo?

Tie a Bamboo Fence Together with Coaxial Cable

Wine Bottles:

29) Wine Bottle Waterer: Turn your empties upside down (with H2O in them) in your plant pots and go on vacation!

30) Wine Bottle Garden Edging: Wine bottles can make colorful garden edging.

31) Wine Bottle Hose Guard: A wine bottle and a stick are all that’s needed to keep your hose out of your garden beds.

Empty Bottle Hose Guard Hard at Work photo: Rebecca Rockefeller

Clementine Boxes:

32) Clementine Box Planters: Clementine boxes make excellent seedling starter boxes or planters for forced bulbs.

Blue Jeans:

33) Blue Jeans Garden Apron: Sew yourself a simple garden apron from an old pair of jeans that can hold your garden tools.

Plastic Mesh Produce Basket:

34) Plastic Mesh Seedling Saver: We use these baskets to prevent slugs and birds from destroying our seedlings.
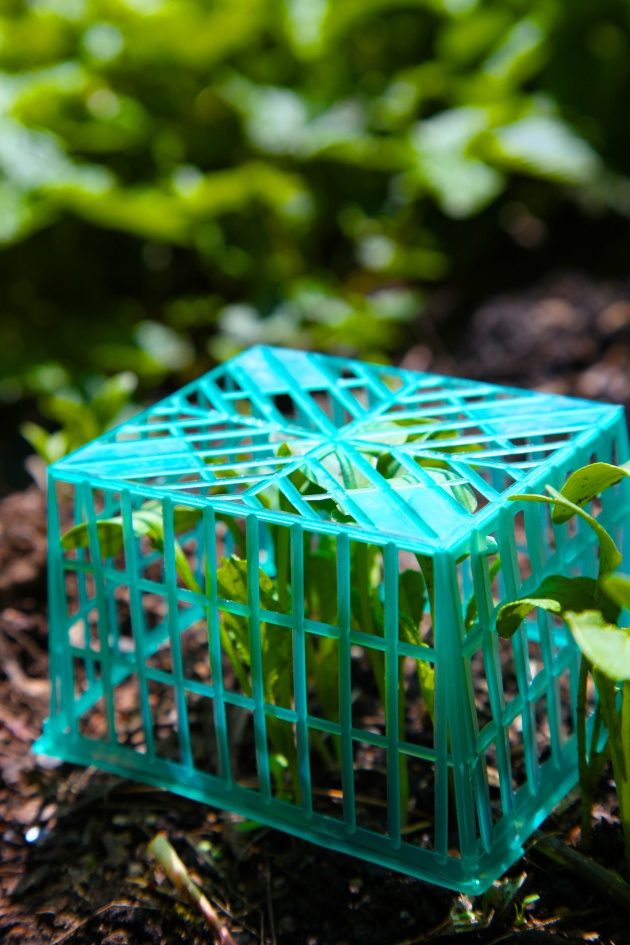
Turn your trash backwards: Place mesh produce baskets over seedlings to protect from birds, frost, and really big slugs.

Windows:

35) Windows Greenhouse: This is a simple design for a small greenhouse made from windows.

36) Window Frame Trellis: An old window frame with mullions makes a pretty trellis.

Broken Ceramics:

37) Broken Ceramics Pot Drainage: Put your broken ceramic pieces in the bottom of plant pots for added drainage.

38) Plant Your Broken Dishes: Plant your favorite broken dishes in the garden and enjoy them throughout the growing season.
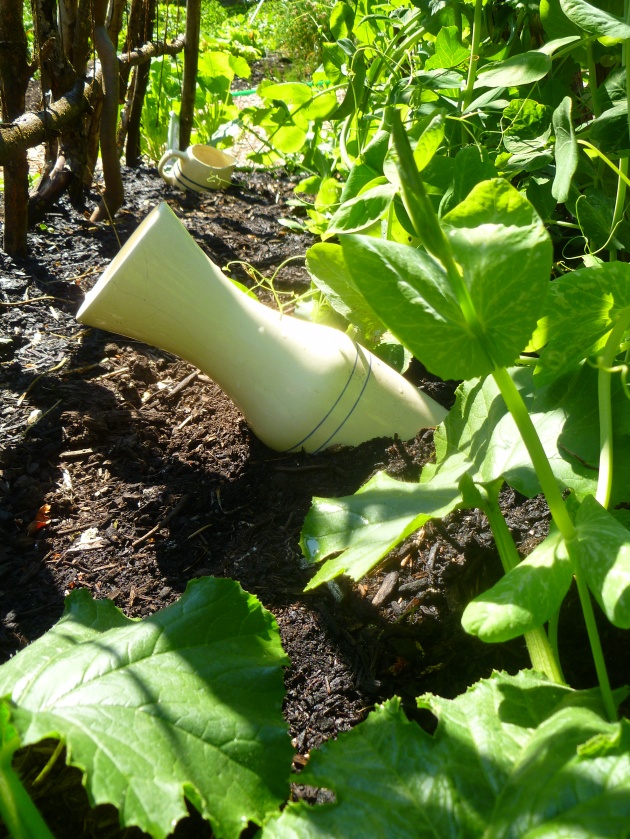
Carafe and Pitcher under the Bean Trellis photo by Rebecca Rockefeller

Broken Pot Planter: When our ceramic pots break, I plant them in our garden along with something planted to look as if it’s spilling out of the pot, having grown there over time.
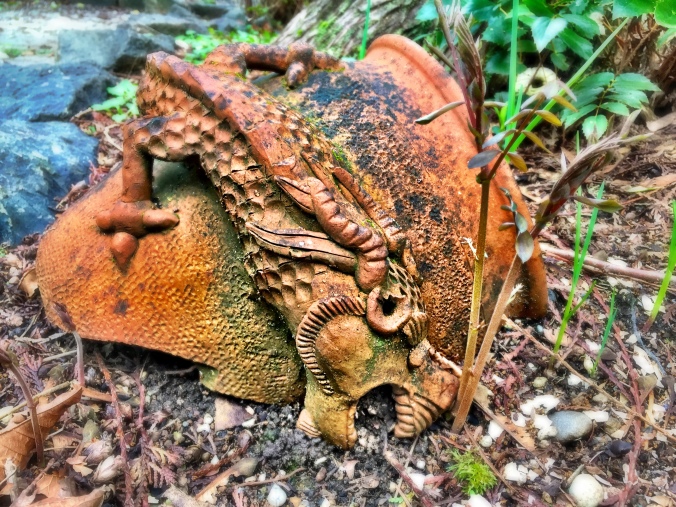
IMG_2266

Paint Cans:

39) Paint Can Planters: I love these paint cans turned planters at my friend Maya’s house in Tsarang, Upper Mustang, Nepal.

Even Paint Cans Add Flowery Color to a Household, Photo: Liesl Clark

Laundry Hampers:

40) Laundry Hamper Potato Planter: I planted potatoes inside an old laundry hamper and the harvest was easy.

Potato Leaves Begin to Poke Out, Photo©Liesl Clark

Skis:

41) Ski Fence: If anyone lives in the Seattle area and wants to make one of these, please contact us as we have several hundred skis at the end of our Rotary Auction.

Window Blinds:

42) Mini Blind Plant Markers: These look really easy to make.

Panty Hose:

43) Panty Hose Deer Repellant: If you place a bar of soap inside the foot of old panty hose and hang it from your apple tree, it should deter the deer from nibbling on your tree. You can also use a single child’s mitten for this, as it looks cute and either put the perfumed soap inside or human hair (they don’t like the smell of humans.)

Headboards:

44) Headboard Trellis: A headboard makes a beautiful pea trellis.
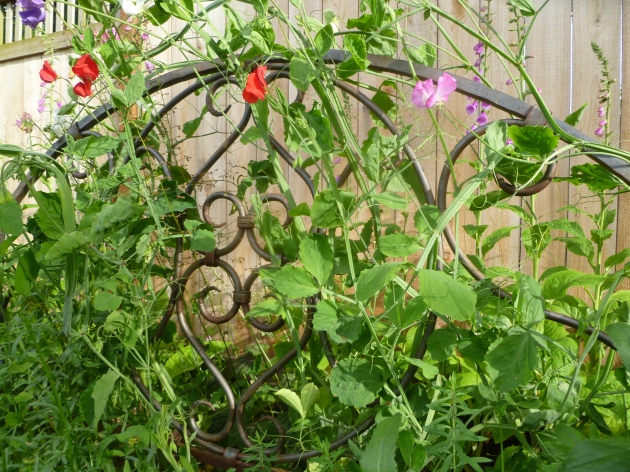
An Old Headboard from Freecycle Makes a Perfect Garden Trellis, photo by Rebecca Rockefeller

Newspaper:

45) Newspaper Garden Uses: There are many reuses for newspaper in the garden.

Cassette Tapes:

46) Cassette Tape Bird Deterrent: Pull the tape out of your cassette and string it over your garden. Birds hate the reflective quality of the tape.

Pet Food Bags:

47) Feed Bag Tarp: Sew your plastic woven pet food bags together into a tarp for garden needs.

Toilet Paper Tubes:

48) TP Tube Seedling Starters: Start your seeds in a tube filled with soil.

Sponges:

49) Sponges in Plant Pots: Cut up your old sponges and place them in the bottom of plant pots. They’ll hold moisture for a long time.

Kiddie Pools:

50) Kiddie Pool Raised Bed Garden: Hard plastic kiddie pools make excellent raised bed gardens.

What do you reuse in your garden? Help me add to the list.