Save Your String

We salvage string. Don’t you? When I see rolls of string sold in the hardware store, I wonder who buys it? String is freely available if you just know where to look for it.

IMG_4364

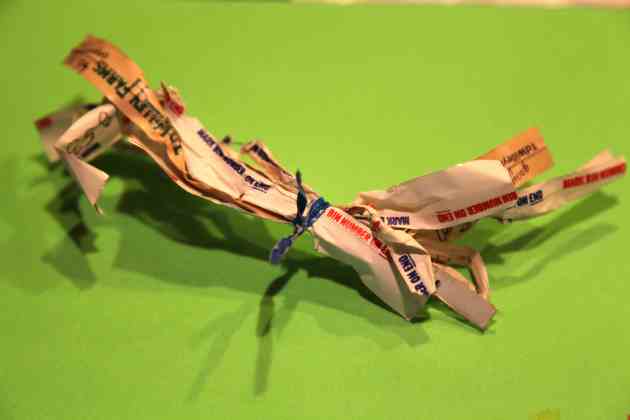
The feed we buy for our chickens comes in large paper feed bags laced up with string. When we pull the string to open the bags, it comes out freely and we have plenty to last us throughout the year. We roll it onto a small roll of paper and it goes into the string box.

IMG_4357

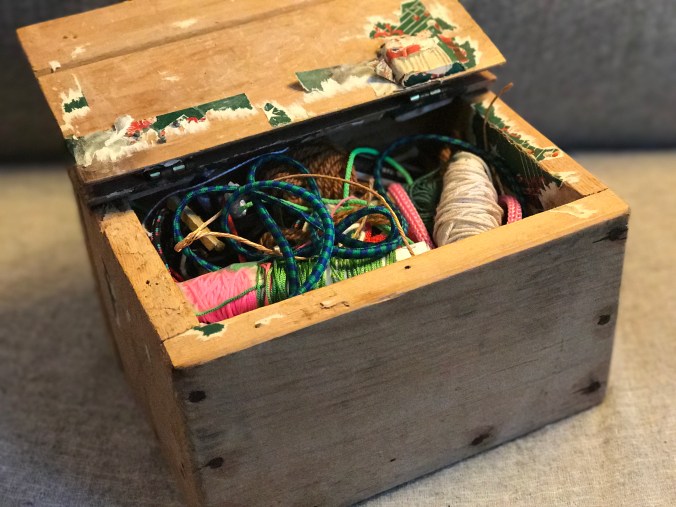
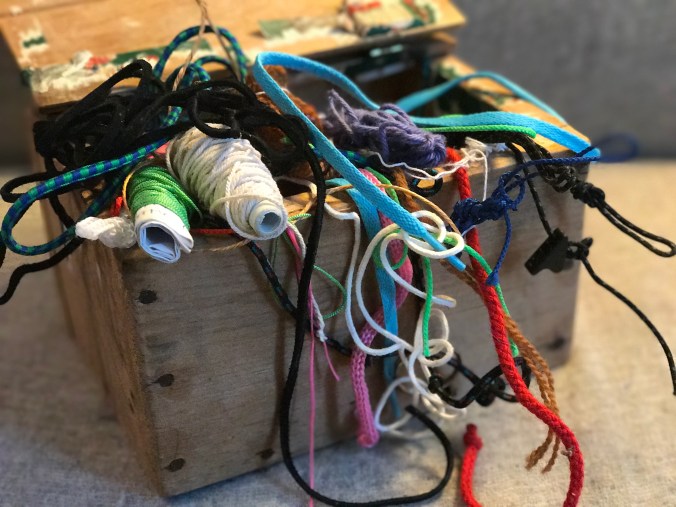
I found an old wooden box that was covered with Christmas wrapping paper a few years ago. This box has been salvaged for the use of storing our saved string. So, shoelaces are salvaged and washed, bungee cord gets thrown in there, craft string, a few pieces of yarn, homemade “plarn,” cordage, twine, even pieces of candle wicking that hasn’t been put in wax go in there. Whenever something has reached the end of its life and we need to throw it away, any string on it gets salvaged and thrown into the string box.

IMG_4361

String is a staple for my gardening, as I use it to create pea ladders between woven sticks for my growing pea shoots, or to hold the hellebore up when the heavy blossoms weigh down the large plants.

The whole family knows where to go when they need a piece of string or shoe lacing to make a repair and tie together a few things. When my son was 5, he connected his favorite truck to its trailer with string when the hitch broke.

bag-o-string.jpg

String is the stuff of life, affording us everyday repairs to sew-up, tie together, wrap around, hold up, and weave anew.

Save your string, all forms of it. Don’t throw it away. And find a pretty container to hold it, for all to access for the projects that will come.

How To Do A Classroom Waste Audit

By Liesl Clark and Rebecca Rockefeller

Conducting a classroom waste audit is a hands-on way for kids to learn how to reduce their waste at school. Whether kindergarteners or highschoolers, waste audits resonate with students of all ages because everyone handles trash on a daily basis. Zero waste in schools takes commitment from both teachers and students and we’d like to be your hub for learning the process and obtaining the tools necessary to make your waste audits a success. This simple guide is an easy resource to get you started with waste audits in your classrooms or schools in your community. If you have any questions or need any further resources, don’t hesitate to contact us at Trash Backwards, and the following video is to inspire you to get into classrooms, have fun, and teach students these simple steps to school waste reduction!

If you’re not a teacher, you’ll first need to obtain permission from the school to do your audit. Meet with the school’s principal or director and pitch the idea. If you have to get permission for a larger body, like a school board, here’s a sample letter you can edit to make the formalities easy for you.

Materials Needed:

1 Tarp for the floor or plastic table cloths to cover tables

1 Scale

2 Buckets with the tare weight written on their sides

Paper and Sharpies for making 2 charts

Small signs for “compost,” “recycling,” “reuse,” and “landfill.”

10 Simple Steps

1) Save 1 days’-worth of classroom trash, including food waste.

2) Tell your personal story about why you’ve discovered how important it is to reduce waste. You can do  a slideshow, showing the students pictures of their landfill, how a landfill (or incinerator) works, how far away it is, and how trash is transported there. We have a movie about how our children discovered plastics washing up on their beaches that you can download or play off the web here as a teaching tool, showing how kids can take action, learn where the ocean plastics are coming from, and what they can do about it.

3) Weigh your recyclables and trash separately.

4) Spread it all out on a tarp.

5) Have the students separate all items into discreet piles next to their appropriate signs: “Compost,” “recycling,” “reuse,” and “landfill.”

6) Teach recycling: Discuss what goes into your local recycling and help the students identify those items.

7) Start a composter, vermicomposter, or chicken bucket. Some classrooms or schools have composters or vermicomposters outside. If not, find a volunteer family that will take the organics home to their chickens or compost bin.

8) Teach reuse: Save items like Ziploc bags, rubber bands or paper clips that were in the trash but can be reused.

9) Weigh your newly separated piles of trash, compost, reuse and recycling.

10) Celebrate your results by making a graph so the students can see the change in landfill trash versus recycling and compost. The decrease in landfill trash will be surprising.

Follow-up activities include having the classroom write a manifesto for changes in behavior to create less waste. Suggestions might include some of the following:

1) Place pictures of recyclables on the recycling bins as a reminder to students.

2) Move a recycling bin near the paper towel dispenser (wet, clean paper towels can be recycled).

3) Start a compost bin, worm bin or a chicken bucket.

4) Start a reuse box as a place to put items that can be reused.

5) Start other recycling streams that don’t go in the recycling bin but can be taken to other recycling facilities, like plastic bags (local supermarket) and juice boxes (a local Terracycle brigade).

Please feel free to contact us with questions or needs. We hope to be your go-to school waste audit resource! And if you’ve conducted a waste audit yourself, do send us a note to let us know how it went.

50 Garden Hacks From Your Trash

screen-shot-2013-03-12-at-1-21-45-am

There may be items in your trash that could help you with your gardening. Check out this list and see if any of these great ideas resonate with you, helping you pull a couple things out of your trash and, well, into your garden to green up your world. If you don’t have these items in your trash, ask for them on your local Buy Nothing group. I’ve categorized the ideas by item, and each one links to a unique reuse. Enjoy!

Plastic Bottles:

1) Plastic Bottle Mosquito Trap: This one is a trick using yeast and a cut bottle glued together. Read on and try it.

2) Plastic Bottle Cloche: It’s as easy as cutting a plastic bottle in half and sticking it upside down over your seedling or plant.

3) Plastic Bottle Self-Watering Seed Starters: These plastic bottles, cut in half and one inverted inside the other have a wicking system worth checking out.

4) Plastic Bottle Drip Irrigation System: 4 small holes in your 2-liter bottle that’s buried in the ground provide excellent watering for your plants.

5) Plastic Bottle Greenhouse: A greenhouse like this is a true inspiration.

Milk Jugs:

6) Milk Jug Scoop: Milk or OJ jugs make easy scoops.

7) Milk Jug Cloches: Use Milk Jugs to protect your larger plants. Just cut the bottom out of the milk jug, turn it upside down and it’ll protect your plants.

8) Milk Jug Mini Greenhouses: These mini greenhouses in gallon jugs can prove useful.

Clear Plastic Containers:

9) Plastic Container Mini Greenhouse: Just turn it upside down and you have a mini cloche/greenhouse.
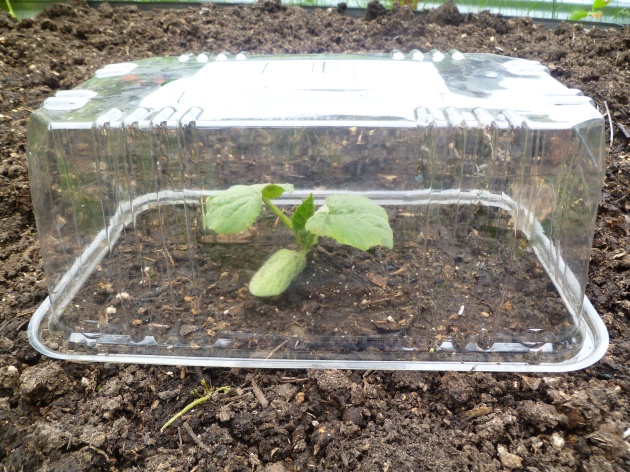
Winter Squash Seedling Basking in the Heat of a Lettuce Box, photo by Rebecca Rockefeller

Cereal Boxes & Cracker Boxes:

10) Cardboard Weed Block: Take your cereal boxes and cracker boxes to the garden and use them as weed blocking.

Bike Wheels:

11) Bike Wheel Trellis: Bike wheel trellises are beautiful.

DVDs/CDs:

12) DVD/CD Bird Scaring Trick: Birds don’t like reflective stuff. It scares them off. Put a few around your berries and you’ll keep those peckers away.

Mailboxes:

13) Mailbox Garden Tool Cache: Post an old mailbox up in your garden, and you have a water-proof place to store hand tools, planter markers, and your notes.

Make a garden tool cache out of an old mailbox. Photo © Liesl Clark

Drawers:

14) Drawer Seedling Starter: This one’s easy. Just use an old drawer as a seedling planter box.

OJ Cans:

15) OJ Can Plant Labels: The can tops make pretty labels for marking your rows.

Rain Boots:

16) Rain Boot Planters: Save a few pairs of the kids cute rain boots for whimsical planters.

Plastic Plant Pots:

17) Plastic Plant Pot Flowers: Add a little flair to your outdoor space with these plant pot flowers.

Trash Cans:

18) Trash Can Root Cellar: I’m interested in trying this for storing our potatoes, carrots, daikon radish, turnips and cabbages next year. It simply requires digging a deep hole.

Tupperware Tubs:

19) Tupperware Worm Farm: Make a few holes in your old Tupperware bins, order a few hundred red worms, follow the instructions here and you’ll have a worm farm.

Plastic Bottle Caps:

20) Plastic Bottle Cap Lawn Flowers: Michele Stitzlein creates beautiful blooms from plastic caps. She’s published a couple of books on plastic cap art, too.

Glassware:

21) Glassware Flowers: These bowls and dishes are all the rage.

Garden Hoses:

22) Garden Hose Flowers: If you have space on a wall, you could create flowery art from your old hoses.

Twist Ties:

23) Twist Tie Plant Trainers: Save your twist ties to use for training plants to fences and stakes.

We reuse twist ties for training our espalier fruit trees. Photo © Liesl Clark

Soda Cans:

24) Soda Can Planters: In a pinch, soda cans can be used as planters and seed starters.

25) Pop Can Plant Markers: With a little effort, you can make some pretty markers for your garden.

Styrofoam:

26) Styrofoam Planter Filler: Fill the bottom of your large plant pots with styrofoam so they don’t get too heavy.

Styrofoam Planter Filler, Photo: Liesl Clark

PVC

27) PVC Garden Tower: Drill holes in a PVC tube and you have a strawberry planter

Coaxial Cables:

28) Coaxial Cable Fence: Who knew that a coaxial cable could look so pretty with bamboo?

Tie a Bamboo Fence Together with Coaxial Cable

Wine Bottles:

29) Wine Bottle Waterer: Turn your empties upside down (with H2O in them) in your plant pots and go on vacation!

30) Wine Bottle Garden Edging: Wine bottles can make colorful garden edging.

31) Wine Bottle Hose Guard: A wine bottle and a stick are all that’s needed to keep your hose out of your garden beds.

Empty Bottle Hose Guard Hard at Work photo: Rebecca Rockefeller

Clementine Boxes:

32) Clementine Box Planters: Clementine boxes make excellent seedling starter boxes or planters for forced bulbs.

Blue Jeans:

33) Blue Jeans Garden Apron: Sew yourself a simple garden apron from an old pair of jeans that can hold your garden tools.

Plastic Mesh Produce Basket:

34) Plastic Mesh Seedling Saver: We use these baskets to prevent slugs and birds from destroying our seedlings.
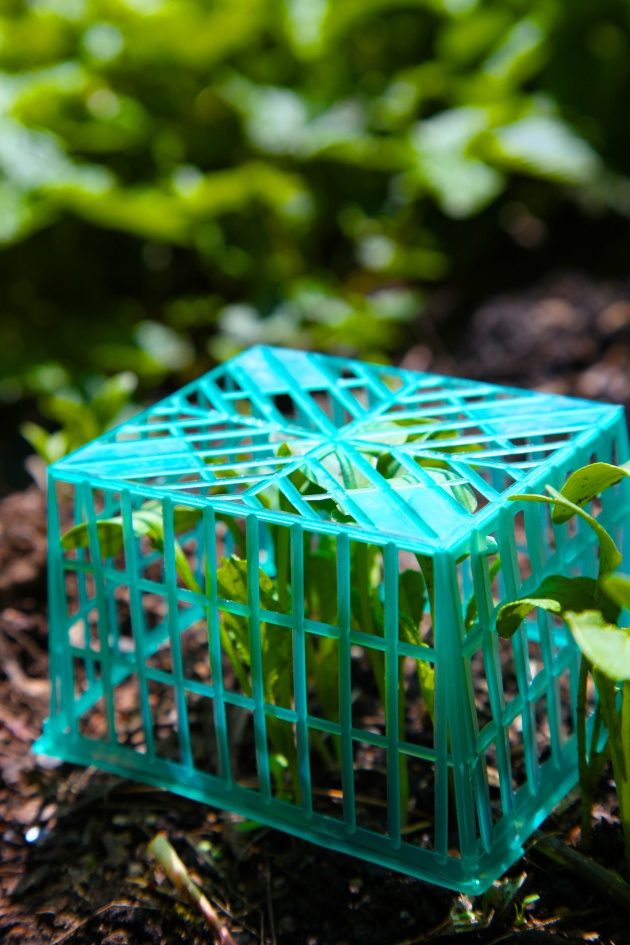
Turn your trash backwards: Place mesh produce baskets over seedlings to protect from birds, frost, and really big slugs.

Windows:

35) Windows Greenhouse: This is a simple design for a small greenhouse made from windows.

36) Window Frame Trellis: An old window frame with mullions makes a pretty trellis.

Broken Ceramics:

37) Broken Ceramics Pot Drainage: Put your broken ceramic pieces in the bottom of plant pots for added drainage.

38) Plant Your Broken Dishes: Plant your favorite broken dishes in the garden and enjoy them throughout the growing season.
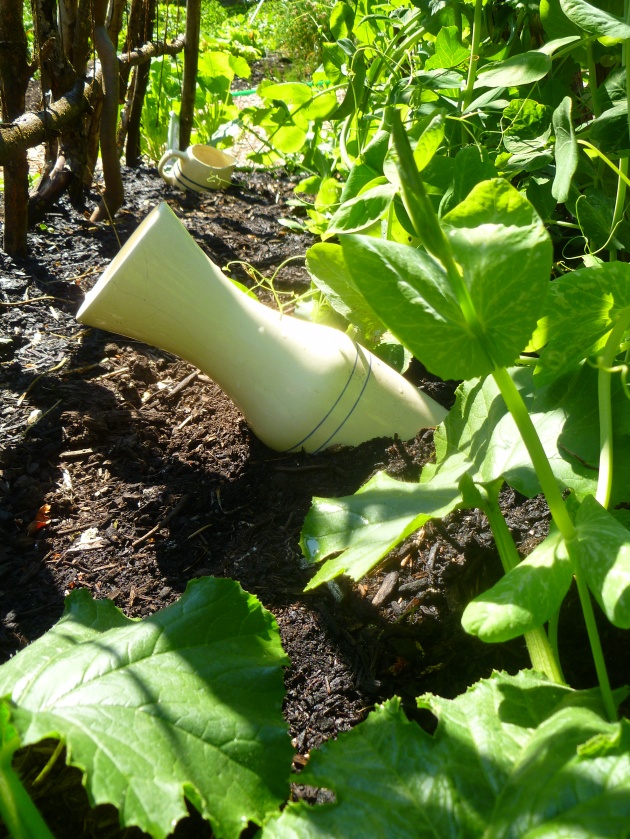
Carafe and Pitcher under the Bean Trellis photo by Rebecca Rockefeller

Broken Pot Planter: When our ceramic pots break, I plant them in our garden along with something planted to look as if it’s spilling out of the pot, having grown there over time.

IMG_2266

Paint Cans:

39) Paint Can Planters: I love these paint cans turned planters at my friend Maya’s house in Tsarang, Upper Mustang, Nepal.

Even Paint Cans Add Flowery Color to a Household, Photo: Liesl Clark

Laundry Hampers:

40) Laundry Hamper Potato Planter: I planted potatoes inside an old laundry hamper and the harvest was easy.

Potato Leaves Begin to Poke Out, Photo©Liesl Clark

Skis:

41) Ski Fence: If anyone lives in the Seattle area and wants to make one of these, please contact us as we have several hundred skis at the end of our Rotary Auction.

Window Blinds:

42) Mini Blind Plant Markers: These look really easy to make.

Panty Hose:

43) Panty Hose Deer Repellant: If you place a bar of soap inside the foot of old panty hose and hang it from your apple tree, it should deter the deer from nibbling on your tree. You can also use a single child’s mitten for this, as it looks cute and either put the perfumed soap inside or human hair (they don’t like the smell of humans.)

Headboards:

44) Headboard Trellis: A headboard makes a beautiful pea trellis.
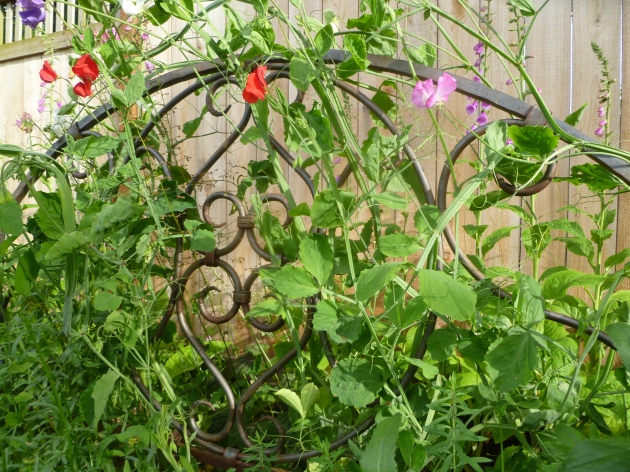
An Old Headboard from Freecycle Makes a Perfect Garden Trellis, photo by Rebecca Rockefeller

Newspaper:

45) Newspaper Garden Uses: There are many reuses for newspaper in the garden.

Cassette Tapes:

46) Cassette Tape Bird Deterrent: Pull the tape out of your cassette and string it over your garden. Birds hate the reflective quality of the tape.

Pet Food Bags:

47) Feed Bag Tarp: Sew your plastic woven pet food bags together into a tarp for garden needs.

Toilet Paper Tubes:

48) TP Tube Seedling Starters: Start your seeds in a tube filled with soil.

Sponges:

49) Sponges in Plant Pots: Cut up your old sponges and place them in the bottom of plant pots. They’ll hold moisture for a long time.

Kiddie Pools:

50) Kiddie Pool Raised Bed Garden: Hard plastic kiddie pools make excellent raised bed gardens.

What do you reuse in your garden? Help me add to the list.

Styrofoam Filler For Planters

Have a large pot you’d like to plant cucumbers or flowers in? Don’t fill it up with planting soil! Save your soil and fill the base with Styrofoam first. The foam will reduce the overall weight of your planter, enabling you to move it around for best sun exposure. It also acts as good drainage for water.

Styrofoam Planter Filler, Photo: Liesl Clark

We found some big chunks of styrofoam washed up on our local beach, so I knew that we wouldn’t be able to recycle it. If you don’t have a readily-available source on your beach, save a few styro-blocks to stuff into your large planters. If you’re concerned about the carcinogenic qualities of polystyrene, make sure you place the foam on the very bottom of the planter so the roots don’t touch it. Then, fill with good planting soil, ensuring you’ve filled in all the in-between spaces so your plants’ roots don’t dry out.

Studies aren’t conclusive whether there are any known effects of styrofoam or plastics in our soil upon our foods. If so, we’re in trouble. Almost all commercial compost has polystyrene and hard plastics throughout.

Most of our styrofoam gets recycled around Earth Day when a local feed store drives our styrofoam to a recycler on the other side of Puget Sound.

What do you think? Have you got your own reuse for Styrofoam? We’d love to hear from you.

12 Twist Tie Reuses

OK, I have thirteen twist tie reuses, but it sounded better with the number twelve.

I have a lot of twist ties. Organic farmers tend to package some of their lettuces and produce in twist ties. I’ve vowed today to avoid those items because the twist tie waste is getting overwhelming in our house. Also, when we get bulk items at our supermarket we accumulate quite a few twisties. Over the course of a year, they add up, and my everything drawer is looking like a twist tie nightmare. But before getting rid of ’em, I thought I’d write down some obvious reuses for the little twisters to see if I might want to save a few:

Everything Drawer Turned Twist Tie Drawer. Photo © Liesl Clark

1) Take them back to the store for your bulk needs and reuse them. I try to remember to bring a stash of twist ties inside my reusable bags for my grocery shopping. If you’re really organized you’ll even have the bulk bin numbers figured out so you can simply reuse the same one over and over again. I discovered an ingenious way to decode the bulk bin numbers by….writing the name of the bulk item on the twist ties too! Duh!

Twist Tie Trash Hack: Write the Name of Your Bulk Item Along with the Bin Number For Reuse. Photo © Liesl Clark

2) Tie up plants and vines in the garden with your twist ties.

We reuse twist ties for training our espalier fruit trees. Photo © Liesl Clark

3) Corral your extra electrical cordage with a twist tie to avoid tripping over them and causing a domestic electronic disaster.

4) Make twist tie stick people. Ok, that was pretty bad. If you want to check out a true master at the craft of twist tying, check out the Twist Tie Guy.

Twist Tie Person? Sort of.

5) Use them to secure ornaments to your Christmas tree.

Twist Tie Ornament

6) Hold your ear buds together with a twist tie so they don’t get all discombobulated in your backpack or briefcase.

7) Make an obvious key ring heart to identify your favorite house key.

Key Ring Heart. Photo © Liesl Clark

8) Reuse twist ties to cinch together plastic bags storing produce, etc. (That was an obvious one.)

9) Make a 4th of July Centerpiece.

10) Give them away on your Buy Nothing group. I was able to BuyNothing a few of my long pink ones for a local textile recycling project. They’re used to tie up trash bags filled with clothing for Goodwill. Yeehaw!

11) Use one to hold all your, um, twist ties together.

A Twist Tie Twist Tie Holder. Photo © Liesl Clark

12) Make a set of “Garbage Gods.” They’re more rad than Legos.

13) Recycle them! If you’ve saved up enough of them, I guess you could strip the paper from the paper ones, put the paper in your paper recycling and put the metal in your scrap metal bin.

But wait, twist ties may be toxic!? According to some reports the metals used in twist ties are often unknown and could have lead in them. But…many store-bought vegetables like kale and Romaine lettuce are held together by metal and paper twist ties. My local supermarket even uses twist ties to indicate something is organic!

What reuses do you practice with your twist ties?

Use Your Bean Water!

Did she say bean water? Yes, bean water is how I refer to the leftover liquid after I’ve cooked beans in my slow cooker or pressure cooker. Every week, we do at least one pot of beans, to provide the staple ingredient (beans) for many meals for the family.

FullSizeRender 81

Dried beans, bought in bulk, are among the cheapest and most nutritious foods we can buy. Now, that weekly practice of ours has yielded several more meals that I had never thought of before — using the bean water to make wonderfully delicious dishes!

FullSizeRender 82

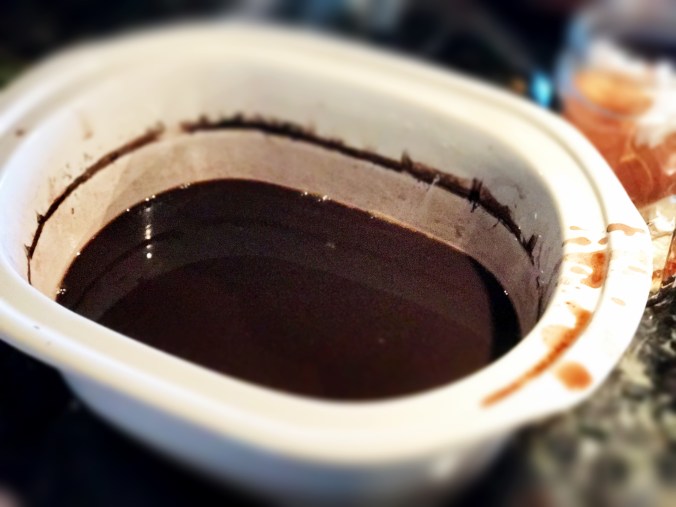
Here’s our black bean water, leftover after I removed the beans to make refried beans.

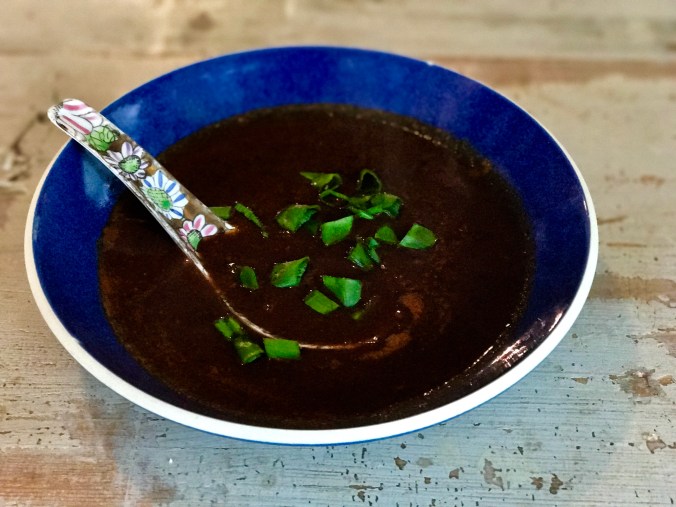
This week, our beans of choice were black beans, and thanks to this article, I saved the bean water and used it as the basis for a huge pot of Tarascan Bean and Tomato Soup. It’s a recipe I first started making in my 20s, because I wanted to find something to use up the bacon grease that I save.

FullSizeRender 79

We save our bacon grease for recipes and bird suet 

The soup takes on the flavors of the bacon and it’s absolutely delicious and Whole30 compliant.

FullSizeRender 77

Bean water can also be saved for use as a base in vegetable stock and in soups like minestrone. Seems there’s a bit of a craze out there for bean water, especially chick pea water, which has the official name of “aquafaba.” Chick peas, or garbanzo beans, can yield a liquid that is a great replacement for egg whites and even meringues can be made from them. So, get creative, learn about aquafaba, don’t pour your bean water down the sink. Use it up to flavor your favorite meals.

FullSizeRender 80

Behold, our bean water.

I’m feeling so very proud that the Tarascan soup which I love has 3 ingredients in it that many people would normally toss: bacon fat, vegetable scrap broth, and bean water.

Here’s the recipe for it, which is based on one found in my favorite Mexican cookbook, The Cuisines of Mexico, by Diane Kennedy.

Sopa Tarasca

4 Cups Bean Water (pinto beans or black beans)

2 Tomatoes or 8 oz Canned Tomatoes

2 Cloves Garlic

Half an Onion

4 Tablespoons Bacon Grease

1 Cup Vegetable Broth (or Chicken or Pork Broth)

Cilantro for garnish

Salt and Pepper

Blend the tomatoes, garlic and onion in a blender or Vitamix until a soupy puree. Set Aside.

Place the bacon grease in a soup pot and put the heat on high to melt it. Add the tomato mixture and mix by hand as it cooks for about 5 minutes. Gradually add the bean water and bring the soup to a boil, turn the heat down to medium and cook for another 8 minutes, stirring occasionally.

Add the broth and allow the soup to cook for another 10 minutes on low, until your soup reaches the thickness you’d like. Add salt and pepper to taste.

Serve the soup and garnish with cilantro, paprika, shredded cheese or sour cream to taste.

Enjoy!

FullSizeRender 78

Easy Wrapping Paper Storage

img_9306

We’ve had three rolls of wrapping paper for the past two years since we typically use cloth bags for “wrapping” our gifts. Yet occasionally a wrapped present is shipped out because it’s easy to pack into a box filled with paper-wrapped items. Our three rolls of paper seem to be lasting forever and we’ve found the most simple way of storing them.

img_5889

Just cut a toilet paper roll open and place it around your wrapping paper roll. It holds that paper together gently, without the ripping we sometimes get from rubber bands.

img_8609

Happy wrapping paper storage for next year!

Buy Nothing Boxing Day

Boxing Day, traditionally, was a thing in Britain’s Victorian era. Boxes were left out in front of churches for people to donate gifts for the poor. It was also the day when servants of the super-wealthy were given a chance to observe Christmas with their families. Hard-working domestic employees were handed boxes of gifts to give to their loved ones. Tradespeople, too, were thanked on Boxing Day with boxes filled with gifts for services well done.

boxingday.jpg

A true Boxing Day is a day filled with small acts of kindness. 

In essence, Boxing Day historically is a day to commit small acts of kindness. Today, we can continue the tradition in less class-structured ways and offer boxes of gifts to our neighbors by posting them in our Buy Nothing groups.

Over the holidays we often acquire gifts that might not be to our liking. It’s the thought that counts, right? Once you’re over that warm-and-fuzzy feeling of gratitude for your gift, yet realize you just won’t ever wear it, or eat it, or use it in any way, why not simply regift it on Boxing Day?

willa-in-box2

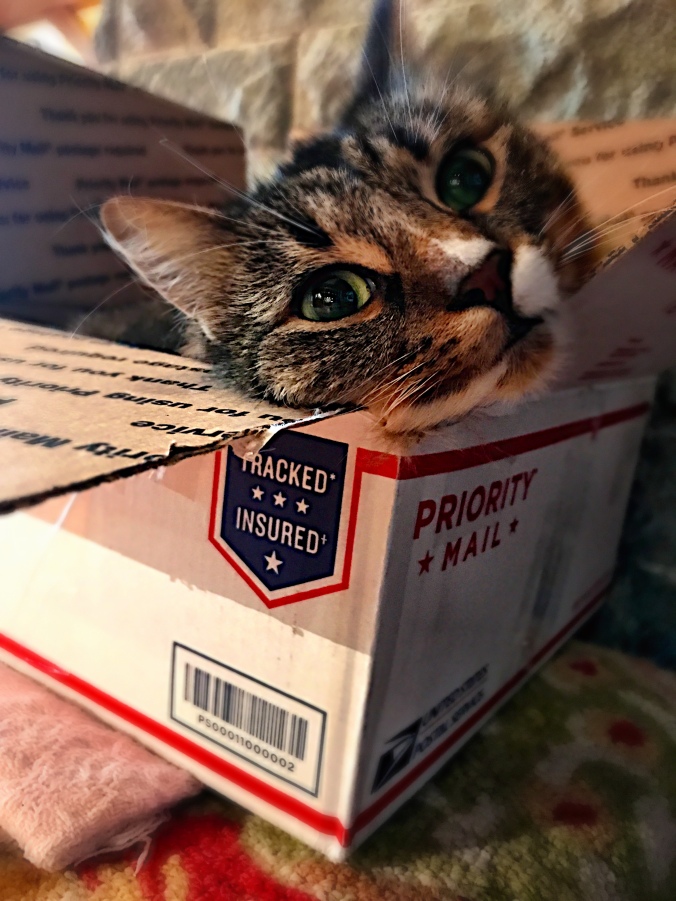
Willa loves Boxing Day © Liesl Clark

In a gift economy, we gain increments of social capital by giving and also receiving with grace. So when we have excess to give, especially on Boxing Day, offering it up to our communities in a transparent fashion, where all can see, is a way of raising our worthiness for future gifts. It also raises the overall wealth of the community since one more item will remain within the materials economy of the neighborhood: an item that might be re-gifted later, or might free-up up its owner to spend more money locally. The more we share within our own communities, the greater our communal wealth. So, get out your boxes and share your bounty. Your neighbors will be thankful, and you’ll earn yourself a little hit of dopamine to go with your added giver clout.


Create An Inventor’s Kit For Your Curious Child

Our alarm clock went on the fritz. It just didn’t keep good time anymore and when we put new batteries in, the whole thing decided to stop ticking. Rather than throwing the clock out, our 9-year-old took the opportunity to try to fix it. He looked deep inside and saw the inner workings of the mysterious time-keeper, its simple gears and all the parts that added up to the whole: A simple machine. The adventure in taking-it-apart-land proved fruitful and now any broken gadgets in our household are fertile ground for young inventors searching for new parts to connect together, creating new-fangled machines.

Motherboards are a universe of fascinating connections for the curiosity-seeker. Keep your youngsters’ minds exploring, even if it’s inside the things you thought would never tick again.

The secondary benefit is not throwing perfectly reusable items away. Rather than putting it all into the metal recycling bin or e-waste, these items will have a prolonged life. Our children’s relationship with “things” is changing rapidly, as they see how items may have a new use in a different iteration.

The fun part of finding an old case to use for the kit. We cleaned out some boxes in our storage room and found these to create new kits to give to neighbors.

IMG_6913_DL.png

Spark creativity in the kiddos around you. You’ll be surprised by what they build, and do send us your suggestions for what you’d add to your child’s inventor’s kit!

Driftwood Building Blocks

We all love manipulatives, items with soft shapes made by the rhythms of the Earth. Give children a few hours and a place to play with found objects, and you’ll be surprised where their imaginations go. During a gorgeous 3 days of camping on our favorite Olympic National Park beach, we picked up not only washed-up plastics battered from years of travel atop the Pacific waves, but we also gathered a beautiful selection of years-worn driftwood.

The organic shapes were beguiling: Sticks worn into rounded gray pieces any child would love to handle, contemplate, and build magic worlds with.

We brought a few favorite pieces home to be used again and again as building blocks for the imagination. And now, whenever we go on our beach camping trips, we collect more, to give as gifts for friends who like to have a basket centerpiece for all ages to enjoy. Gather some up to offer at your next creative meeting with colleagues. They’ll get engaged, quickly. Collect some of nature’s beautiful bounty for your children and friends, and they’ll thank you for the plastic-free tactile experience.

It’s local, organic, and sustainable. What natural found objects do you use for mindful play?