Use Your Bean Water!

Did she say bean water? Yes, bean water is how I refer to the leftover liquid after I’ve cooked beans in my slow cooker or pressure cooker. Every week, we do at least one pot of beans, to provide the staple ingredient (beans) for many meals for the family.

FullSizeRender 81

Dried beans, bought in bulk, are among the cheapest and most nutritious foods we can buy. Now, that weekly practice of ours has yielded several more meals that I had never thought of before — using the bean water to make wonderfully delicious dishes!

FullSizeRender 82

Here’s our black bean water, leftover after I removed the beans to make refried beans.

This week, our beans of choice were black beans, and thanks to this article, I saved the bean water and used it as the basis for a huge pot of Tarascan Bean and Tomato Soup. It’s a recipe I first started making in my 20s, because I wanted to find something to use up the bacon grease that I save.

FullSizeRender 79

We save our bacon grease for recipes and bird suet 

The soup takes on the flavors of the bacon and it’s absolutely delicious and Whole30 compliant.

FullSizeRender 77

Bean water can also be saved for use as a base in vegetable stock and in soups like minestrone. Seems there’s a bit of a craze out there for bean water, especially chick pea water, which has the official name of “aquafaba.” Chick peas, or garbanzo beans, can yield a liquid that is a great replacement for egg whites and even meringues can be made from them. So, get creative, learn about aquafaba, don’t pour your bean water down the sink. Use it up to flavor your favorite meals.

FullSizeRender 80

Behold, our bean water.

I’m feeling so very proud that the Tarascan soup which I love has 3 ingredients in it that many people would normally toss: bacon fat, vegetable scrap broth, and bean water.

Here’s the recipe for it, which is based on one found in my favorite Mexican cookbook, The Cuisines of Mexico, by Diane Kennedy.

Sopa Tarasca

4 Cups Bean Water (pinto beans or black beans)

2 Tomatoes or 8 oz Canned Tomatoes

2 Cloves Garlic

Half an Onion

4 Tablespoons Bacon Grease

1 Cup Vegetable Broth (or Chicken or Pork Broth)

Cilantro for garnish

Salt and Pepper

Blend the tomatoes, garlic and onion in a blender or Vitamix until a soupy puree. Set Aside.

Place the bacon grease in a soup pot and put the heat on high to melt it. Add the tomato mixture and mix by hand as it cooks for about 5 minutes. Gradually add the bean water and bring the soup to a boil, turn the heat down to medium and cook for another 8 minutes, stirring occasionally.

Add the broth and allow the soup to cook for another 10 minutes on low, until your soup reaches the thickness you’d like. Add salt and pepper to taste.

Serve the soup and garnish with cilantro, paprika, shredded cheese or sour cream to taste.

Enjoy!

FullSizeRender 78

DIY Freezer Bags

We never buy freezer bags and I’m on a mission to help people see that they’re entirely unnecessary. In the category of plastic bags in general, please don’t ever buy them!

Most of our freezing is done in glass jars. Roasted pumpkin, for example, goes into a large mouth glass jar with a few inches left at the top to account for expanding liquid when it freezes.

But what about things that really don’t need to be put in jars, like berries and bananas and pre-made burritos? Enter the DIY freezer bag. I’m feeling sheepish even writing about this, because I know most of my friends already do this. If you’re going to freeze your goodies for more than a month, be sure to use a very sturdy bag. Simply reuse another thick bag!

FullSizeRender 76

We get frozen cassava tortillas, for example, and frozen berries when we run out of our own, and simply save those self-sealing bags to reuse as freezer bags for our own food.

FullSizeRender 75

A DIY Freezer bag, Ahem, is Just a Reused Freezer Bag.

And, if you run out of those, double up on regular self-sealing bags that you’ve saved. By using two, you’ll extend the freeze-life of your perishables. Simple! If you don’t have ziploc-style bags, just ask for them in your local Buy Nothing group. People will gladly share the ones they typically throw away and you’ll never have to buy those bags again.

IMG_2950

Don’t Buy Freezer Bags. Just Double Up on Your Reusable Self-Sealing Bags.

Eat and Drink Your Dandelions

It’s been a long winter, and since the deer ate all our kale, we’ve been sans greens for too long. This week, the dandelions are in full force, and I’m eradicating them from my vegetable garden while weeding the lovelies more selectively from the lawn. Honey bees need their pollen, too, so I aim to leave plenty to flower for the bees, as dandelion flowers are among the first pollen sources for bees in the spring.

FullSizeRender 74.jpg
Today, I collected a bucketful of dandelions, making sure to get as much of the roots and greens as I could. This is my second harvest, and we’re hungry for more. After washing the greens thoroughly, I’ve made a few dishes with them and they’re delicious!

FullSizeRender 73

Sausage on a Bed of Dandelion Greens (serves 2)

Sauté 4 sausages to your liking.

Add some olive oil to the pan and sauté 4 cloves of chopped garlic in olive oil. Add a teaspoon of red pepper flakes to sauté along with the garlic. Add two pinches of salt. After 2 minutes, add a couple of handfuls of dandelion greens and another pinch of salt. Pour 1/4 to 1/2 cup of vegetable or chicken broth into the pan and let simmer for a few more minutes. Place sausage on top of the greens on a plate and enjoy!

FullSizeRender 68

Poached Eggs on a Bed of Dandelion Greens (serves 2)

Follow the same instructions above for cooking your greens and in the last 4 minutes, add 4 eggs sunny side up to your skillet or pan, right on top of the greens. Put a cover over your pan to let the eggs poach. Let them cook for 3-4 minutes until the eggs have cooked to your liking.

FullSizeRender 67

Roasted Dandelion Root Tea

I love dandelion root tea as a substitute for coffee. It’s dark and bitter like coffee and tastes great with cream or your favorite creamer. Simply clean your dandelion roots as best you can.

IMG_2819

Dice them and throw them into a Vitamix or blender to chop them into small nugget size pieces. Don’t puree them into a powder.

IMG_2862

Place them in a 250 degree oven and roast for 2 hours. Let them cool completely and store in an airtight jar.

IMG_4823

IMG_2901

You can grind them down to a powder after this if you like. I just put them in a tea strainer like other loose leaf tea and brew up!

FullSizeRender 71

FullSizeRender 70


DIY Suet

I love making things from what I already have in my house, without buying anything new, things that are secondary uses for what might eventually become waste. When we fry up some bacon, there’s always some leftover grease. What do we do with that bacon fat? We turn it into suet for our wild birds.

chicadee suet 2

Our bacon comes from grass-fed natural sources with no added sugars or chemicals. It’s about as healthy as bacon can get. So, I’m happy to share the grease with our little feathered friends who in winter do need an added boost of calories.

chickadee suet 3

First, save the plastic holder for bird suet that commercial suets come in. If you don’t have any, ask in your local Buy Nothing group for the square plastic packaging for suet. This way, you’ll be able to use that plastic container as your future mold to fit into the suet feeder.

IMG_2794

Here’s our recipe:

  1. Fill 3/4 of a plastic suet mold with any kind of bird seed.sizzling bacon
  2. Collect the melted liquid fat from your bacon grease. You can keep it in a jar until you have about 2 cups of it, and melt it. Or, simply pour the not-too-hot grease into your plastic suet mold with seeds in it. Fill the suet mold with your grease. IMG_2777
  3. Place the plastic suet mold filled with seeds and bacon grease in the freezer. IMG_2787
  4. When the suet is completely frozen, take it out of the suet mold and place it in your suet feeder. Done!Suet 1

We sometimes add peanut butter, old flour, nuts, berries, anything that birds would like. Chicadee suet 1

Your little tweeties will love their suet and you won’t have to buy any more plastic-packaged suet again!

Willa and bird feeders


Corn Mache, The Sustainable Green

IMG_4573

This is my favorite hardy green as it’s the first to pop up in the spring here in the Pacific Northwest. If you don’t know what corn mache (Valerianella locusta) is, Google it and you’ll find some people call it corn mache choux, mouse ears, or corn salad. It’s a super fancy French green, used in top restaurants, and yet it grows like crazy in my garden, self-seeding every year.

FullSizeRender 56

I just love the stuff: as a substitute for baby spinach, in salads, in stir-fry, and as a bed of greens beneath any kind of organic meat we have for dinner. It has a creamy, nutty, slightly floral taste, but is very mild, so putting something flavorful on it works well as it compliments strong flavorings.

FullSizeRender 55

Balsamic chicken thighs and asparagus on a bed of corn mache © Liesl Clark

We throw it in smoothies every morning this time of year. And I give it away to happy neighbors in the spring, who are hungry for anything green and fresh. Plant yourself a bed of corn mache, let a few go to seed, and next year you’ll thank yourself for the effort as this lovely little veggie, like arugula and jerusalem artichokes,  will be come a perennial springtime friend.

corn mache1

It takes a little extra effort to wash as grit can get down inside. I just soak the little florets in a big bowl of water and submerge them before pulling them out. Seems to work just fine!

FullSizeRender 57

Paleo Sugar-Free Seed Crunch

IMG_2268

I fell in love with a delicious seed bar that’s sold down the hill in our local farm store. But they’re a bit pricey and come wrapped in plastic, and so my son and I worked together to figure out what’s in them, so we can make them at home.

IMG_1029

Ours taste pretty much exactly like the bars at the store, but our little seed mix ends up just that, a mix that you can eat with a spoon. This deliciously healthy mix of seeds and berries is now a staple lunch item for our always-hungry teen!

Enjoy.

IMG_5764

Paleo Sugar-Free Seed Crunch

2 Cups pumpkin seeds

1/3 Cup cacao nibs

1/2 Cup coconut butter

¼ Cup gogi berries

¼ Cup golden raisins or colored raisin mix

1/8 Cup almond flour

1/8-1/4 Cup cashews

3 dates (chopped up)

2 Tbsp sesame seeds

pinch of salt

Put everything in your Vitamix or similar kitchen gadget and let it rip on high until you have a meal-like consistency. Sometimes I have to take half of the mix out, half-way through, and do it in two batches. Throw the mix in a jar and it’ll keep for weeks!

IMG_2541


Easy Scrappy Vegetable Broth

Our kitchen compost container is full most days because we eat a lot of vegetables. Even though we give carrots, lettuce, broccoli etc. to our guinea pig, and many other kitchen scraps to our hens, I’m still amazed at how many veggie and fruit scraps still go into the compost pile. But then a discussion in our BuyNothing7 group (a group that challenges people to buy nothing for 7 days, or longer) got me thinking: Before I send my most scrappy vegetables to the compost pile, I should turn them into veggie broth.

IMG_4307

I’m not talking about your big chunks of carrot (that go to the guinea pig) or whole cloves of garlic (which we use up ourselves.) I’m referring to the paper skin on the garlic (which has many uses), the ends of the carrots, the skins off my onions (which also have many uses) and the leaves and bitter hearts of my celery. Throw those scrappiest of scraps into a pot of boiling water, with a bay leaf, your favorite herbs, and a pinch of salt, let it simmer for an hour and you’ve rendered yourself some yummy broth to use as a base for a soup, in chili, or in any recipe that calls for broth.

IMG_2459

Then, you can take your over-cooked vegetables, once you’ve filtered out the broth, and send those to the compost. Scrappy veggie broth in zero waste style!

IMG_0291

DIY Wool Dryer Balls Reduce Dryer Time

The title of this blog post were the words I used for a Google search yesterday, as a question, and the answer from over 10 bloggers was resoundingly “yes.”

I had to find this out for myself.

IMG_2644

So, I went to my yarn basket and found a few balls of 100% wool yarn that we hadn’t used for years and wound a few contrasting colors of yarn around them. If you’re not sure if your yarn is wool or acrylic, check out this article that’ll help you determine what’s what.

IMG_4300

I also took some old knitting projects the kids had done (half-finished scarves and finger knitting garlands), balled them up, wound more wool yarn around them to make them into tennis ball and soft ball size.

IMG_8397

IMG_2240

IMG_2229

I then grabbed a few oddball socks out of my single socks box (yes, we have hundreds) and placed one wool ball inside one sock and tied off the end.

IMG_2726

I did this for each of the balls, until I had 6 balls-in-socks, ready for the washing machine.

IMG_6114

I put the cycle on high and threw in a few towels and T-shirts. I did the cycle twice, just to be sure that the wool balls were felting up. The wet wash then went into the dryer for a high heat cycle.

The outer tied-off socks were easy to untie and I rescued the now-felted-wool balls from their sock prisons. Each one felted up pretty nicely!

IMG_2291

Experts at this have suggested putting a few drops of your favorite essential oil on the wool balls about every 4th load you dry, so I found some rosemary (so my son won’t feel that he smells too flowery and to also keep buggies off of us (they don’t like rosemary.))

IMG_2321

Now, the true test was upon me: If I ran a load of laundry with wet towels through the dryer, would 6 wool dryer balls reduce the dry time? The answer is resoundingly yes. Typically, we have to run our towels through our high heat normal dryer cycle twice. This time, with 6 dryer balls, I only had to run them once! So, that’s a win. I figure this will save our family on dryer time (i.e lower our electricity bill) during the winter months when we can’t put our laundry out to dry in the sun.

IMG_2309

Oh, and the wool dryer balls also are a replacement for fabric softener (we’ve never used it anyway) and dryer sheets (ditto) as they remove static cling, soften your fabrics and add a lovely scent via your essential oil!

IMG_2325IMG_4251

20 DIY Crafts Not Plastic

A Case For Exposing Your Children to Traditional Arts Using Natural Materials. Photo © Liesl Clark

When my children reached elementary school age and we enrolled them in programs that had art classes, we were amazed at how few natural materials were used for art supplies and just how much of it was plastic: glitter glue, colorful plastics for mosaics, acrylic-coated feathers, various items to be “recycled” through art like yogurt cups and plastic straws. The myriad cut-and-paste-style art projects they did were primarily made of art supply store plastics. All too often schools and art classes are cutting corners and can only afford cheaper plastic materials for art supplies.

Hand-crafted tiles or buttons, made by a young Nepali stone-carver. Photo © Liesl Clark

I would’ve preferred sticks, stones, leaves, sea glass, natural feathers and wood over the pre-fabricated plastic materials my son and daughter were exposed to. These plastics were simply mimicking what’s found readily in nature. I also believe the color palette children are exposed to in those early years, through day-glo style plastics, can affect their color choices later in life. Gone might be an appreciation for natural greens, browns, blues and purples found regularly in the environment. We started to opt out of the popular kinder art projects in preference to doing our own art, making an effort to learn from traditional artists who work with stone, wood, glass, wool, and ceramics. These experiences, for our children, were enriching as they learned quickly that they could create things of beauty from resources found in the natural world, as people have done for millennia.

A Young Nepali Artist Carving Prayers Onto a Mani Stone. Photo © Liesl Clark

A coupling of leaves, feathers, and flowers could become a miniature nest or fairy’s bed from a 7-year-old’s imagination.

A Fairy Bed, Made From Leaves, a Pod, Feathers and a Flower. Photo © Liesl Clark

Or a piece of wood might be whittled into a boat, a stone carved into a work of art. Exposing children to traditional folk art from around the world is a great way to teach them how natural materials that are readily available can be turned into works of beauty.

Azurite Is One of The Pigments Used in Traditional Himalayan Art. Photo © Liesl Clark

On a recent trip through South Korea while we were in transit, we took part in a program at the airport in Seoul that teaches traditional art forms. Every time we pass through this airport our children learn a new form of art made from a surprising material. They’ve worked with rice paper to make stone carving prints onto them, they’ve made paper lanterns, they’ve hand painted fans, and they made a tapestry necklace. This time, they learned the Na-Jeon art form, working with mother of pearl-colored shells and shellac from the lac tree.

Learning the Na-Jeon Art Form in Korea. Photo © Liesl Clark

This highly sophisticated ancient Korean craft utilizes iridescent abalone and conch shells in contrast to a lacquered black wood background, creating a sense of balance and harmony in this mariage of opposites.

A Hand Mirror Made in the Korean Na-Jeon Style © Liesl Clark

The children were given hand mirrors to decorate in the Na (which means “pearl”) Jeon (which means “decorate”) style. The focus and concentration the craft required was mesmerizing for us to watch. And the mirrors will be treasured for years to come in our family.

IMG_5929 © Liesl Clark

If you’re looking for some ideas for arts and crafts less plastic, we came up with a list of 20 traditional crafts from natural materials found in and around your home that are easy to try. Copy this list or share the link with your art teacher at school. No need for spending money on cheap plastic art supplies when there are supplies we can contribute from our own homes and backyards: scrap fabric, acorns, sticks, scrap paper, wool sweaters, leaves and sea shells are just a few. Incorporate information about the cultures that started the folk art form you’ll practice so your children appreciate the history behind their craft and how interconnected we all are through our art forms:

1) Doll-Making: Fabric Scrap Dolls have been made for the children of many cultures for centuries.

DIY Tiny Dolls Wear Fabric Scraps in Style

2) Vegetable Stamps: My favorite veggie to use for stamps is okra. But you can also carve stamps from a potato with excellent results. And the celery rose stamp is absolutely beautiful.

3) Fabric Scrap Mosaic: Reusing fabrics is an art unto itself and certainly has been passed down for generations. Try making a pretty mosaic from your leftover scraps.

4) Embroidery: Try your hand at embroidery. You can even embellish a tired old lampshade to create color in a room.

5) Twig Basket: Collect some long green twigs and make a freeform basket out of them.

6) Origami Tea Bag Folding: Learn the traditional art of origami paper folding using the paper the covers tea bags! If families saved up their tea bag covers, a school art program would have plenty of paper to work with and couldn’t complain about budget constraints.

7) Scrap Paper Flowers: Art classes should save all scrap paper to make these beautiful flowers. Or toilet paper rolls are all you need to make these flowers.


Toilet Paper Roll Flowers. Photo © Kelly Munson

8) Fallen Leaf Art: There are many beautiful artistic creations you can craft from leaves.

9) Scrap Paper Tree: This pretty craft utilizes tiny pieces of your favorite scrap paper as well as sticks collected from outdoors.

10) Seashell Arts: We’ve made mobiles from sea shells and endless mosaics. These seashell koalas would make any child happy.

11) Tin Topiary: Use pie tins to make these beautiful tin flowers.

12) Knitting: With some saved-up chopsticks, you can teach anyone how to knit.

Knit with Old Chopsticks photo © Rebecca Rockefeller

13) Felting: Learn how to felt your wool sweaters.

14) Rubbings: Make rubbings for things natural or extraordinary.

15) Weaving: DIY weaving is easy and a great craft to do with scrap yarn and fabric strips. You can even make your own loom.

16) Phone Book Paper Painting Meditation: Teach the kids meditation by doing phone book paper art.

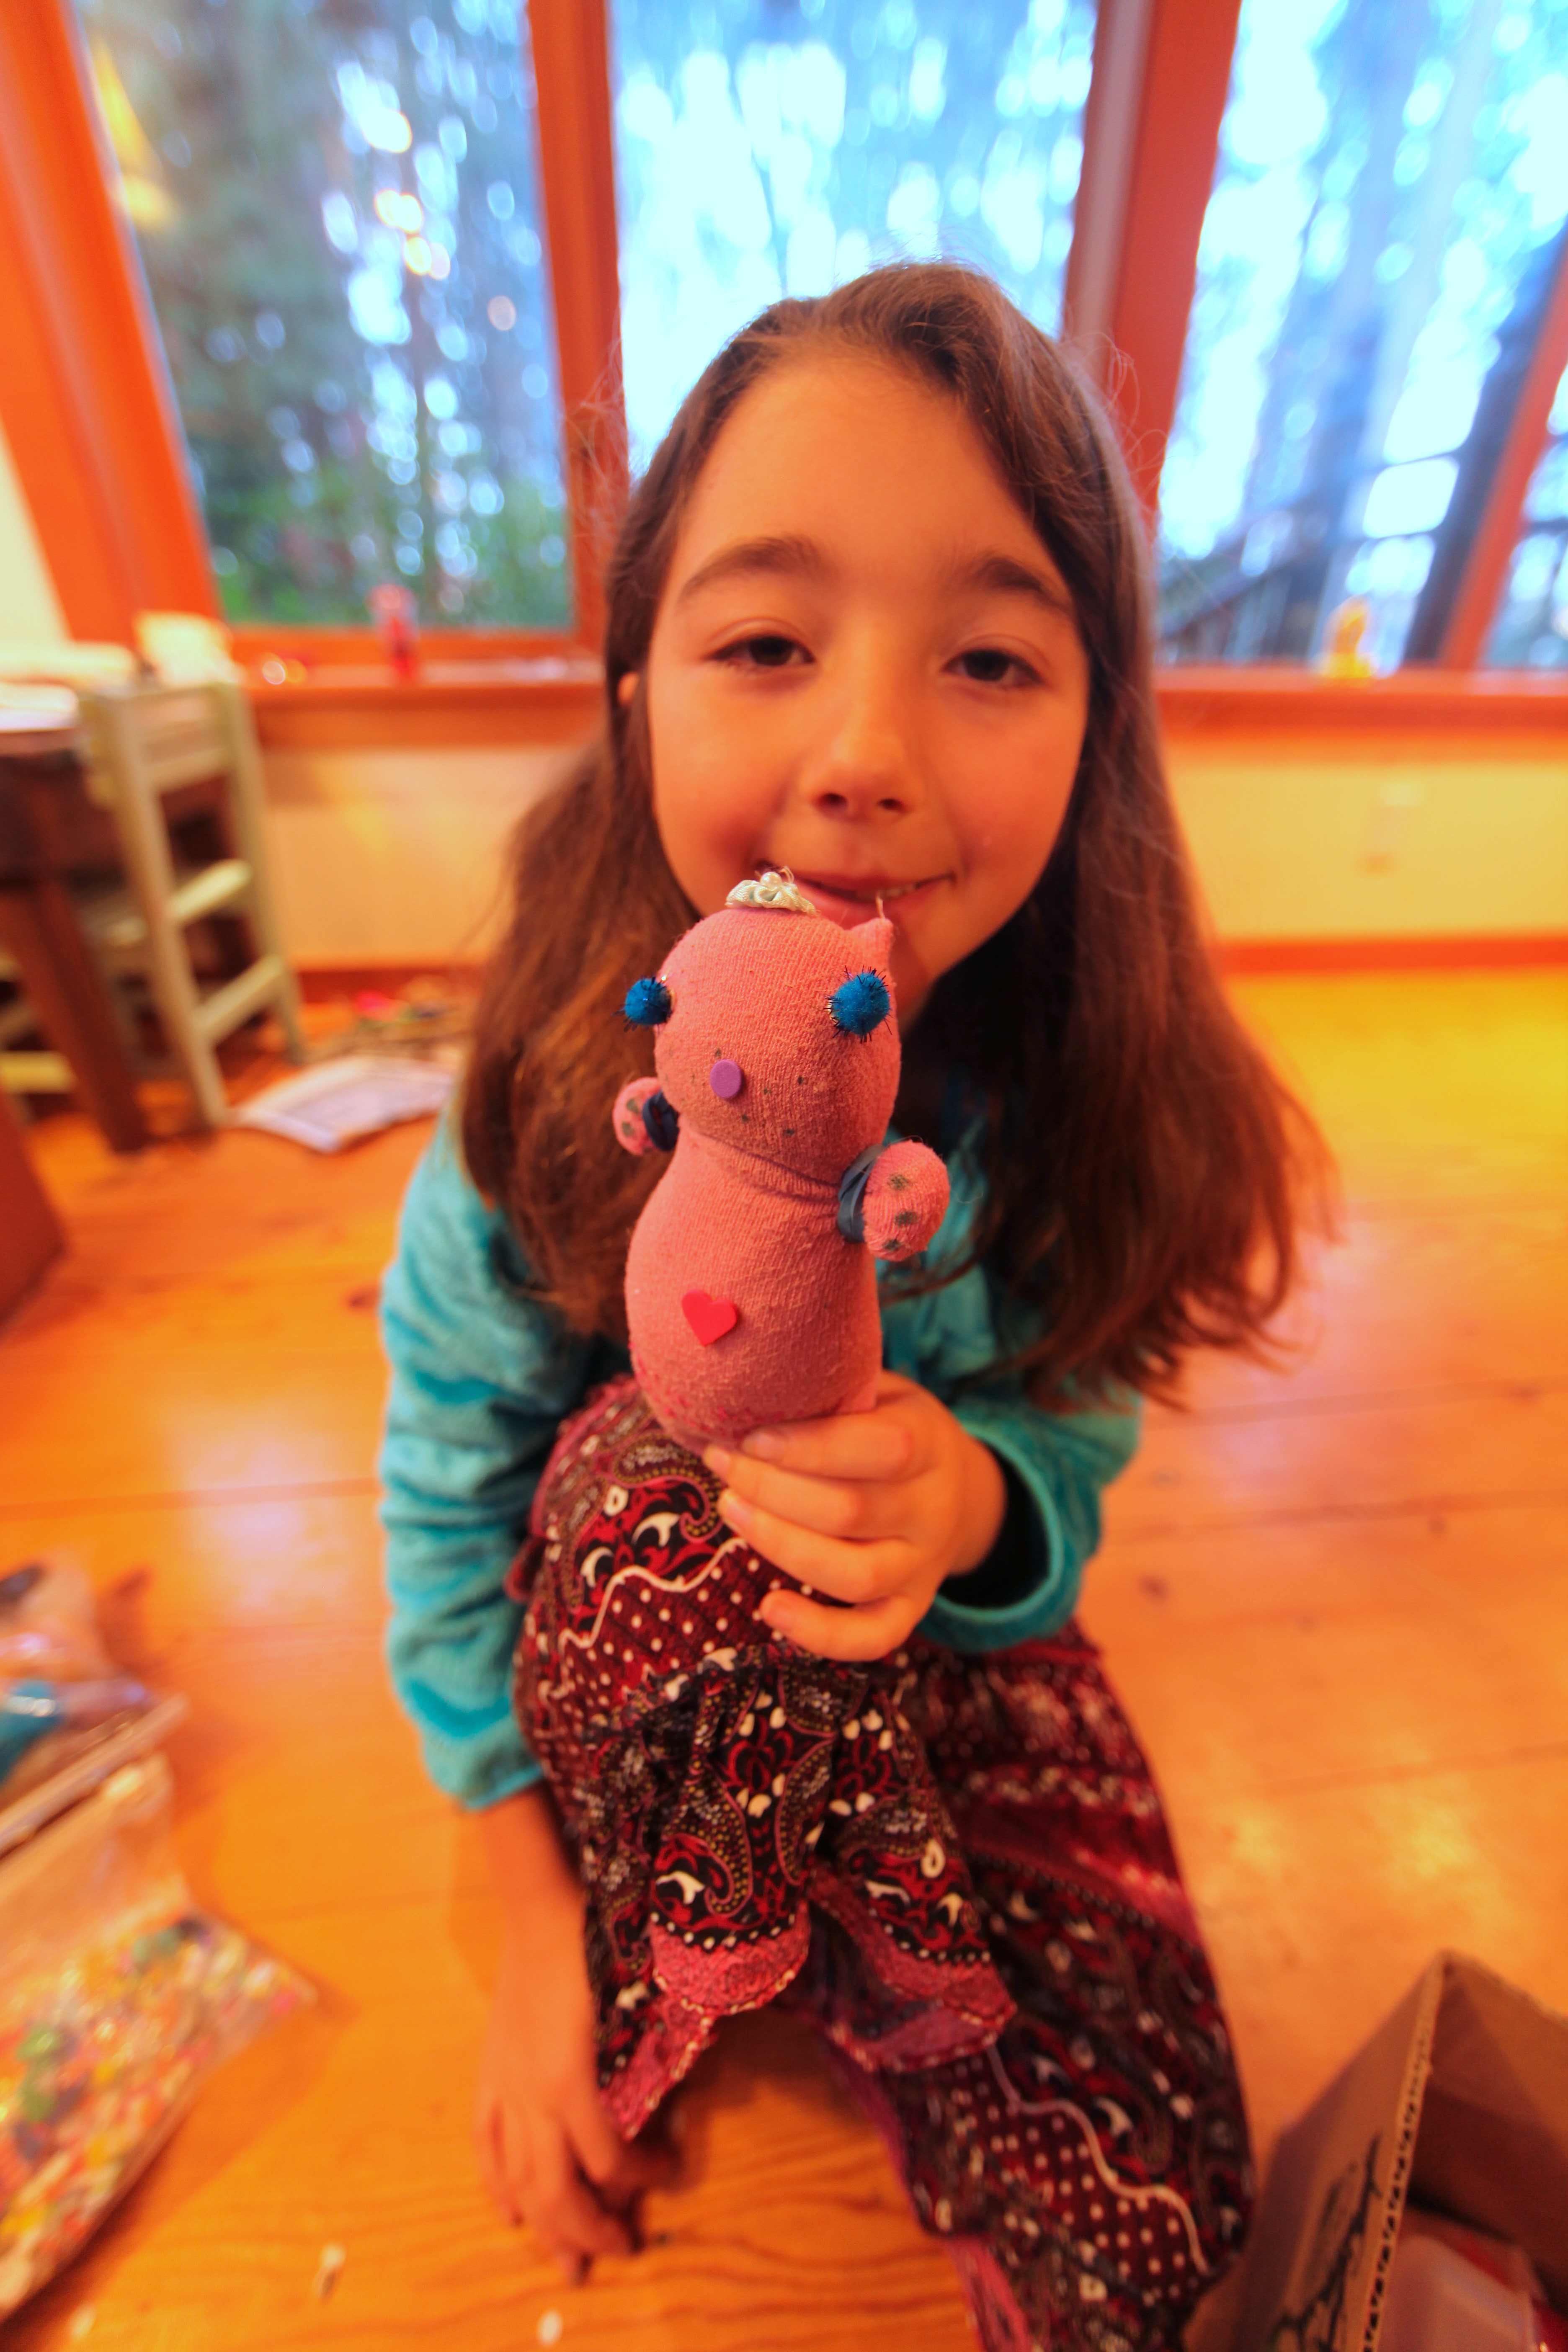
17) Sock Crafting: If you’re in need of a stuffed animal, try making one from a sock.

Sock + Rubber Bands + Bits & Bobs = Sock Hippo. Photo © Liesl Clark

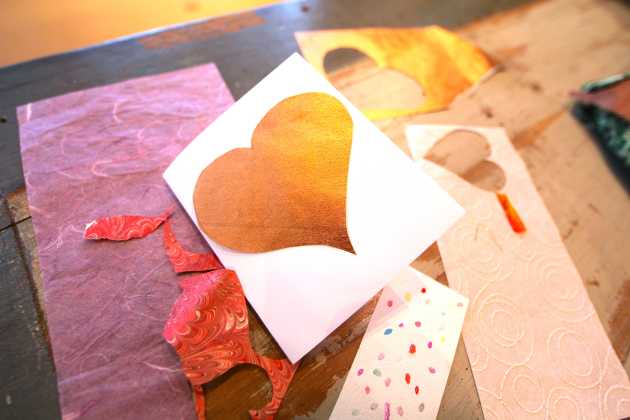
18) Hand-Made Valentines: Valentines are an original folk art scrap hack.

Handmade Paper Valentines, An Original Folk Art. Photo © Liesl Clark

19) Stencils: You can make stencils from food boxes and use beets as your ink dye.

20) Driftwood Sculptures: If you collect enough of a variety, driftwood lends itself to creative art from their smooth appealing shapes.

What crafts from materials readily-available can you add? We love to make things from what’s abundant around us!

Vegan Parsley Pesto

parsley-pesto-ingredients

© Liesl Clark

It was January 12th, the ground was frozen solid, and I harvested parsley from my garden! If this hardy herb can withstand 26 degree temps, then that’s a green I want in my body. Parsley provides so many nutritional benefits, including vitamin A, vitamin K, vitamin C, vitamin E, thiamin, riboflavin, niacin, vitamin B6, vitamin B12, pantothenic acid, choline, folates, calcium, iron, magnesium, manganese, phosphorous, potassium, zinc, and copper, to name a few.

harvesting-parsley

A January harvest of deep greens. © Liesl Clark

Here’s a quick and easy recipe for parsley pesto that goes well with myriad dishes, and it’s perfect for a Whole30 diet. It’s quickly becoming my go-to sauce for most dishes. I’ve used it on Mexican food, Italian foods, and as my savory sauce to throw on eggs in the morning.

parsley-pesto-on-eggs

Scrambled eggs and baby spinach with parsley pesto. Fried bananas, too! © Liesl Clark

img_4270

The dish, above, all mixed together. © Liesl Clark

Parsley Pesto

1 Large bunch of parsley

5 Cloves garlic

2 Serrano peppers, roasted. (I roast them right over the stove and then sweat them in a paper bag.) Remove the seeds.

Juice of half a lemon

1/2 tsp sea salt

1/2 Cup olive oil

Throw it all in your Vitamix, Cuisinart, or blender and blend until almost smooth.

parsleypesto-star

Green goodness. © Liesl Clark

I put it on poached salmon the other night and it was so delicious!

poached-salmon-parsley-pesto

Mango avocado salsa with fried green plantains and poached salmon. I used 3 sauces to try with this dish: parsley pesto, homemade ketchup, and homemade mayo. The pesto was the tastiest! © Liesl Clark