Chickens Love A Wood Ash Dust Bath

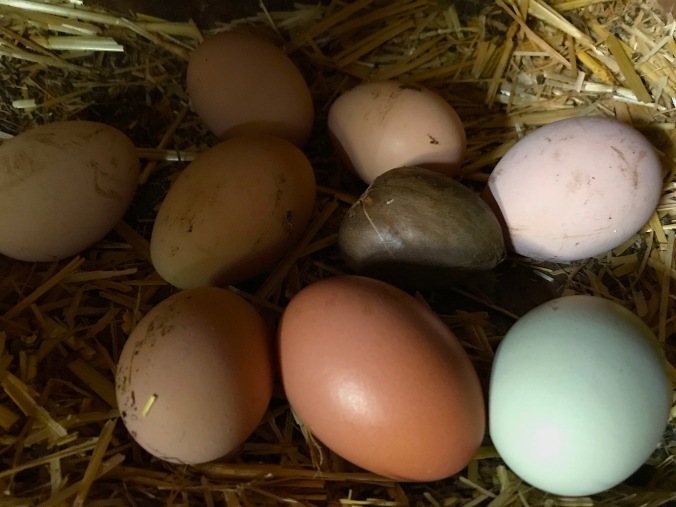
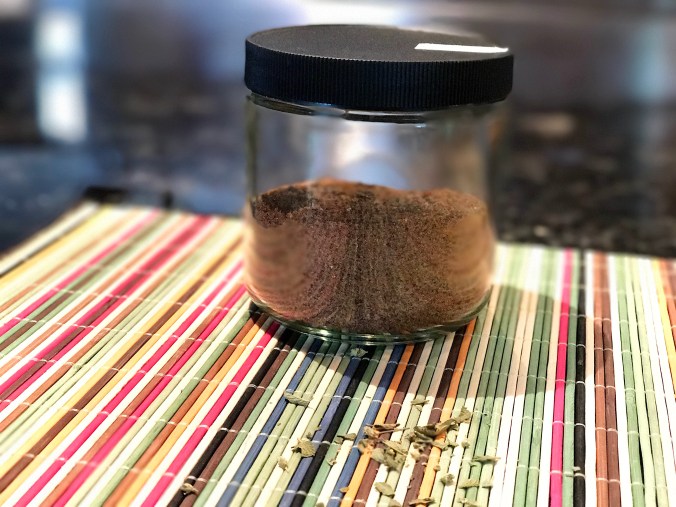
We burn wood for heat in our house, mostly wood that we collect from our property. High winds bring down a lot of limbs from the trees so we cut them up and use them for heat, as well as bring down any “standing dead” trees in the forest. A weekly by-product of our wood heat is wood ash and when we don’t place it around the base of our fir trees for soil amendment, we occasionally place some in our hen yard for the girls to use for dust baths. In the winter and spring months, here in the Pacific Northwest, it’s mud season, so chickens are in need of some dry dirt for dust bathing, as a pest repellant to rid of mites and bothersome bugs that harbor in their feathers and on their skin, which must be itchy as heck. It also gives them a little added magnesium and calcium.

IMG_6051 2

Our hens love their wood ash baths. They fight over them, in fact!

Here’s how we help our hens use wood ash to rid of their unwanted pests: We find a small “hen bowl” that they’ve dug in the yard, for bathing, and pour in the wood ash. Within minutes, they’ll scratch it around, mixing in the surrounding dirt, and then lay down in it to dust themselves up! A pop-up hen spa!


Apparently dried lavender and dried lemon balm are also great pest deterrents so sprinkling some into your wood ash bath could be an excellent potpourri addition for your chooks. We do love pampering our girls! After Valentines Day, our leftover dried roses were turned into rose petal chicken bedding for their coop, along with some blue paper hamster bedding a neighbor give us from our Buy Nothing group to line the chicken coop floor. Pretty!!

EAFEC7D3-344D-4262-9130-E5E2D45C3423

Rose petal and blue paper hamster bedding make for a fun late-winter coop bedding.

What spa treatments do you give your hens?

Avocado Pit Turned Fake Egg

It was a dark and stormy winter….and my hens were bored. Here in the Pacific Northwest, our hen yards can get pretty mucky and the chickens tend to turn to deviant eating behaviors, like, well, eating their own eggs. There, I said it. Gross! That’s like….oh, never mind. We can’t allow this to happen, because the purpose of backyard chickens is their yummy eggs, a critical part of our family’s mostly vegetarian diet. (Our hens do produce other products for us, like amazing compost.) But no, we won’t be allowin’ them hens to eat their eggers.

I found a great solution to deter an egg-eater, right in my compost bucket: An avocado pit!

IMG_9813

An avocado pit works beautifully as a dummy egg. © Liesl Clark

For years, I’ve used dummy wooden eggs, plastic easter eggs, egg-shaped stones, golf balls and pingpong balls as dummy eggs, to deter the little peckers (egg-eaters) from pecking apart their eggs. Dummy eggs are just that, fake eggs that chickens think are real (think, bird brain.) They peck ’em and realize they can’t break ’em and therefore we stop the deviant eating  disorder in its tracks. Problem solved.

IMG_8245

One of these things is not like the other. © Liesl Clark

So, don’t go and buy fake eggs. Please. Just use an avocado pit in your nest box. Deploy 5 of them if you’d like, and your egg-eater will get frustrated when the avocado pits won’t crack and produce an egg-licious mess in your laying box.

IMG_6870

© Liesl Clark

Enjoy your guacamole knowing your avocado pits can be put to use!

IMG_9812

New use for an avocado pit. © Liesl Clark

How to Preserve Arugula

Arugula likes me. For some reason — likely the soil on our property and the not-full-sun exposure — arugula, that spicy green also known as rocket, grows profusely in our garden. We never have to plant it because it just keeps sprouting year after year in our vegetable beds. I weed out the bed interiors and let the arugula grow along the edges, creating a green perimeter where kale, peas, and Egyptian walking onions happily grow in the middle.

IMG_5453.jpg

But this spicy goodness only lasts for the summer months and we dearly miss arugula the rest of the year. I make as much arugula pesto as I can and freeze it in small jars for pizza and pasta topping for later. Yet, since I have so much of it, and have been giving as much as I can away, I’ve been searching for a way to preserve arugula, so we can enjoy our it in the cold months of the year.

Frozen arugula doesn’t taste like arugula and doesn’t work well in smoothies, either. Blanching it takes the verve out of it, too. But, preserving arugula in olive oil, and freezing it, helps seal in the flavor!

IMG_0510

Here’s how: I use a pie tin and chop as much arugula as I can to fit just below the rim of the pie tin.

IMG_5471

I then pour in extra virgin olive oil until it’s about an inch deep and put the tin in the freezer. When it’s totally frozen, pop your tin out of the freezer and break your frozen oil/arugula into chunks that you can then store in the freezer in freezer bags or a large glass jar. I never buy freezer bags, but just reuse ones that I acquire through other frozen items we get at the store, or I double bag some Ziploc bags. Please don’t buy plastic bags, as there are so many in our landfills, we can simply make do with what we have, or ask for them on our local Buy Nothing groups.

FullSizeRender 97

So, what do we do with our frozen olive oil/arugula chunks? In the winter, I use one at a time, in salad dressings, on top of pizzas, in pastas, salads, and stir fries. The arugula still has its punch and my crop is extended into the heart of the cold months, reminding me of the dog days of summer.

Purple Deadnettle Purple Smoothie

Purple deadnettle is my new favorite weed. At the Brooklyn Botanical Garden, they have a great description for this lovely purple fuzzy flower to pop up in early spring: “This common weedy plant is a member of the mint family and forms early groundcover mats, with fuzzy, spade-shaped leaves and delicate purple-pink flowers, a lovely addition to a spring weed bouquet.”

FullSizeRender 95

For years, I’ve pulled it out of my vegetable garden, and have given it to my happy hens who devour it immediately. But this year, I’m eating as many weeds as I can, that are within just feet of my front door. For this, purple deadnettle is your friend. It’s a superfood, with known anti-inflammatory properties! I always let it flower because I know it’s one of the first spring flowers the honey bees use for nectar and pollen. Purple deadnettle looks a little like henbit, which is also edible, so there’s little chance of you getting a stomach ache from this beauty.

FullSizeRender 94

So, in our bellies it goes, with morning or lunch smoothies, pestos, or atop our green salads. Here’s a quick recipe that’s our staple for most smoothies, and you can replace the fruit with any favorite fruit you have on hand or replace the purple deadnettle with kale if you no longer have any on hand:

Purple Deadnettle Purple Smoothie

1 small bunch purple deadnettles, flowers and stems included

2 bananas

1 Cup coconut milk

2 Cups mixed berries (we love blueberries, marionberries, blackberries, and raspberries)

1 scoop of your favorite protein powder (I use Vital Proteins collagen)

FullSizeRender 92

That’s it! I throw a sprig of mint into our pretty glasses as garnish and the kids drink it down. When it ends up really thick, we use spoons and eat it like ice cream. Often, our bananas and berries are frozen, so this serves as a meal or an ice cream treat for the whole family.

Sticky Weed Cleansing Drink

You probably know this weed well, for its clingy tendencies. In the Northwest, we affectionately call it sticky weed. It comes in the door on our dog, our socks, and the backs of our sweaters. Also known as clivers, cleavers, goosegrass, catchweed bedstraw, or sticky willy, this little bugger with tiny hooked hairs that’ll stick to you better than velcro, now holds a special place in my kitchen culinary arts: I use it in a simple spring cleansing drink, thanks to the advice of a friend.

IMG_9069

The Kew Royal Botanic Gardens has this to say about its uses:

Galium Aparine — “The whole plant is edible, though not particularly tasty, and in China, for example, it is eaten as a vegetable. Its seeds can be roasted to prepare a sort of coffee substitute. It is also reputed to have a number of medicinal properties, having been used in traditional medicine (usually as an infusion) to treat kidney problems, skin disorders and high blood pressure among other ailments. Archaeological evidence suggests that it may have been used in this way for hundreds, if not thousands, of years. Cleavers is still used by medical herbalists today, although scientific evidence regarding its effectiveness is still lacking.”

I use it as a spring “cleanse” that might be good for my kidneys but just tastes wonderful, and excites my need to get the most out of the plants around me. As I weed it out of my garden, I set it aside to be washed and then stuffed into a jar filled with fresh water and throw it into the fridge.

IMG_4607

Twenty-four hours later, we have a refreshing sticky weed infusion that tastes like spring green. It thickens the water a little, too, (or maybe I’m just imagining that) making it feel silky on its way down.

IMG_4716

Drink Your Sticky Weed © Liesl Clark


This Homemade Citrus Power Cleaner Works

We have hard water in these parts, which means that whenever it sits around, like at the base of a water faucet, you get calcium/mineral buildup. Here’s what ours looked like a few hours ago. Ew!

IMG_6194

Thanks to some homemade citrus vinegar that I made last month, I now have a power cleaner that’ll cut through the boilerplate mineral deposits found around our sinks, shower, and bathtub.

IMG_3967

This mineral deposit is hard and sticks like glue.

First, to make the citrus cleaner, just throw your orange peels into a mason jar and pour in some distilled white vinegar to cover the orange rind. Keep adding orange peels until the jar is filled, adding vinegar to totally cover over the peels.

IMG_3687

Screw a lid on the jar, and let it sit for a month with all of the peels totally submerged. Remove the orange peels and the remaining liquid is your all-purpose citrus cleaner that’ll work wonders in your home.

IMG_4499

I dilute it with water 1:1 into a spray bottle and use it wherever I’m cleaning: countertops, windows, ovens and stoves, bathrooms. But the kitchen sink faucet was where I hit paydirt. This stuff cut through that mineral deposit and enabled me to get my faucet back to looking like new.

hardwater before after

Just spray the 1:1 solution on your affected area and let it set for a few minutes and rub off.

closeup before and after

I had to repeat this several times, but it eventually removed the white caked-on material.IMG_4494

IMG_5979

So the next time you eat an orange, just save those peels, stuff them into a jar and cover with white vinegar, adding more peels and vinegar until the jar is full. After a month, you’ll have a citrus cleaner ready for your toughest jobs.

Save Your String

We salvage string. Don’t you? When I see rolls of string sold in the hardware store, I wonder who buys it? String is freely available if you just know where to look for it.

IMG_4364

The feed we buy for our chickens comes in large paper feed bags laced up with string. When we pull the string to open the bags, it comes out freely and we have plenty to last us throughout the year. We roll it onto a small roll of paper and it goes into the string box.

IMG_4357

I found an old wooden box that was covered with Christmas wrapping paper a few years ago. This box has been salvaged for the use of storing our saved string. So, shoelaces are salvaged and washed, bungee cord gets thrown in there, craft string, a few pieces of yarn, homemade “plarn,” cordage, twine, even pieces of candle wicking that hasn’t been put in wax go in there. Whenever something has reached the end of its life and we need to throw it away, any string on it gets salvaged and thrown into the string box.

IMG_4361

String is a staple for my gardening, as I use it to create pea ladders between woven sticks for my growing pea shoots, or to hold the hellebore up when the heavy blossoms weigh down the large plants.

The whole family knows where to go when they need a piece of string or shoe lacing to make a repair and tie together a few things. When my son was 5, he connected his favorite truck to its trailer with string when the hitch broke.

bag-o-string.jpg

String is the stuff of life, affording us everyday repairs to sew-up, tie together, wrap around, hold up, and weave anew.

Save your string, all forms of it. Don’t throw it away. And find a pretty container to hold it, for all to access for the projects that will come.

Banana Peel Shoe Polish

You heard that right! I used a banana peel to shine my shoes.

IMG_4072

Before

IMG_4091

After

My boots were looking pretty bad, having made a few trips to the hen house surrounded by mud. They’ve also been scraped and battered over the years, and I never seem to have the time to shine ’em up. We don’t have any shoe polish here in the house and I didn’t want to go out and buy some, knowing it’s likely not made with the most environmentally-friendly ingredients. I had also done some research a year or so ago about 20 incredibly versatile things a banana peel can be used for. Shining your shoes with a peel was on the list. I figured it was time to give it a try.

So here’s all you need:

Your scuffed up shoes, made of leather or a facsimile thereof

A Banana Peel

Soft Cloth

IMG_4078

These seriously needed some help.

The Method: Rub the inside of the banana peel all over your shoes. Spread that shiny gook all over and rub some of it in as you swipe peel over leather. Then, grab your soft cloth and buff, just as you would if you were polishing your shoes with that black or brown stuff you see at the airport shoeshine spot. Rub and then buff. Apply a second coat of banana peel goodness and rub and buff again. Do it a third time, and you’re done! They’re not sticky at all. The oil from the inside peel of the banana did its magic and my boots are good to go for a few hundred more miles.

IMG_4081

Maybe not perfect, but so much better! Try it, this banana stuff works.

DIY Taco Seasoning in Bulk

Buying taco seasoning is pricey and when you have the ingredients in your own home, why not just make a batch that’ll last you days. Your own seasoning is also lower in salt content. Here’s our family recipe that we’ve used for the past year, and sometimes the amounts of each ingredient change a little, based on just how much we have in the spice rack. We buy our spices in bulk, too, to save money, have a zero waste kitchen, and so we don’t accumulate a lot of those little plastic bottles.

IMG_3576

Taco Seasoning (makes about 1 2/3 Cups)

  • ½ Cup chili powder (we sometimes use speciality chili powders we find in Mexico. Go with your favorite!)
  • 1/3 Cup cumin
  • 3 teaspoons garlic powder
  • 3 teaspoons onion powder
  • 1 Tablespoon coarsely ground pepper
  • 2-3 Tablespoons ground coriander seeds
  • 2 Tablespoons paprika (sometimes we add smoked paprika)
  • 1 1/2 Tablespoons salt (feel free to add more if you like your seasoning salty)
  • 2 teaspoons red pepper flakes
  • 2 teaspoons oregano (we like Mexican oregano)FullSizeRender 83Enjoy!

Paper Bag Cast Iron Skillet Cleaner

We stopped buying paper towels years ago. Never really needed them.

And since we were eating mostly vegetarian meals, we rarely had the dilemma of what to do with a greasy cast iron skillet. Now that we eat bacon occasionally, because we’ve reintroduced a little locally-produced organic meat now and then, we have to contend with the leftover grease. We’ve used a few rags on the grease and just wash the rags, but that isn’t the best use for the rag.

And then, one day a week or so ago, I posted a dozen lunch-bag size bags to give away in my local Buy Nothing group. (I save these little bags whenever they somehow make their way into our house, and the kids use them when they go on school field trips.) A member immediately posted a comment explaining that he uses those thin lunch bags to sop up his bacon grease. It was an “aha” moment for me.

IMG_3974

Here’s what he wrote:

“If you have a new, or not-so-well-seasoned pan, a thicker bag will leave little micro fragments of paper. So generally, the smoother the pan and the finer quality of the bag, the better it works. Newspaper is completely unworkable because it’s such lo’grade.”

I decided to keep the bags, and now I have a small stash of little brown bags I can use to clean out my cast iron skillet when it gets a little too greasy. The thin bag is pretty darn absorbent.

IMG_3984

I throw in a little Celtic sea salt to scrub the bottom of the pan with the crumpled up bag, and the salt acts as a perfect scrubbing agent.

IMG_3986

No need to run soap and water over the well-seasoned skillet. And the pan is ready for its next job.

IMG_4001

The greasy bag goes into our next fire as fire-starter or we just toss it in our compost.

IMG_3996

Save those little bags for jobs like this!